The Adjustment Program is used to reset the waste ink pad counter on Freejet 330-series printers. This is typically installed and configured during your setup session with a training coordinator, but it’s quick and easy to do if you don’t already have it.
How to use the Adjustment Program is detailed in another OmniPrint Knowledge Base article, but if you don’t already have it installed onto the PC connected to your printer, we’ll explain how to get it and set it up here.
Downloading the Adjustment Program
Click on the following link to download the Adjustment Program to your Windows Desktop or any other folder of your choice: http://www.omniprintonline.com/r2400.zip
Installing the Adjustment Program
The Adjustment Program doesn’t require an installation process, technically speaking. We just need to extract the r24000 folder out of the downloaded zip file using the following simple steps.
- Find the r2400.zip file that you downloaded using Windows File Explorer or by searching from the Windows Task Bar.
- Double-click on the file if you used File Explorer to find it. If you searched from the Task Bar and selected r2400.zip from the search results, Windows will have already opened a File Explorer window with a view of the contents of r2400.zip.
Depending on your File Explorer settings, you’ll see something like this: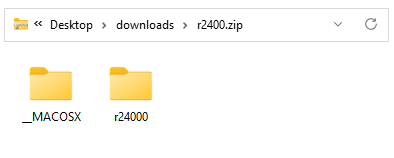
- Drag the r24000 folder onto your Windows Desktop, or any other folder of your choice, then go to that r24000 folder with File Explorer. Again, depending on your File Explorer configuration you’ll see some form of this list of files and folders:
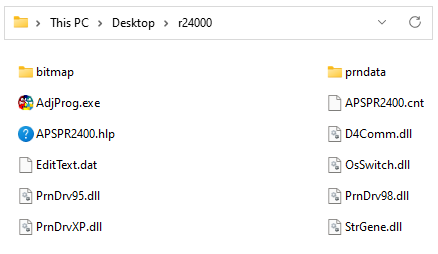
AdjProg.exe is the actual executable file which is the Adjustment Program. (You may or may not see the “.exe” file extension, depending on your Windows File Explorer settings.)
We’re now ready to configure the Adjustment Program.
Configuring the Adjustment Program
Before using the Adjustment Program, we need to make a couple of simple configuration changes to the AdjProg.exe file using the following steps:
- In Windows File Explorer, right-click on AdjProg.exe to open a pop-up menu of things that Windows can do with the file.
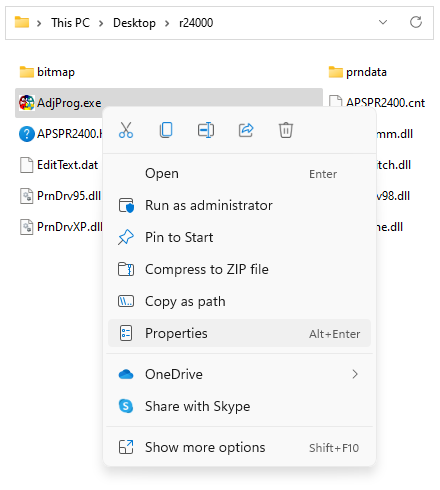
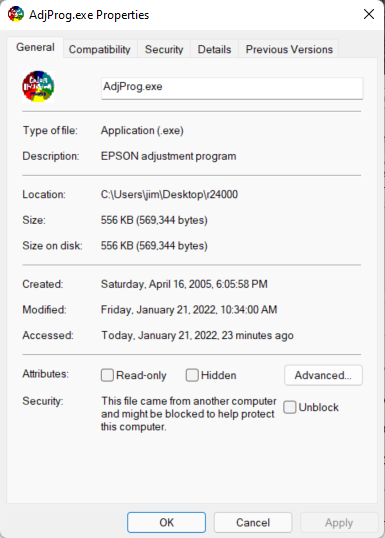
- Click on ‘Properties’ and this window will open:
- Click on the ‘Compatibility’ tab and the ‘AdjProg.exe Properties’ window contents will change to this:
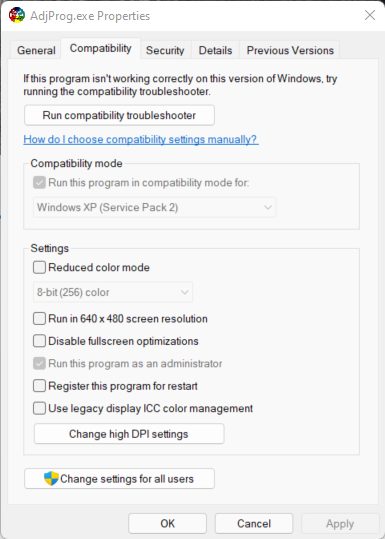
Windows 10 or Windows 11 may have already configured the compatibilities properties of AdjProg.exe for you automatically. Check the following two items from the above screen.
- Compatibility mode should have a check mark on ‘Run this program in compatibility mode for’, and ‘Windows XP (Service Pack 2)’ should be selected from the drop-down list
- Run this program as an administrator should be checked
4. Confirm or select the above settings, then click on ‘OK’ to save them.
That’s it! The Adjustment Program is now ready to be used, as explained here.
Not finding what you need?
You can contact our technical support team by sending an email to support@omniprintonline.com with your company name, contact name, phone number, printer serial number, and a quick description of how we can help you.
This will automatically open a support case for you in our ticketing system and a technical support rep will follow up with you shortly.