The printer driver for FreeJet printers is installed during the pre-training setup session for new FreeJet customers. Use the following step-by-step instructions if a new or different PC will be used with our FreeJet printer then the driver will need to be installed.
Download the Driver Installer
- Go to https://bit.ly/driver-FJ330 for access to Epson Stylus Photo R2400 downloads.
- Select your Windows version from the Operating System drop-down list.
NOTE: If you use Windows 11, select the Windows 10 64-bit version of the driver. No driver useful for FreeJets is available under the Windows 11 selection but the Windows 10 driver works perfectly well. - Click the ‘GO’ button to display the available downloads.
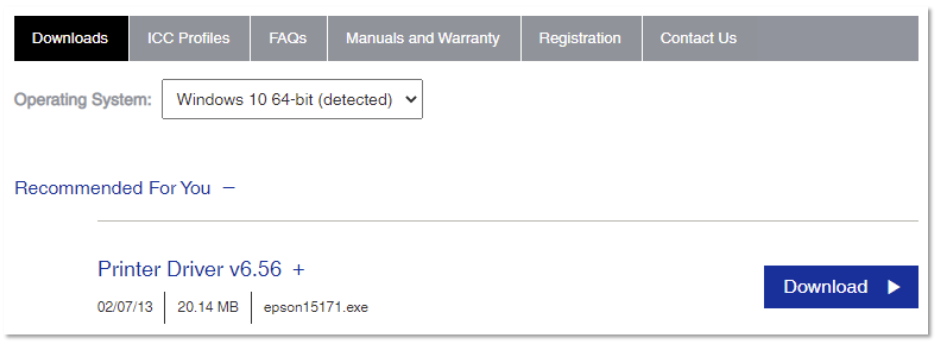
- Click the ‘Download’ button for Printer Driver v6.56.
- If prompted by your browser, select a download location for the file. Otherwise, the file will be downloaded to your browser’s default Downloads folder.
Install the Driver
- Connect the printer’s USB cable to the provided USB hub on your PC, and connect the other end to the printer.
- If you are installing the driver to a new printer, be sure to remove both yellow carriage lock brackets at the rear of the printer before turning the printer on.
- Toggle the printer’s main power switch to the ON position
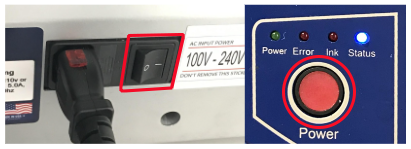
- Turn on the FreeJet’s “print engine” using the control pad’s red Power button.
- Run the downloaded installer program (“epson15171.exe”).

- Allow the installer to automatically configure the port. It will then complete the installation.
- If the installation software can’t find the printer, double-check that the printer is turned completely on, with the control pad’s green Power light lit, and the USB cable is connected to your PC and the printer. Then retry the installation.
Confirming Success
When the installation is completed, you will see an image of 8 multicolored columns (representing ink bottles) under the heading of Ink Levels on the “Main” tab of the EPSON Stylus Photo R2400 driver’s Printing Preferences window.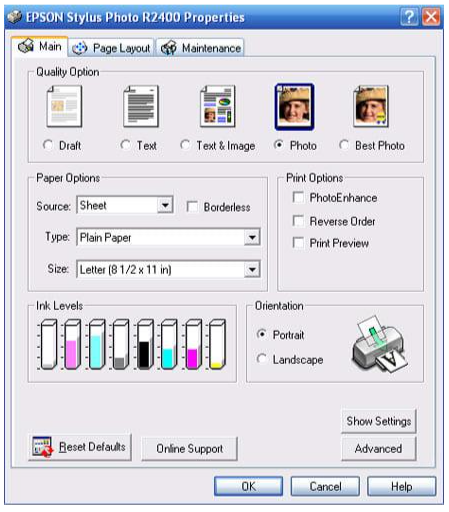
Not finding what you need?
You can contact our technical support team by sending an email to support@omniprintonline.com with your company name, contact name, phone number, printer serial number, and a quick description of how we can help you.
This will automatically open a support case for you in our ticketing system and a technical support rep will follow up with you shortly.