Properly shutting down your OmniDTF printer is very important to ensure that it will be ready to print the next time you start it up. Fortunately, the process is very easy!
Take about 10 minutes to go through these simple steps when you’re finished with your print jobs.
Click the Related Articles link at the bottom of this page if you are experiencing a power outage, printer hardware issue, or PC connectivity problem preventing you from following the instructions below.
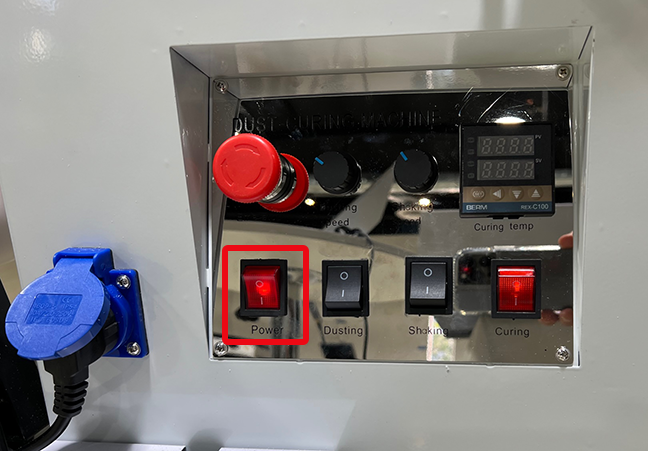
Curing Oven Shutdown
If you haven’t already done so, start by turning off the Curing Oven’s main power switch. This is a master switch that will cut power to the Duster, Shaker, and Oven — so shutting off any other switches is optional.
Printer Shutdown Maintenance & Wet Capping
See the below video demonstrating the OmniDTF printer shutdown maintenance and wet capping processes, or read the following description.
Demonstration video
Step-by-step instructions
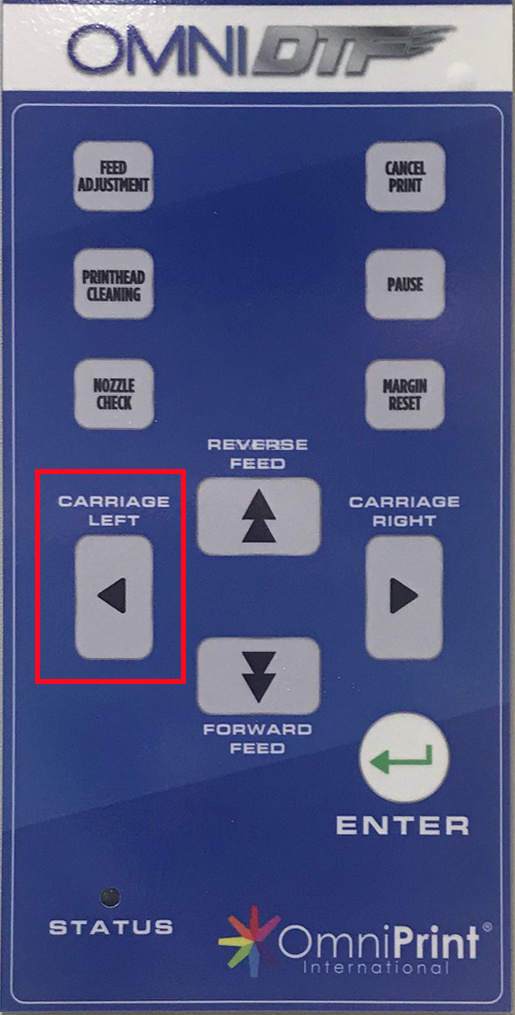
- Press and hold the Carriage Left button until the printhead carriage is in the center of its range of motion to ease access to the ink clips and expose the capping stations and wiper blade.
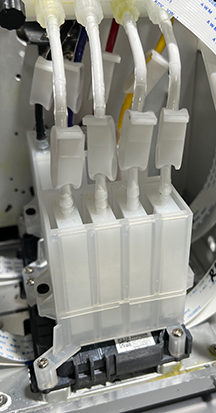
- Clamp all 8 of the ink line clips shut.
- Use the Carriage Left button again to move the printhead carriage to its full-left position.
- Wet an anti-static foam swab or a clean, lint-free cloth with Super Cleaner to thoroughly clean:
- The full length of the wiper blade
- The rubber seals surrounding both capping stations
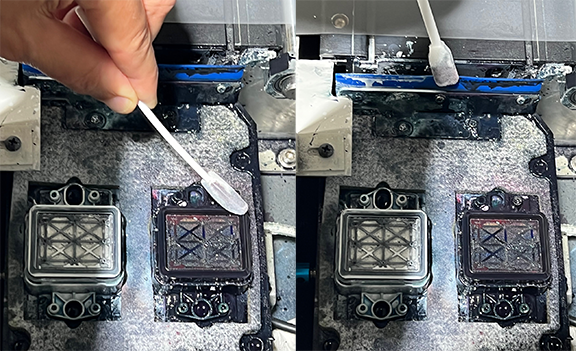
- Remove any bits of dried ink on the capping station sponges or seals with tweezers.
The remainder of the steps before wet capping the printhead are all about keeping the printhead mounting plate and the side edges of the printhead nozzle plates clean. If these areas are allowed to accumulate ink then eventually the dried ink will hang down below the printhead and leave streaks on the film.
Before continuing this maintenance process, please note the following images of the shape and relationship of these parts to each other, and examples of how they may appear before and after cleaning.
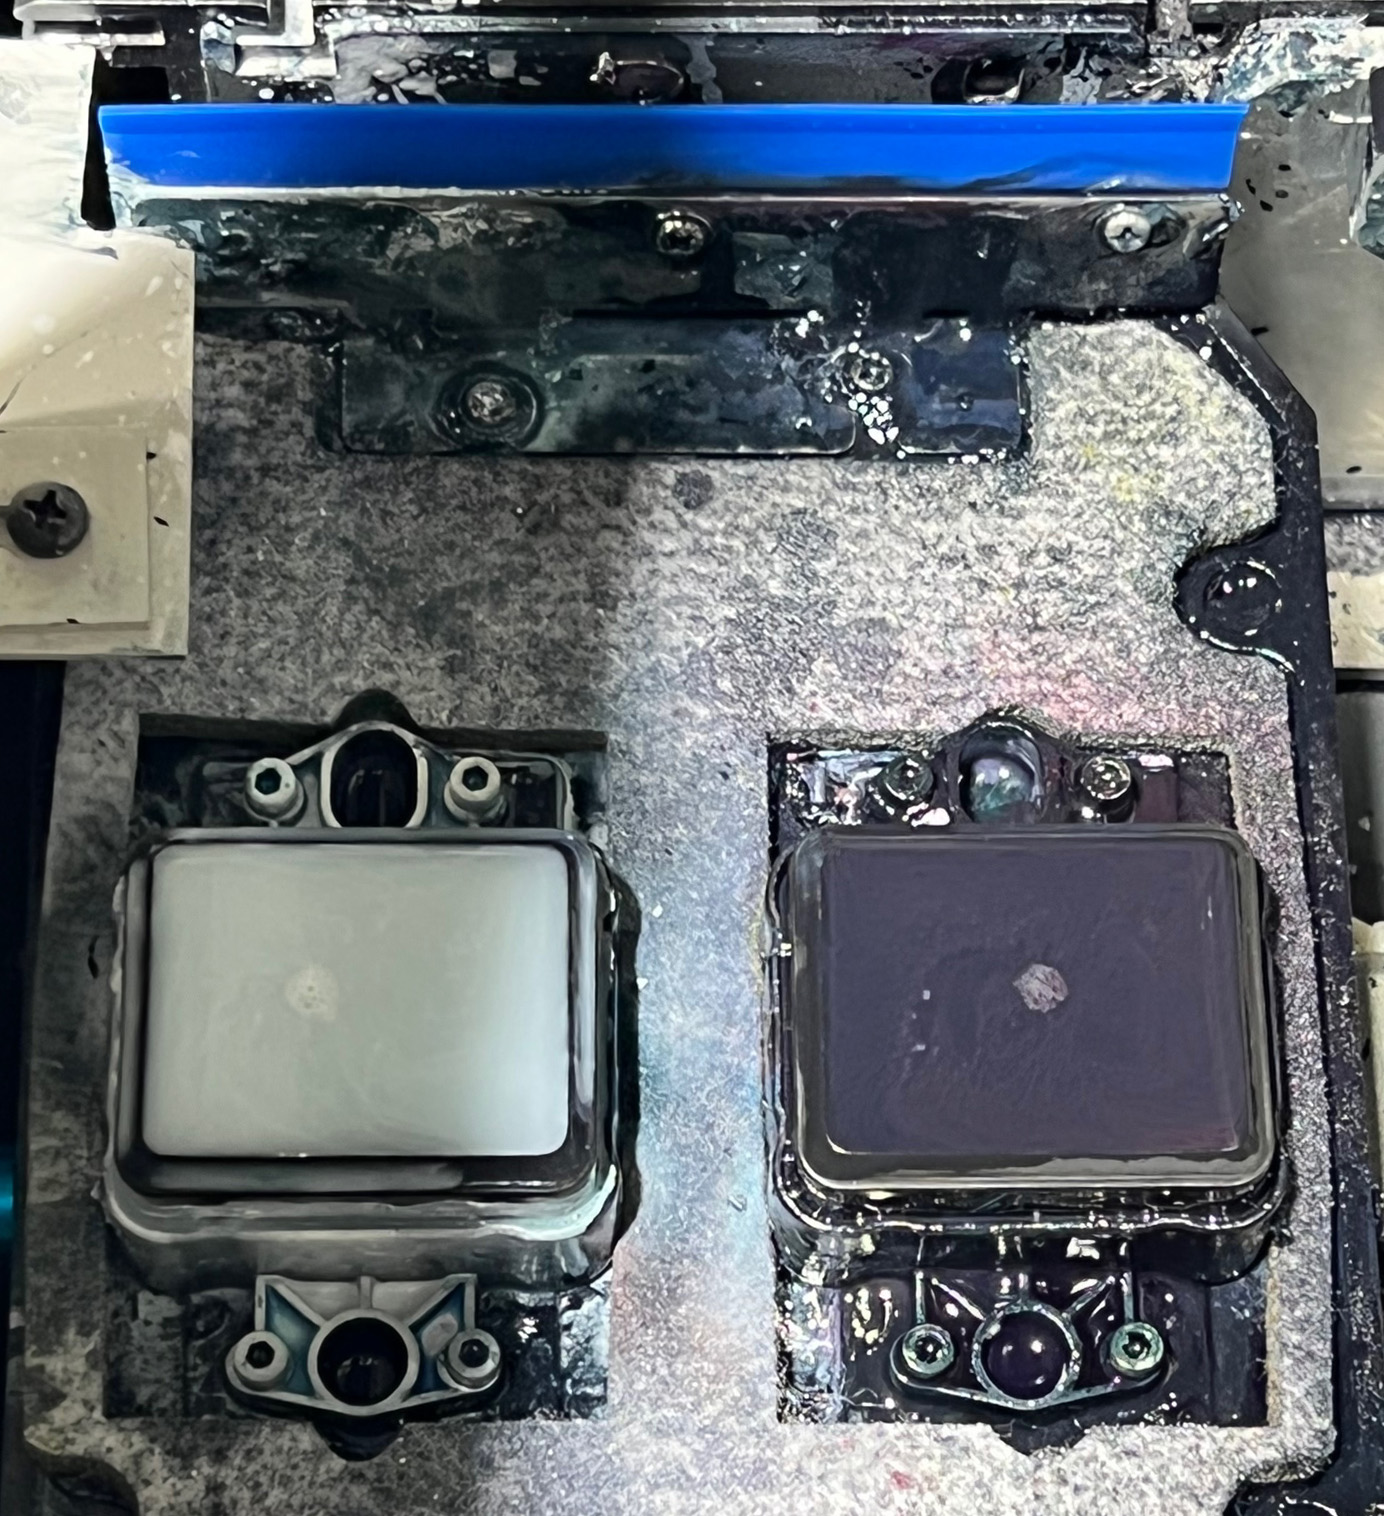
Area of printhead mounting plate and nozzle plate edges to be cleaned.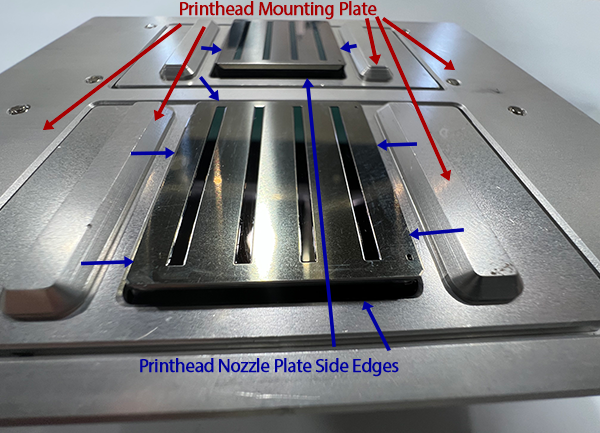
Bottom of printhead mounting plate with printheads installed. Red arrows point to areas of the mounting plate; blue arrows point to the nozzle plate side edges
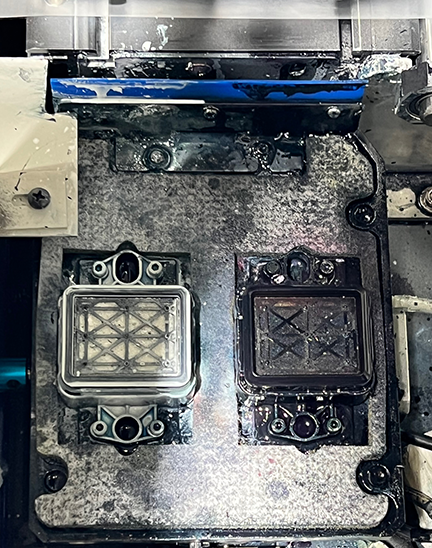
Areas of the printhead nozzle plate cleaned by the wiper blade, not manually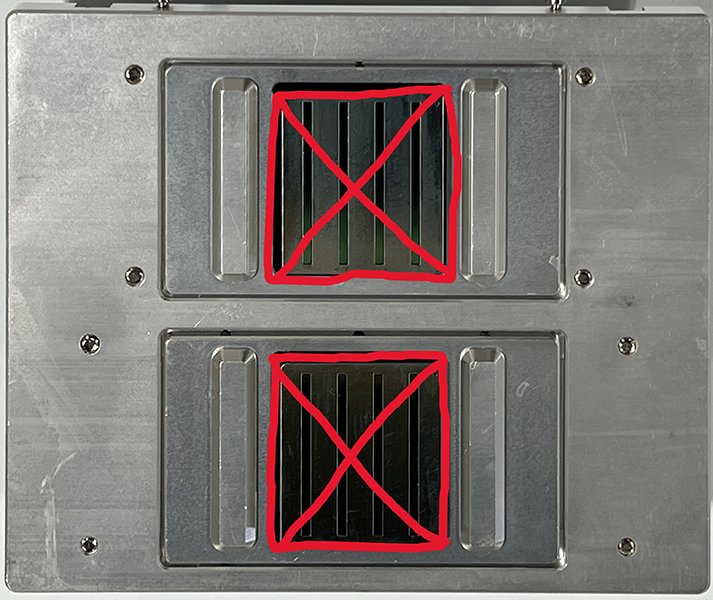
Red X’s mark the face of the nozzle plates, an area that we don’t clean manually.
Before & After examples of dirty and clean mounting plates and nozzle plate edges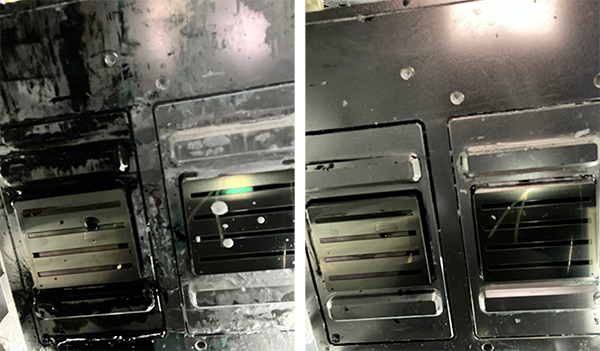
Cleaning the mounting plate and nozzle plate edges daily prevents ink buildup.
Now that you’re familiar with the area we’ll be working with, let’s proceed with cleaning the mounting plate and the side edges of the printhead nozzle plate. - Remove the left-side window to access the chassis interior’s left side.
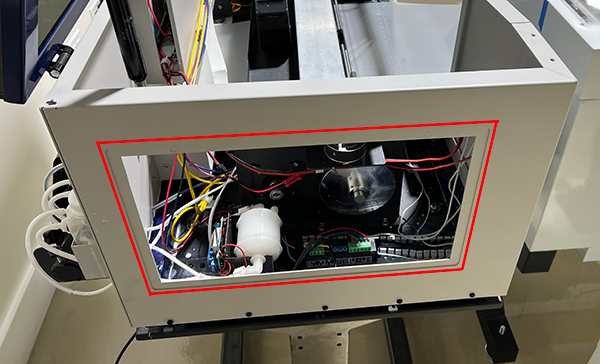
Left side of OmniDTF printer with the window panel removed. - Place a mirror or smartphone camera in selfie-mode inside the front-left corner of the printer chassis, tilted at an angle to provide you with a view of the printhead plates and their mounting plate, which face downward on the bottom of the printhead carriage, to orient yourself and get your hand into position to begin cleaning the area.
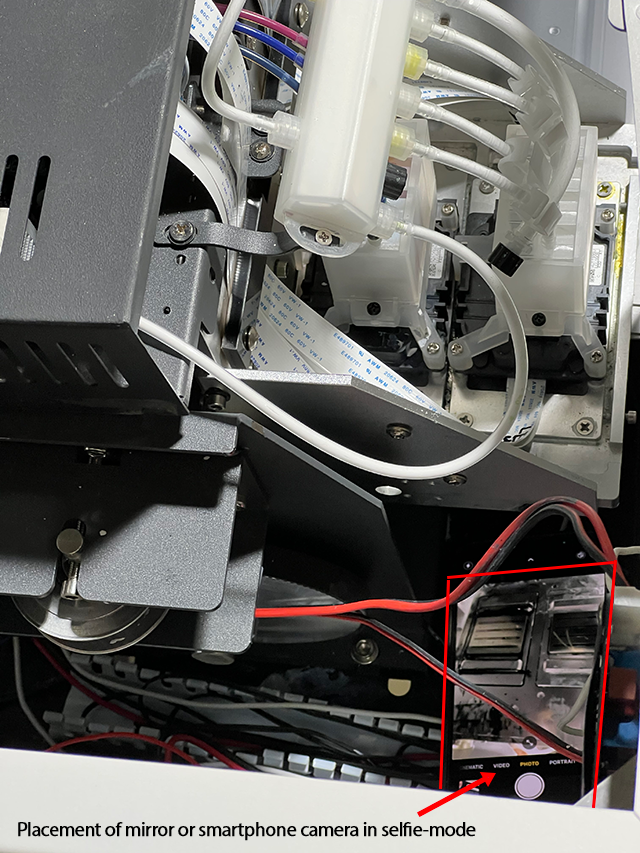
Top-down view of a smartphone in selfie-mode tilted at an angle to display the printhead mounting plate and the printhead nozzle plates. - Use a clean, lint-free cloth dampened with Super Cleaner to reach under the printhead carriage and wipe any ink from the mounting plate and the side edges (only) of the printhead nozzle plates.
- A foam swab can be used to clean the area at the front of the white ink printhead if a cleaning cloth wrapped around a finger won’t fit in the space.
- If contact with the printhead’s nozzle plate is made accidentally, dab the contacted area with Super Cleaner on a clean, lint-free cloth before wet capping.
Wet Capping the Printhead
- Fill both capping stations to the brim with Super Cleaner.
The wiper blade and capping station seals should now be free of any ink build-up and the capping station sponges completely submerged in Super Cleaner, up to the top of their seals. - Click the WetCap button under the Settings tab in the OmniDTF Windows program.

This will send the printhead carriage to its docked position and raise the capping station seals to press against the bottom of the printhead plate, bathing it in Super Cleaner within an air-tight seal.
The printer can now be turned off from the power switch on the right side, near the back of the printer.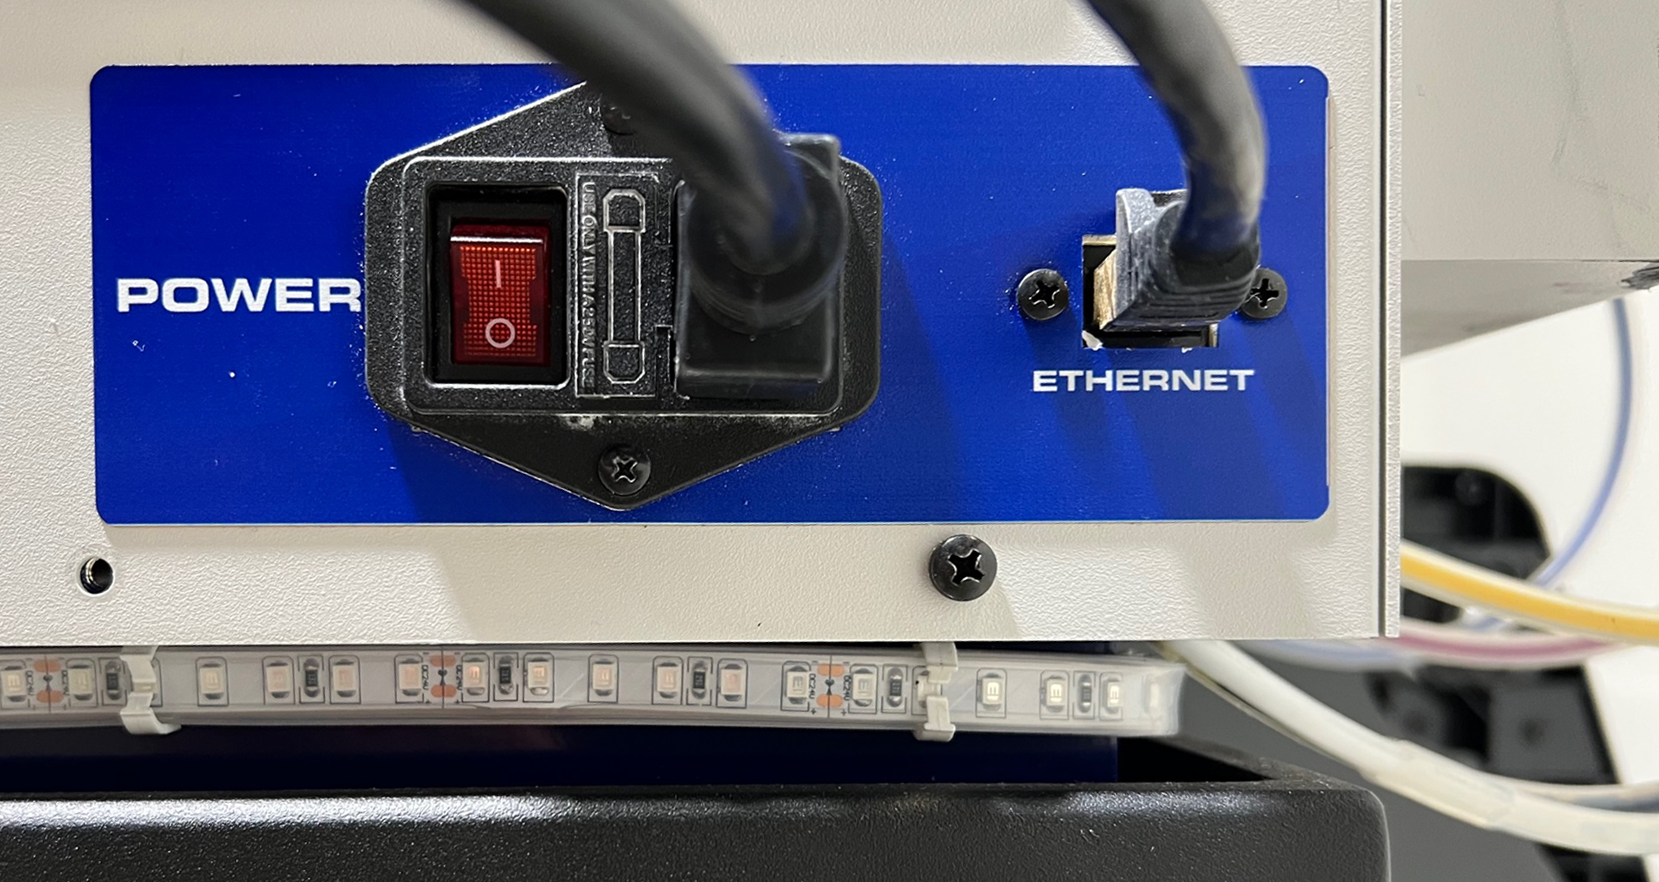
The printhead maintenance components have now been cleaned and the printhead is wet capped.
Prepare for Success
We recommend two more steps to wrap up your shutdown process by preparing your printer in advance for the next day of printing.
- Empty the waste ink bottle for a fresh start next time the printer is used.
- Agitate the white ink to mix any separating pigment and prevent sediment from collecting in the bottom of the white ink bottles.
- Press a clean cloth or finger against the ink bottles’ breather hole to avoid spillage.
- Shake the bottle aggressively for 15-30 seconds to thoroughly mix the ink.
- When finished, use a clean cloth to wipe away any ink that appears to be blocking the breathing holes in the center of the bottle caps.
We can also shake the white ink during the startup process, and will want to do that if the printer has been idle for several days. However, shaking the white ink will result in small bubbles forming so we need to wait at least 15-30 minutes after shaking before circulating the white ink or printing.
If using the OmniDTF nearly every day, shaking the white ink at the end of a printing day, rather than at the beginning, helps to keep the pigment mixed while not delaying the startup process next time we want to use the printer.
That’s all there is to it. Your printer is now well-maintained and ready for your next day of printing.
Not finding what you need?
You can contact our technical support team by sending an email to support@omniprintonline.com with your company name, contact name, phone number, printer serial number, and a quick description of how we can help you.
This will automatically open a support case for you in our ticketing system and a technical support rep will follow up with you shortly.