It’s important to have a basic understanding of how the ink delivery system works and the parts that are involved. Knowledge is power, and understanding the basics of how ink gets from the bottles to the print head empowers us to use deductive reasoning to quickly troubleshoot and resolve most ink flow issues.
Here’s a full list of the components of the ink delivery system:
- Ink bottles (8)
- Ink lines (8)
- Ink tubes (8)
- Ink clips (8)
- Dampers (8)
- Damper fixation nut (8)
- O-rings (8)
- Print head
- Pump with capping station
Since we have eight ink channels (cyan, magenta, yellow, black, and four whites), there are eight of each part in the ink path until we get to the print head.
Let’s first define the purpose of each component, and then we’ll briefly go over how they all work together to get ink from the bottles and onto the garments when we print.
Component Functions
Ink bottles: The ink bottles provide a reservoir of ink for each channel. These are the beginning of the ink path for each of the eight ink channels. Each bottle has a metal fitting, through which an ink line will pass as it moves out of the bottle.

Ink lines: The translucent, plastic ink lines provide the majority (roughly 90%) of the path between the ink bottles and the print head. In combination, they’re an 8-lane ink expressway with no stops and no lane changes allowed.
One end of each ink line passes through a fitting on its ink bottle and extends down to about 1/4″ to 1/2″ from the bottom of the bottle. The other end of each ink line terminates inside the gantry, where it connects to an ink tube.
Ink tubes: The short (about 3″), softer plastic ink tubes are the “last mile” of the ink path, providing a flexible interconnection between the ink bottles and the dampers. If the ink lines are an ink expressway then the ink tubes are the off-ramp where the ink has almost reached its destination.
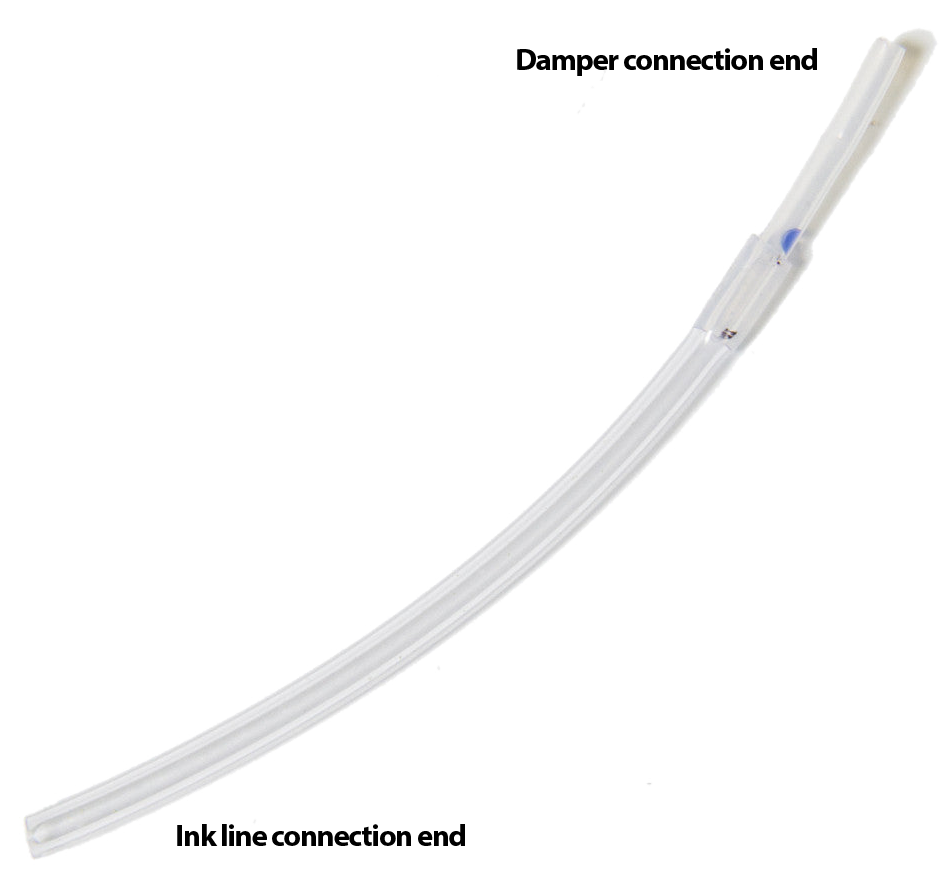
The Ink Tube connects the ink line to the damper.
The larger end of the ink tube tightly slips around the ink line, while the small end is attached to the damper with an o-ring and copper-colored nut.
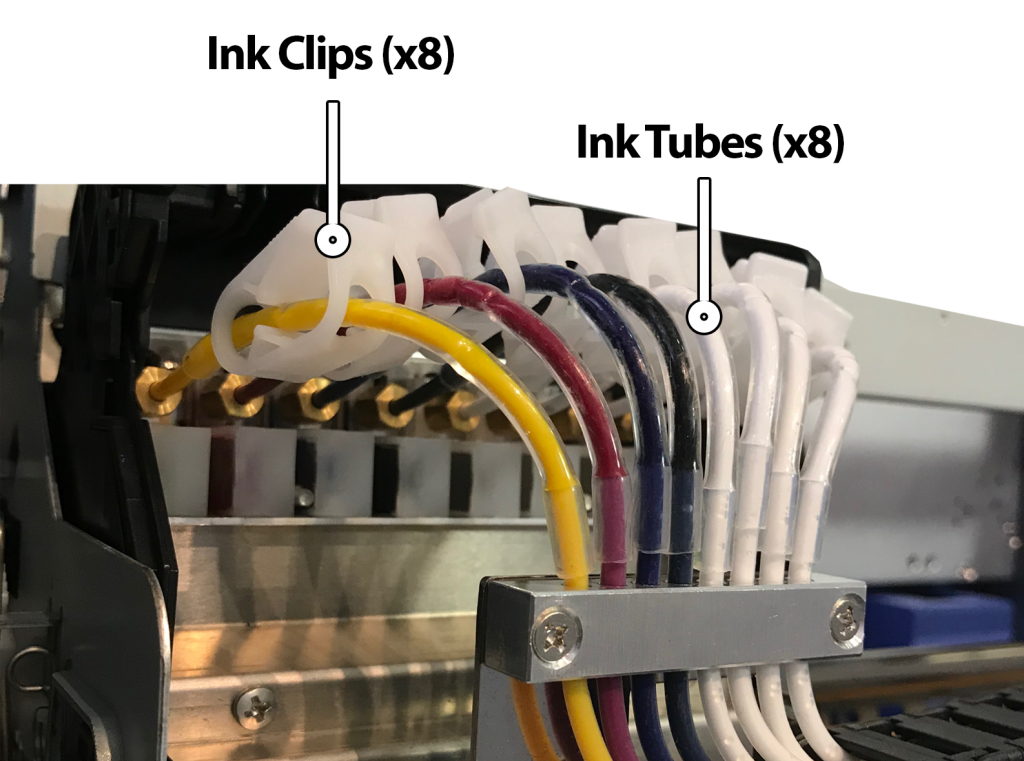
Ink clips: The purpose of the ink clips is to crimp the ink tubes and shut off ink flow when desired (such as when the printer is idle.)
Dampers: Dampers provide the final “Quality Assurance” for ink with their mesh filter, which serves to trap bubbles and any dried ink or foreign material that doesn’t belong in the ink supply. (Better to replace a clogged damper than to have to replace a clogged print head.)
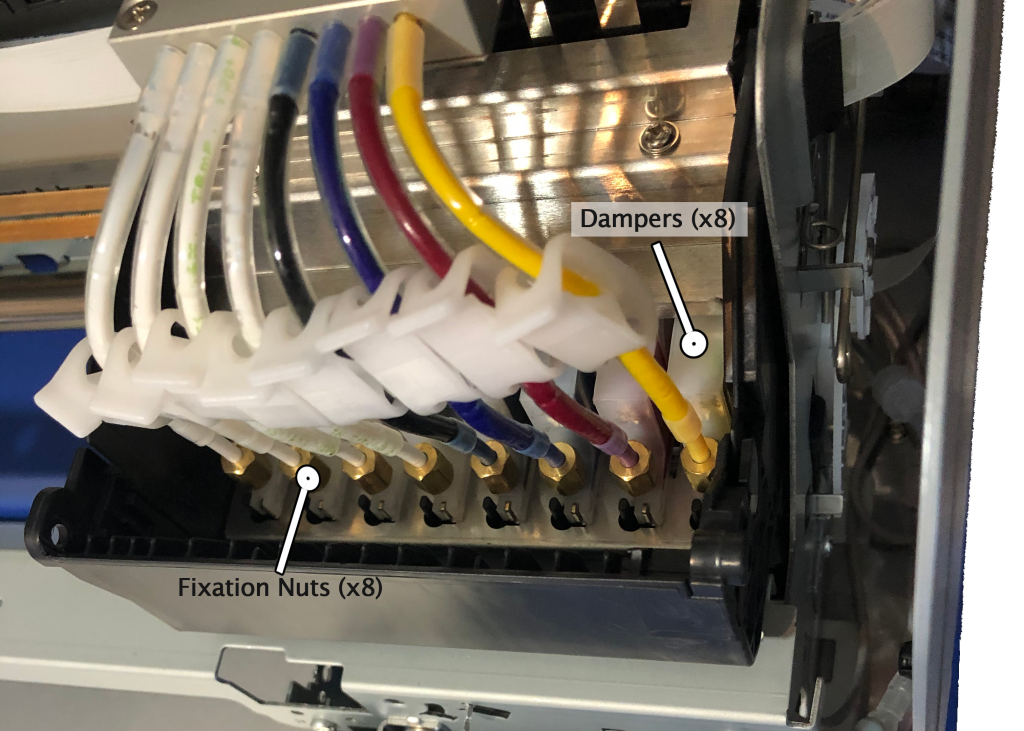
Damper fixation nuts & O-rings: These two parts complete the air-tight, mechanical connection between the ink tube and the damper. The o-ring goes around the smaller end of the ink tube and presses against the inside of the fixation nut to ensure an air-tight connection when the nut is attached to the damper.
The dampers and their associated o-rings and fixation nuts are the last components in the printing ink path before the print head.
Print head: The print head is where it all comes together — literally. All eight of the ink channels feed into the eight posts on top of the print head, to which the dampers directly connect.

Print head top, with damper posts.
The purpose of the print head is, of course, to deliver the ink to the garment that we’re printing onto through the over 1,400 tiny nozzles of the print head plate, on the bottom of the print head.
All of the components listed above except the print head itself are completely passive while the printing. That is, they are simply a conduit for the ink to travel through.
Pump with capping station: Ink doesn’t actually flow through the pump when we’re printing, but it’s included here because it is instrumental for priming and for running head cleans before or between print jobs.
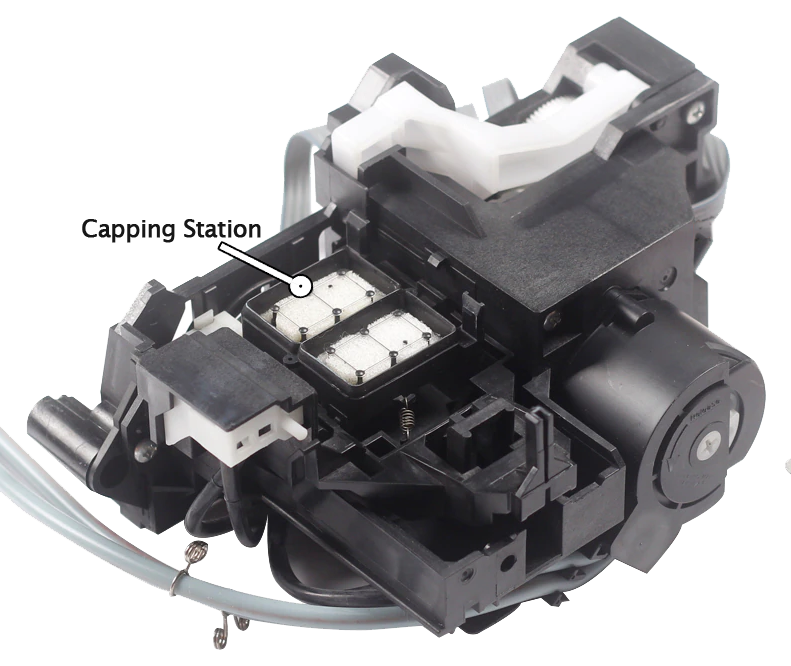
The purpose of the pump, with regards to ink delivery, is to pull ink through the print head nozzles when priming and running head cleans, but not when printing.
Ink Flow Dynamics
When printing, ink is jetted out of the print head nozzles by micro-piezo electronics within the print head. This creates pulses that push drops of ink out of nozzles as the carriage moves back & forth. This happens very quickly and very precisely in order to produce high-quality prints at high resolution.
You may wonder, if it’s only the print head that actively does anything to make ink flow while printing, what causes the ink to flow into the print head while printing? Essentially, it is gravity — but more specifically, the ink delivery system is a type of siphon. As the print head expels drops of ink, the siphon effect causes more ink to be drawn into the print head from the bottles, through the ink lines, tubes, and dampers.
In order for ink to flow properly through a siphon system, every component and connection in the system must be air-tight. So while this isn’t a troubleshooting guide, if one of your ink channels starts dropping out while printing after getting a perfect nozzle check, you may want to verify the following:
- Ink bottles filled to their proper level
- No air gaps in the visible sections of the ink line
- No air gaps in the ink tubes
- All ink clips open (yes, we all forget that occasionally)
- Ink tubes round (not collapsed from repeated clipping at the same location)
Contact tech support for more in-depth troubleshooting if you’re experiencing unresolved ink flow issues.
Not finding what you need?
You can contact our technical support team by sending an email to support@omniprintonline.com with your company name, contact name, phone number, printer serial number, and a quick description of how we can help you.
This will automatically open a support case for you in our ticketing system and a technical support rep will follow up with you shortly.