The OmniDTF system comes with everything you need to set up and start printing, including stands for both the printer and the dusting/curing oven assembly.
Review the below videos for help with the unboxing and setup process.
Unboxing the OmniDTF video
Setting up the OmniDTF video
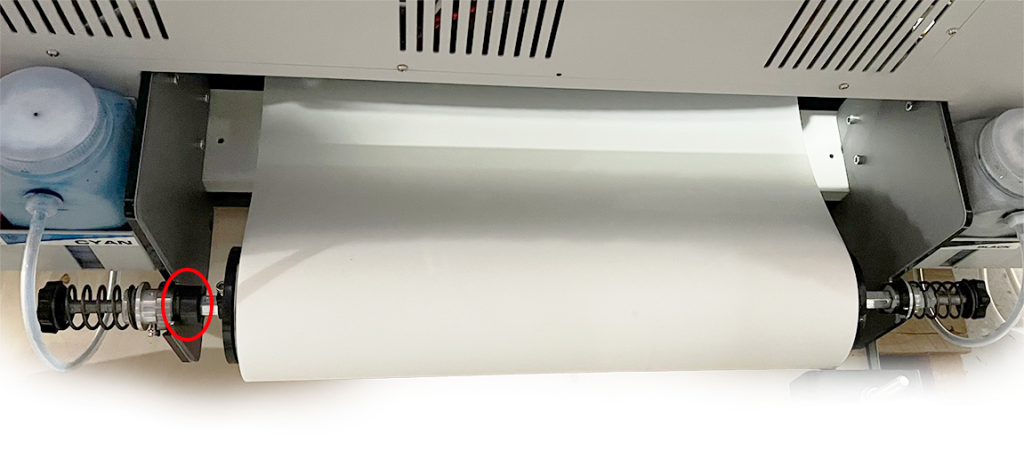
Printer Film Mount Detail
The film roll mounting hardware is not exactly the same on both the left and the right sides of the film roll.
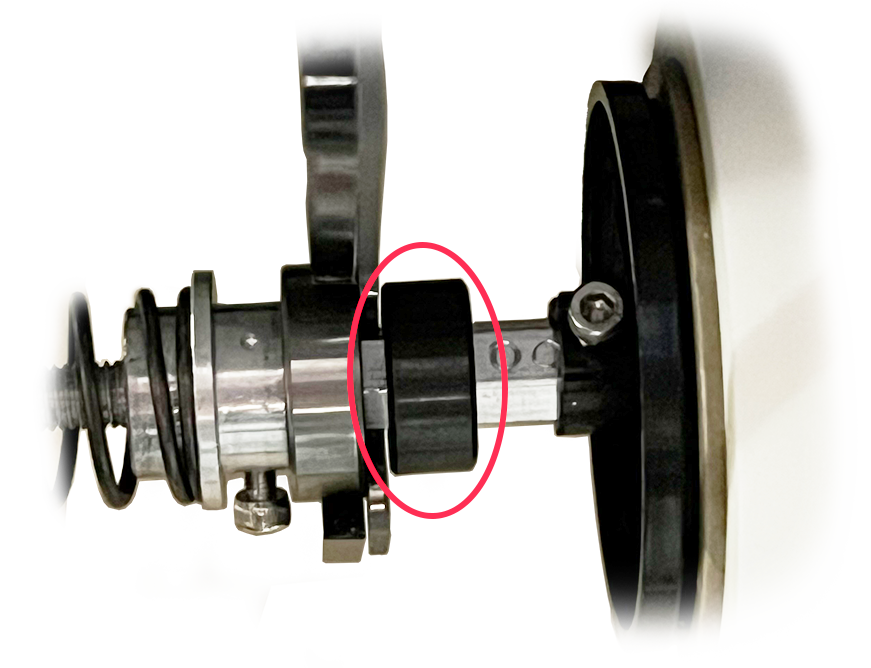
The left side includes a positional lock (circled in red below) that prevents the mounting hardware from shifting in either direction once it is properly positioned and tightened.

Here’s a closer look of the detail of the positional lock on the left side.

This positional lock is fixed with a screw once the film is confirmed to be properly aligned, using the line on the yellow alignment sticker near the back of the printers platen. Leave a small gap between the lock collar and the bracket that the assembly rests on.

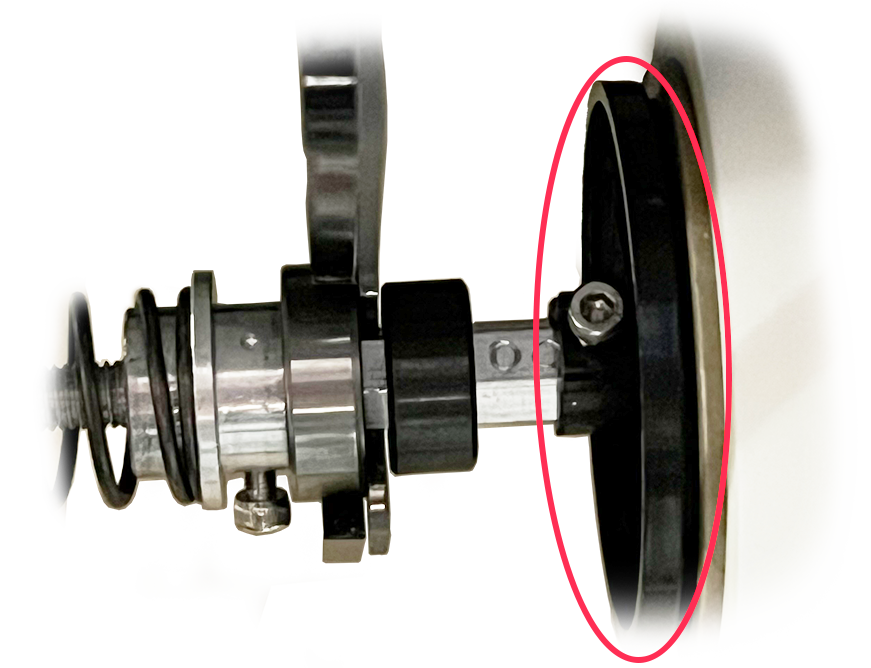
Once the setup and initial film alignment is completed, we don’t want to change the position of the film core’s mounting hardware, circled above.
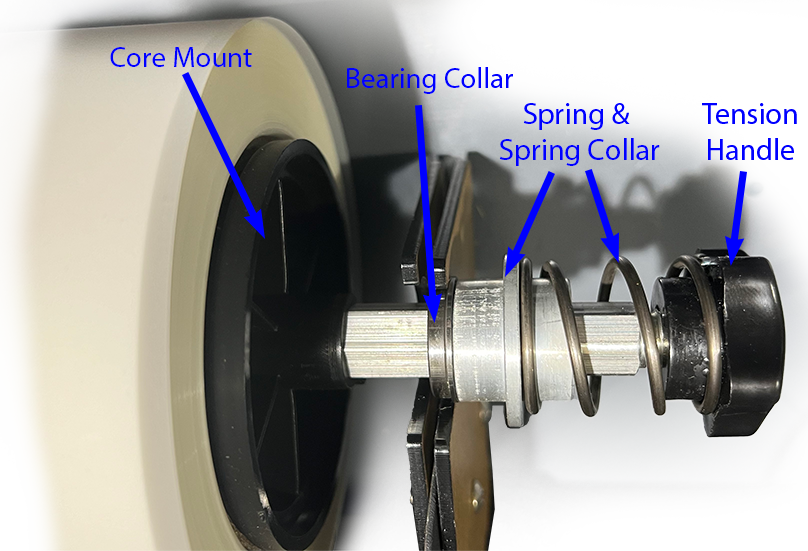
Work from the right side of the assembly to replace a film roll. Unscrew and remove the tension handle, then remove the spring, spring collar, bearing collar, and core mount on the right side of the film roll (when viewing from the rear of the printer), leaving the hardware on the left side in place.

Then reassemble after loading the new film roll.
Oven Film Takeup Roll Assembly Detail
Not finding what you need?
You can contact our technical support team by sending an email to support@omniprintonline.com with your company name, contact name, phone number, printer serial number, and a quick description of how we can help you.
This will automatically open a support case for you in our ticketing system and a technical support rep will follow up with you shortly.
