The OmniPrint i2 printer uses the TCP/IP (Transmission Control Protocol/Internet Protocol) over an Ethernet connection to communicate with your PC, along with USB 3.0. The Ethernet connection requires a one-time configuration in Windows, which OmniPrint Training sets up for you during your initial training session.
The following information will help you to perform that same configuration if you should ever need to update your PC’s Ethernet adapter or if you’ve installed the i2 UI and Print Pro software onto a new PC.
We configure TCP/IP parameters in the Control Panel of Microsoft Windows.
IP Address Configuration
Windows Control Panel’s Network and Sharing Center is where any Ethernet adapters to be used in a Windows PC can be configured. Use the steps demonstrated in the video below or the following step-by-step instructions to configure an Ethernet adapter for use with the i2. The video includes the Ethernet IP configuration process using the Windows 11 Settings app.
Video demonstration
Step-by-step instructions
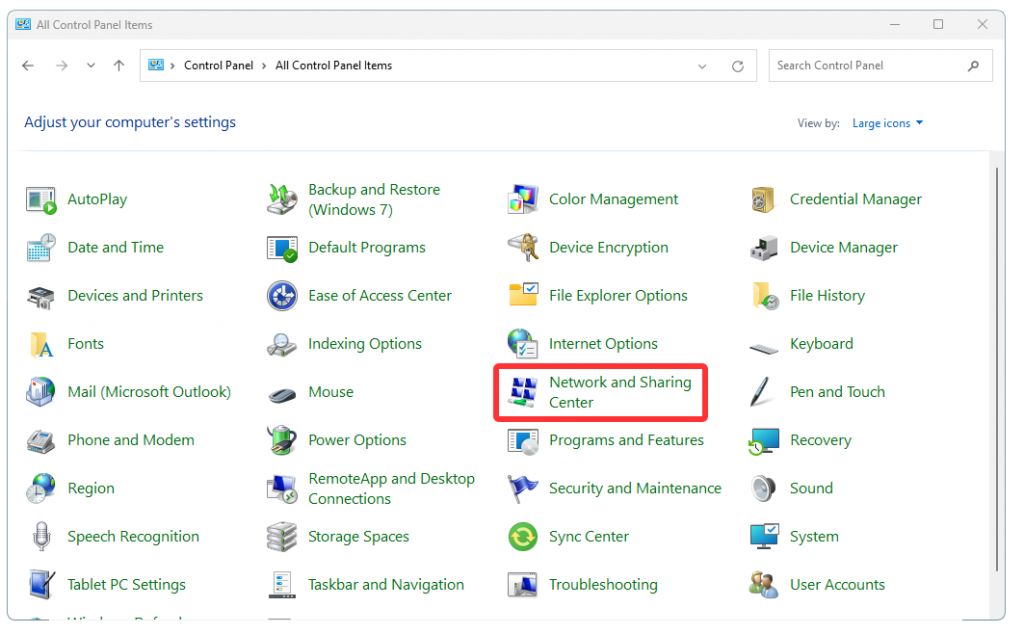
- Run Windows Control Panel.
- Click on Network and Sharing Center.
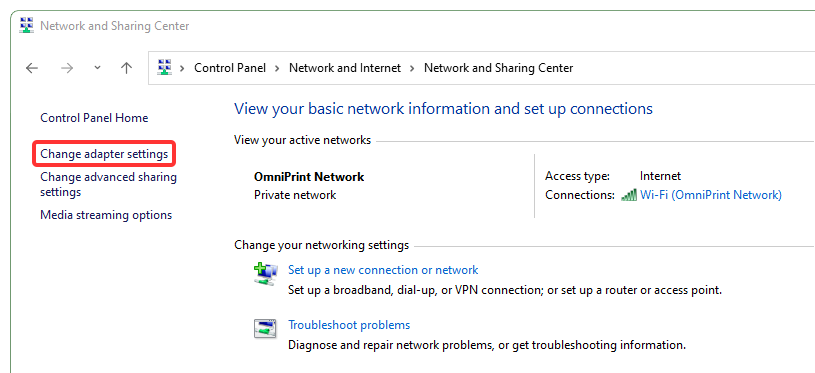
- Select Change adapter settings
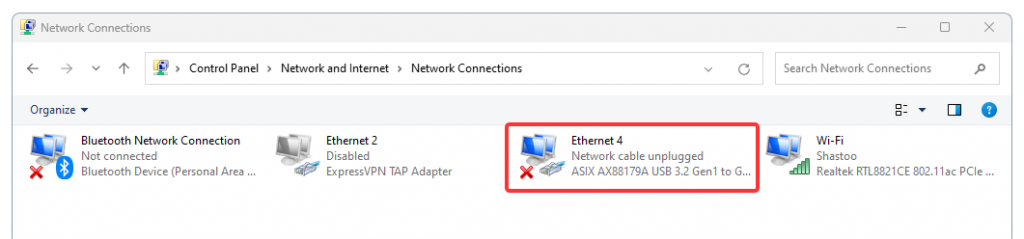
- Double-click on the Ethernet adapter to be used (or right-click on the adapter and select Properties).
- Double-click on Internet Protocol Version 4 (TCP/IPv4) (or single-click on it and then click the Properties button).
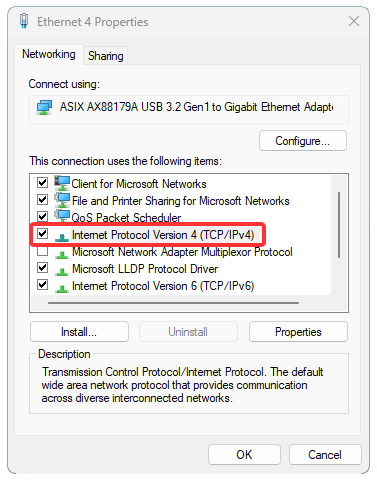
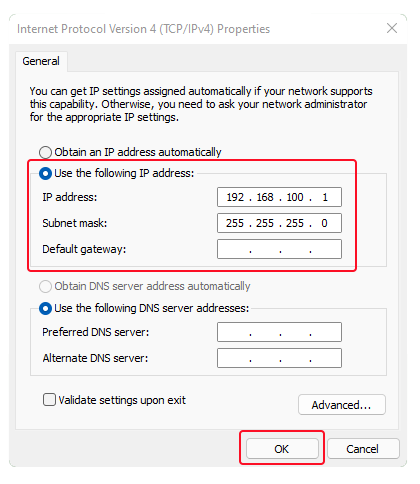
- Click the Use the following IP address radio-button (if it isn’t already selected) and enter the following, then click ‘OK‘.
IP address: 192.168.100.1
Subnet mask: 255.255.255.0
The Ethernet configuration is now complete!
Not finding what you need?
You can contact our technical support team by sending an email to support@omniprintonline.com with your company name, contact name, phone number, printer serial number, and a quick description of how we can help you.
This will automatically open a support case for you in our ticketing system and a technical support rep will follow up with you shortly.