Introduction
As mentioned in the OmniDTF System Shutdown article (linked at the bottom of this page), performing proper maintenance and wet capping the printer when shutting it down is critical to maximizing the service life of your printheads, capping stations, and wiper blade.
The process detailed in that article requires using the OmniDTF UI software to wet cap the printheads after completing the shutdown maintenance. Moving the carriage away from its home position can be done from the printer’s control pad or the OmniDTF UI program.
But what if you experience a power failure or your PC has lost its ability to communicate with the printer for some reason?
In the below video and the following instructions, we explain how to manipulate the capping station platform and the carriage to allow performing shutdown maintenance and wet capping the printer manually in the event of a power failure or any situation that prevents normal use of the controls and software.
Demonstration video
Your PC Can’t Wet Cap the OmniDTF
If you have not lost power and the printer’s control panel is working fine but you can’t complete the wet cap process from the OmniDTF UI software on your PC for any reason, follow the usual shutdown procedure until it’s time to click on the software’s WetCap icon. At that point, follow the instructions near the end of this article for Manually Wet Capping the Printheads.
The Printer Has No Power
If you have lost power, first make sure the Emergency button hasn’t been accidentally depressed by rotating it about ¼ turn clockwise. That will release the button and restore power if it had been depressed.
If the Emergency button was not depressed, either power is no longer being provided by the outlet or the printer’s power system needs troubleshooting. In either case, we want to ensure that the printer’s carriage will not move if power is restored while you’re working on it by turning off the printer’s power switch. Optionally, you can also unplug the power cable.
The Dust-Curing Machine’s master Power switch or its oven’s ‘Curing’ switch (for power to the oven) should also be turned off, to prevent it from coming back on while potentially unattended when power is restored.
Manually Releasing and Undocking the Printhead Carriage
- Remove the small, black rubber plug covering a hole below the printer’s control pad and locate the screw head on the other side of the hole(s) exposed by removing the plug(s).
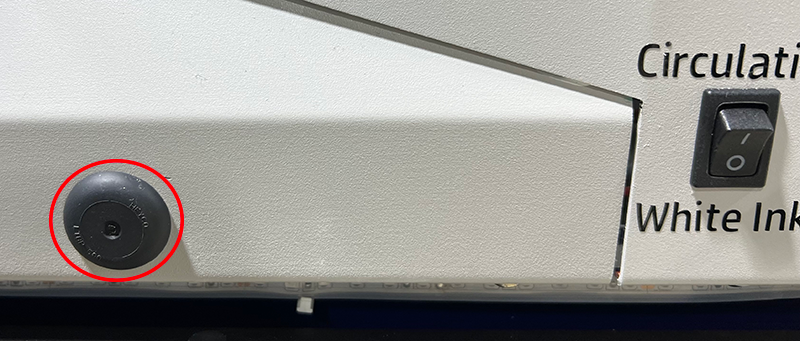

- Identify whether the head of the screw in your printer has a Phillips or Allen-type head.
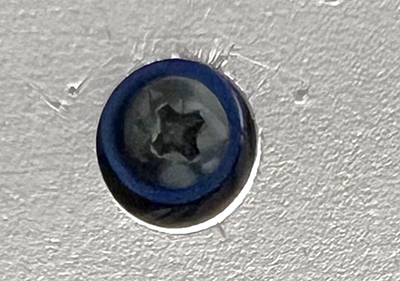
- Rotate the screw counterclockwise to lower the capping station platform until it can turn no further in that direction.

- After the capping stations are fully lowered, manually push the carriage to its fully leftward position to perform the routine shutdown maintenance.
With the carriage at its full left position, you can now perform all of the routine shutdown maintenance steps.
Manually Putting the Carriage in its Home Position
The printhead carriage’s Home position is not its fully-right position. That would be too far right and the nozzle plates and capping stations may not be properly aligned.
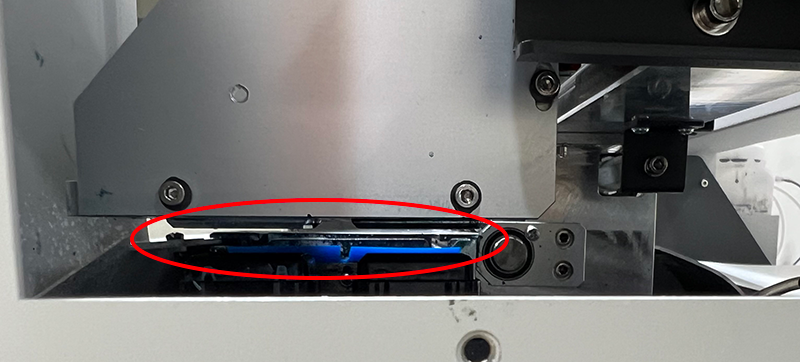
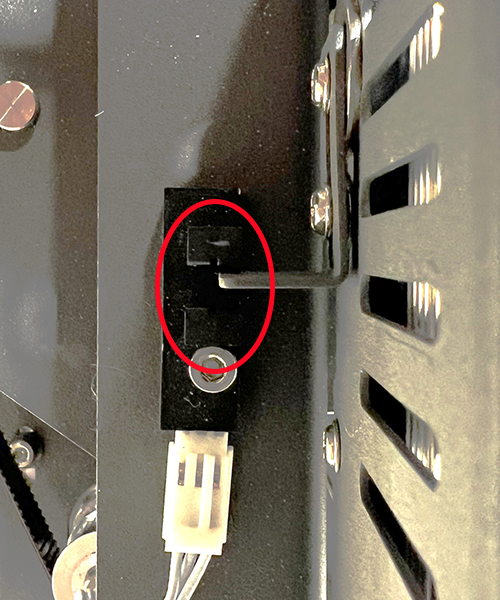
Use the metal tab on the right side of the printhead carriage and the slotted sensor on the carriage frame to find the Home position. The correct carriage position is when its tab reaches the assembly’s sensor window, at the mid-point of the slot.
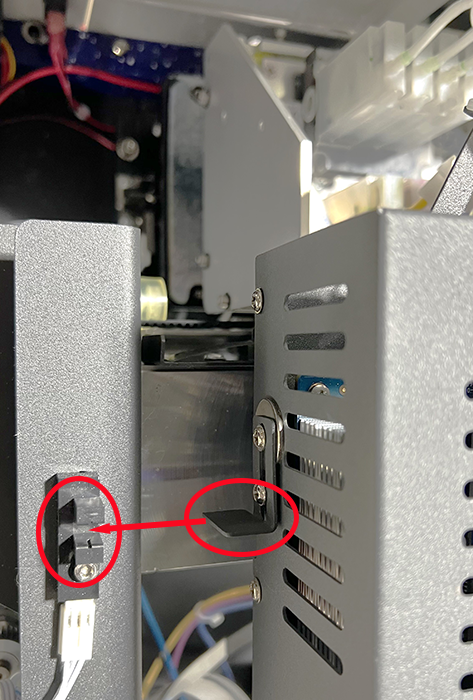
Position the carriage so the end of the metal tab just reaches the center of the sensor’s gap.
Manually Wet Capping the Printheads
At this point, you should have already performed the shutdown maintenance, filled the capping stations with Super Cleaner, and moved the carriage to its Home position. If not, do that now before continuing.
- Remove the black rubber plug(s) under the printer’s control pad, if you haven’t already done so. (See steps 1 & 2 in the Manually Releasing and Undocking the Printhead Carriage section above.)
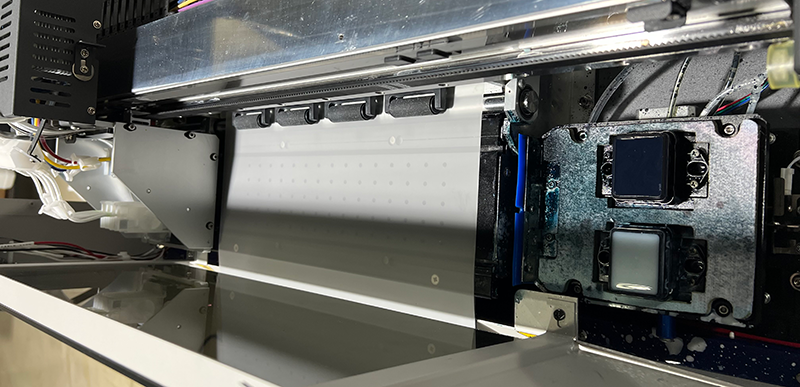
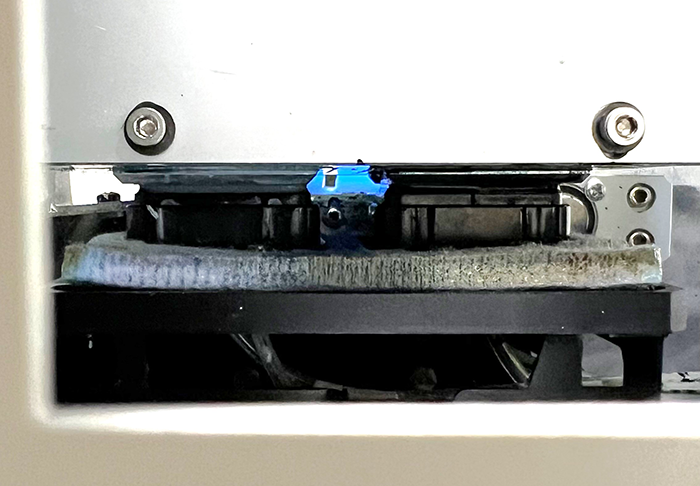
- Use a Philips head screwdriver or Allen wrench (depending on the screw head behind the exposed hole) to rotate the screw clockwise while looking through the opening made by removing the right side window to watch the capping station platform rise.
- Continue rotating the screw until the capping station presses against the bottom of the printhead, then raise it about another 1/4″ or so to compress the capping station seals against the printhead plate.
The printer is now properly shut down and wet capped when the above steps have been completed.
If you haven’t already done so, this is a good time to empty the waste ink bottle and confirm that all of the ink clips are closed.
Not finding what you need?
You can contact our technical support team by sending an email to support@omniprintonline.com with your company name, contact name, phone number, printer serial number, and a quick description of how we can help you.
This will automatically open a support case for you in our ticketing system and a technical support rep will follow up with you shortly.