Print Pro provides a rich set of features to set up a print job using one or more images to automate the creation of “gang run” layouts, making the most efficient use of your film effortless. This article is intended to supplement your Omniprint training as a handy reference to refresh your memory and to use as an annotated checklist of the process steps.
View the below videos or see the following instructions for all the basics of loading & configuring images, then creating and positioning the images onto a Layout.
Loading Images
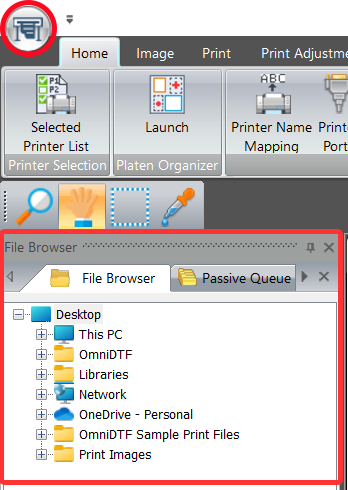
Loading your images is the first step in creating a print job. You can either use the Print Pro ‘File Browser’ or click on the Print Pro printer icon in the top-left corner of the program’s window and select ‘Open…’ to navigate through the Windows file system and select image files to load.
The latter option is recommended because it lets you make your selection from thumbnails of images, rather than just their filenames.
Whether you’re printing a single design or multiple different images for a print job, you’ll want to load and configure each image individually.
Setting the Image Configuration
As each image is loaded, set the following parameters using the Q Rip tool.
Size the Image
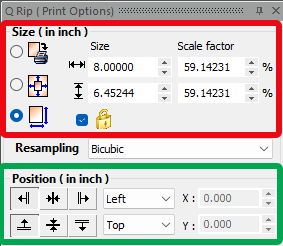
Size the image in the Q Rip window, using the 3rd (bottom) option to rescale the image if needed, ensuring that the width does not exceed 14.25″ for the OmniDTF or 12.5″ for the Omni DTF Mini.
When resizing, be sure the padlock icon option is checked to lock the aspect ratio and prevent distorting the image (see red box in the image).
Position the Image
The default settings of ‘Left’ and ‘Top’ are always used in the Q Rip tool (see green box in the above image.) Changing this setting has no effect on where the image will be positioned on the layout. This is because Print Pro will find the earliest (topmost) point in the layout where each image can fit as they are being added to the print job, maximizing the efficiency of linear film use.
Create a White Underbase Choke
After configuring the image in Q Rip, click on the Image menu tab and then on the White Underbase Choke tool.
Click the ‘OK’ button to accept the default Choke Width value of 2.0.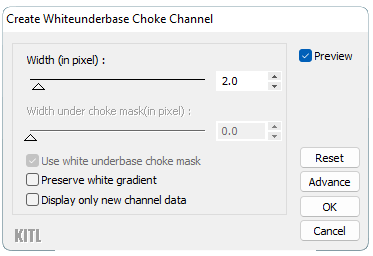
The image is now configured and ready to be loaded onto a Layout.
If you want to print a Layout with a combination of various images on it, repeat the above steps to open a file, set image parameters, and create a white underbase choke for each image before proceeding.
Creating and Configuring a Layout
Now that any images that we want to print have been loaded and their parameters have been set, we’re ready to create the Layout that the images will be placed onto, using the following steps.
If the Page Layout window isn’t already open, select Open Layout from the Home toolbar
Create a New Layout
Whenever we create a new layout we must also tell the Print Pro software which Environment we want to use for printing the new layout. These Environments are a collection of “presets” that OmniPrint provides to simplify and streamline configuring print jobs.
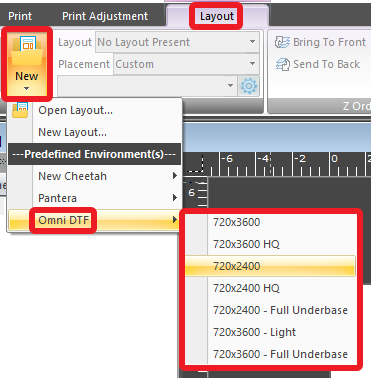
Click on the Layout menu, then select New, then hover over Omni DTF and select the desired Environment from the list that appears.
The Layout window is then loaded and preconfigured with the parameters of the selected Environment.
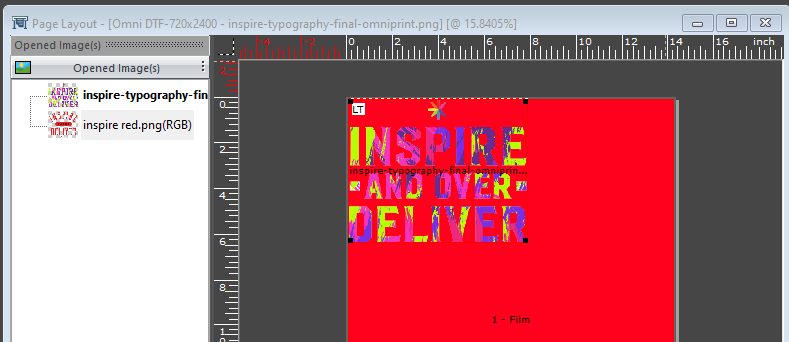
Put Opened Image(s) onto the Layout
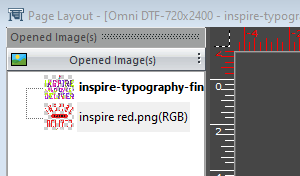
Images opened and configured using the above steps will appear as thumbnails with their filenames under the Page Layout window’s Opened Image(s) header.
Double-click on any item in the Opened Image(s) list to add it to the Layout.
You can repeat the above step any time to load more images from the Opened Image(s) list onto the layout, or to load more copies of a single image. But there’s a better way to load many copies of an image once it is on the layout.
Duplicating Images on a Layout
Once an image is on the Layout, you can create additional copies of that image on the layout by clicking the Ups option in the toolbar…
…then enter the number of additional copies you want to add to the Layout into the dialog box that pops up and click the green checkmark.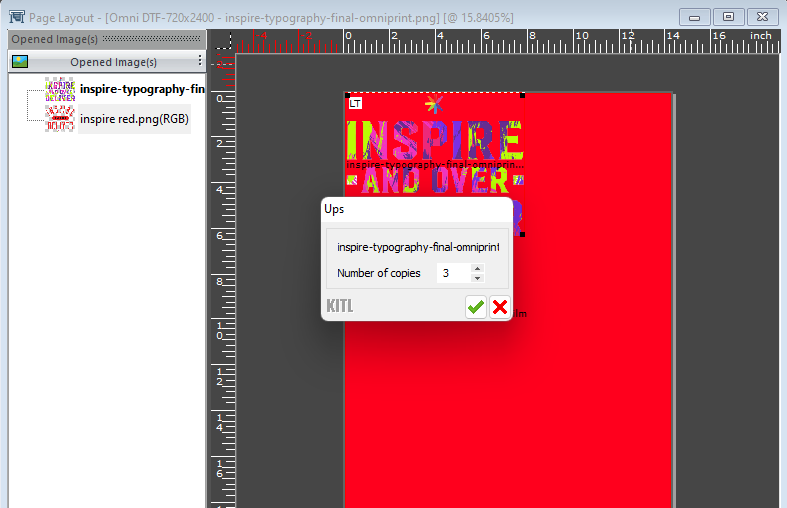
The additional copies of the image will now appear on the Layout.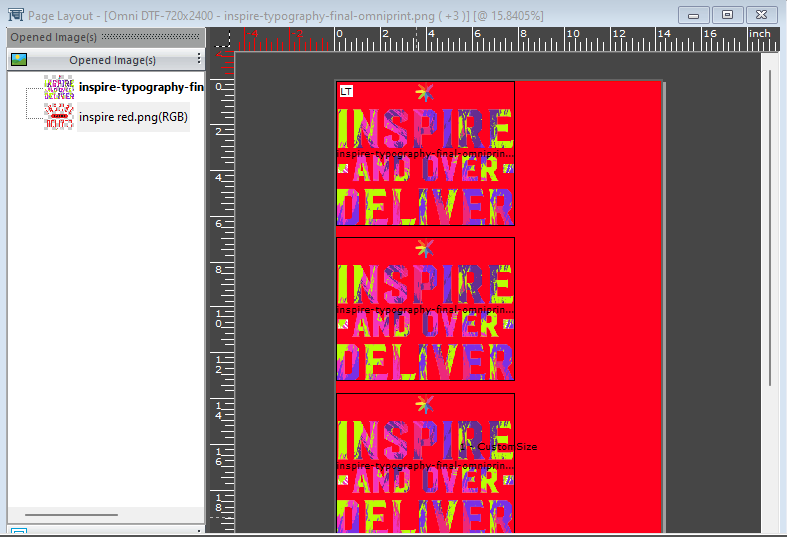
Note: You can scroll down in the Layout window if you want to confirm the number of copies if they don’t all fit in the window’s view. You can also zoom out and in on the layout by using Ctrl+’-‘ (to zoom out) and Ctrl+’=’ (to zoom in).
That’s how to load images, set their properties, select an Environment for and create a new layout, and place the images onto the layout in Print Pro!
Printing a Layout
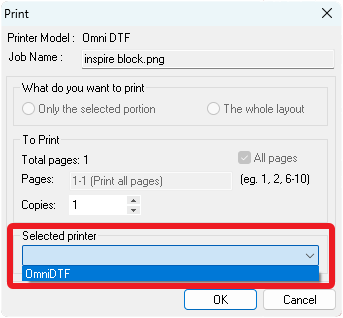
To print the Layout, click the Print menu item, then select Print Layout from the toolbar, or just press Ctrl+’p’….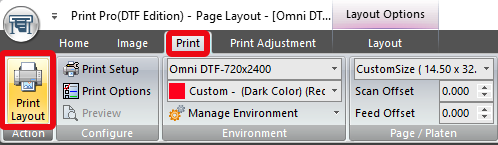
…and make sure your printer is selected in the Print dialog before clicking the ‘OK’ button.
Not finding what you need?
You can contact our technical support team by sending an email to support@omniprintonline.com with your company name, contact name, phone number, printer serial number, and a quick description of how we can help you.
This will automatically open a support case for you in our ticketing system and a technical support rep will follow up with you shortly.