February 14, 2024
Estimated reading time: 1 min
In this article
Properly shutting down your OmniPrint i2 printer at the end of a production day is the most critical maintenance task.
This shutdown maintenance supports producing high-quality prints and maximizing economical operation. That’s because everything we do during the shutdown routine is focused on protecting and prolonging the service life of the printheads.
Process Summary
- Run a head cleaning.
- Close the ink clips.
- Clean the wiper blades.
- Clean the capping station seals.
- Clean the printheads’ undercarriage.
- Flush ink residue from the capping stations.
- Wet cap the printheads.
- Clean up any ink under the capping stations.
- Exit the i2 UI program.
- Turn of the i2 printer’s power.
- Empty the waste ink bottle.
Illustrated Step-by-Step Details
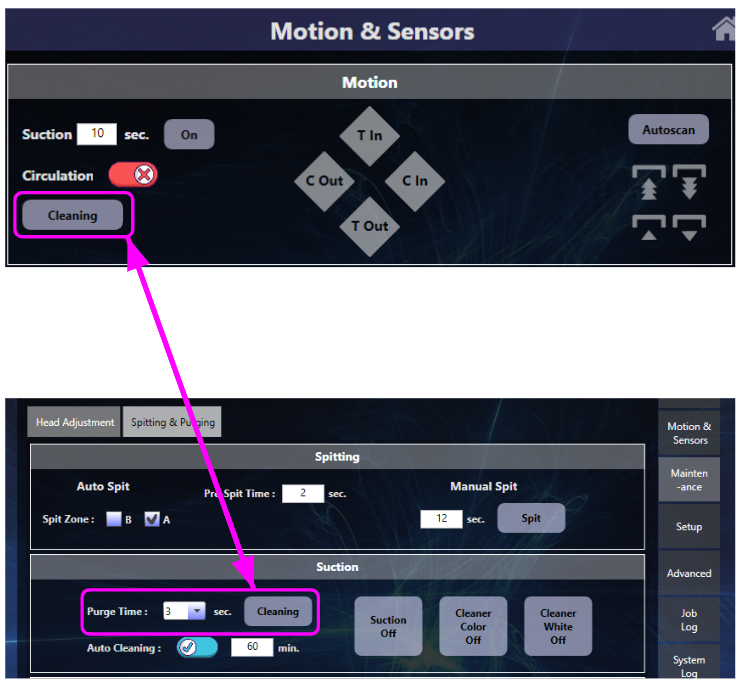
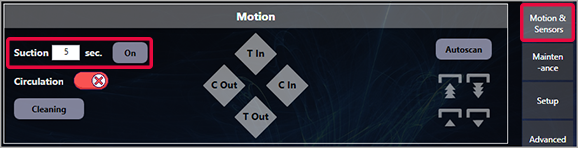
- Run a head cleaning by clicking the Cleaning button on either the Motion & Sensors or Maintenance screen.
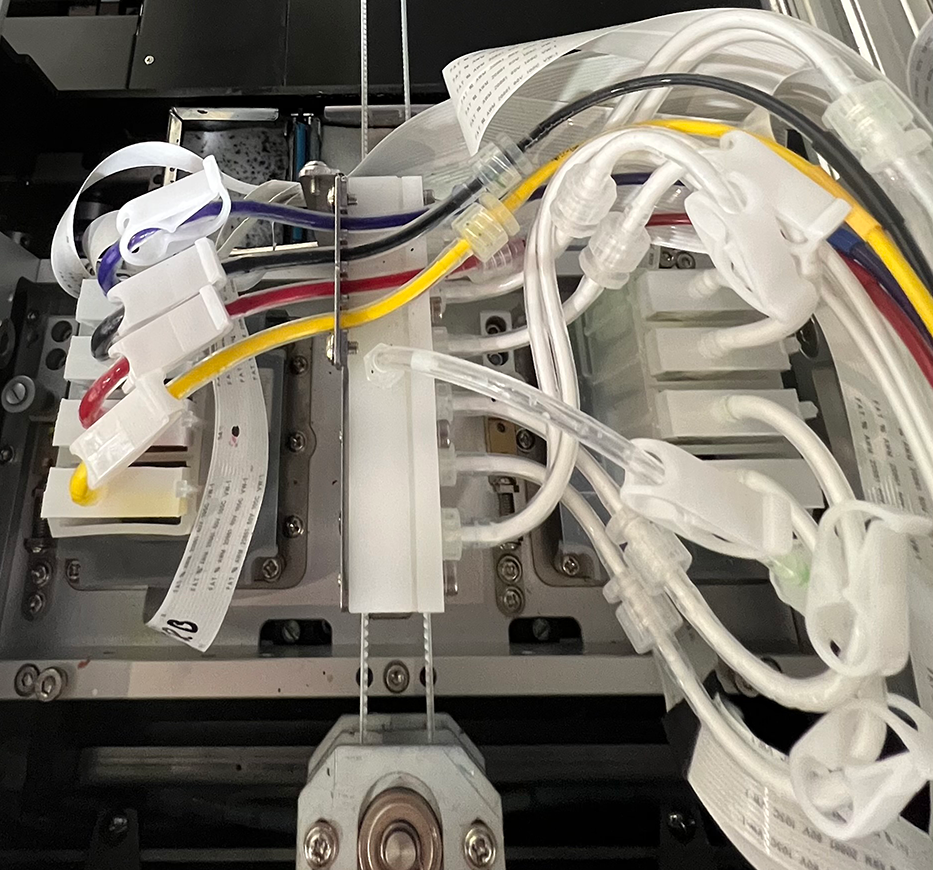
- Close the ink clips
- Clean the wiper blades with an anti-static foam swab or microfiber cloth wetted with Super Cleaner.
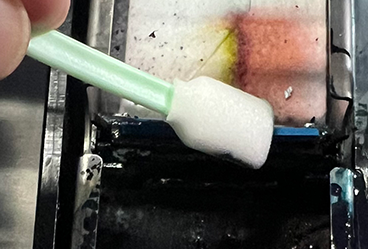
- Clean the capping stations seals using an anti-static foam swab or microfiber cloth wetted with Super Cleaner.
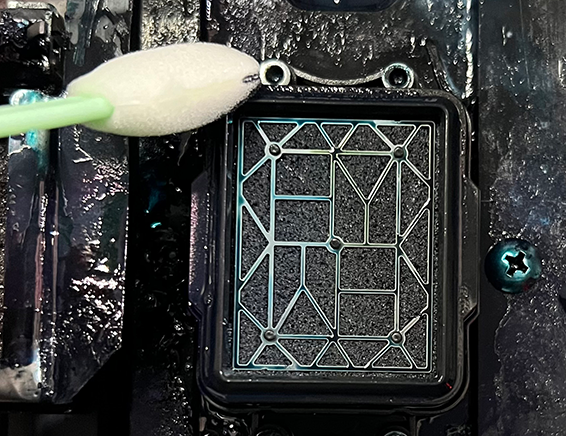
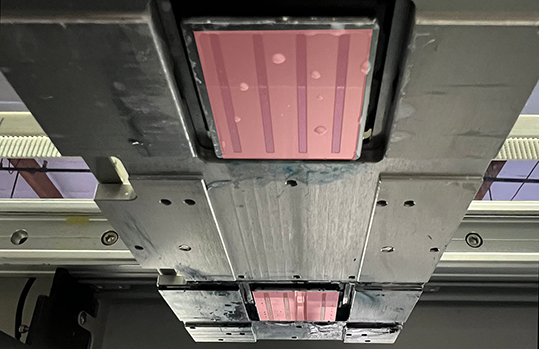
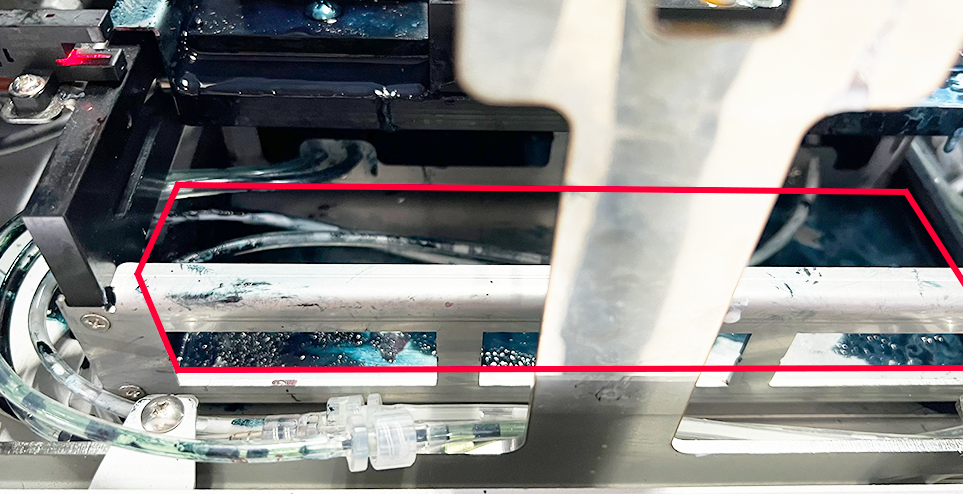
- Clean any ink on the underside of the printheads mounting bracket and the side edges of the printheads, being careful to avoid contacting the mirror-like nozzle plates of the printheads (highlighted with a red tint below).
- Flush ink residue from the capping stations.
- Fill the capping stations with Super Cleaner.
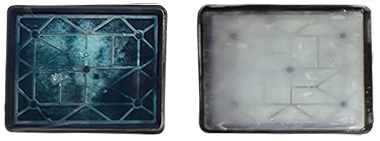
- Run Suction to flush the Super Cleaner and any ink residue out the capping stations.
- Repeat (or continually squirt Super Cleaner into the capping stations while Suction is running) until the loose ink is rinsed out.
- Fill the capping stations with Super Cleaner.
- Wet cap the printheads.
- Fill both capping stations with Super Cleaner until you can see the surface tension of the liquid sitting slightly above the top of the rubber capping station seals.

- Click the Home icon on the Motion & Sensors screen to send the carriage to its Home position, completing the wet cap process.

- Fill both capping stations with Super Cleaner until you can see the surface tension of the liquid sitting slightly above the top of the rubber capping station seals.
- Clean up any liquid (ink or Super Cleaner) that may have spilled out of the capping station while flushing and wet capping.
- Remove the right side access panel for access and visibility.
- Remove the right side access panel for access and visibility.
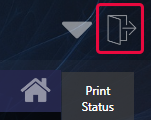
- Exit the i2 UI program by clicking on the door icon in the upper-right corner of its window.
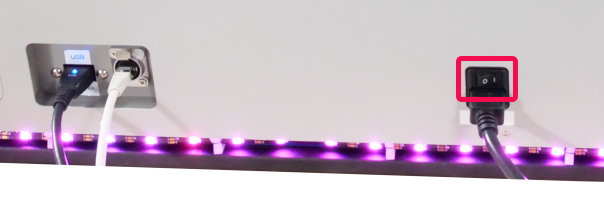
- Switch off the i2 printer’s power.
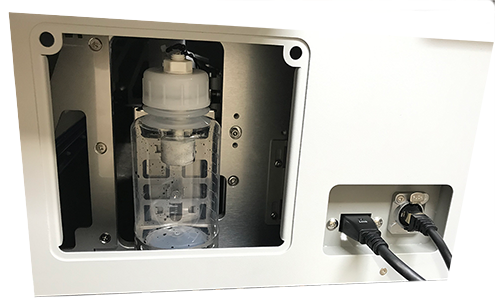
- Empty the waste ink bottle.
You can leave feedback about this article:
Views: 115
Not finding what you need?
You can contact our technical support team by sending an email to support@omniprintonline.com with your company name, contact name, phone number, printer serial number, and a quick description of how we can help you.
This will automatically open a support case for you in our ticketing system and a technical support rep will follow up with you shortly.