Follow this procedure to ensure that your first print of the day, and every print, is the high quality you expect from your OmniPrint i2.
Following a summary of the steps, we’ll provide the step-by-step details.
Daily startup summary
- Turn on the i2 printer’s power switch.
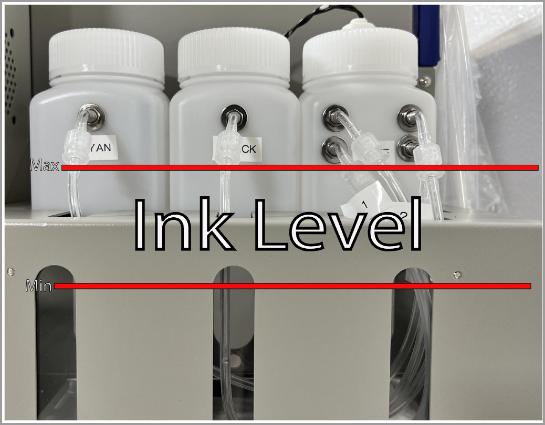
- Check the level in your ink bottles and top them off, as needed.
- Confirm that the white ink is well-mixed, with no separation of the pigment from the base.
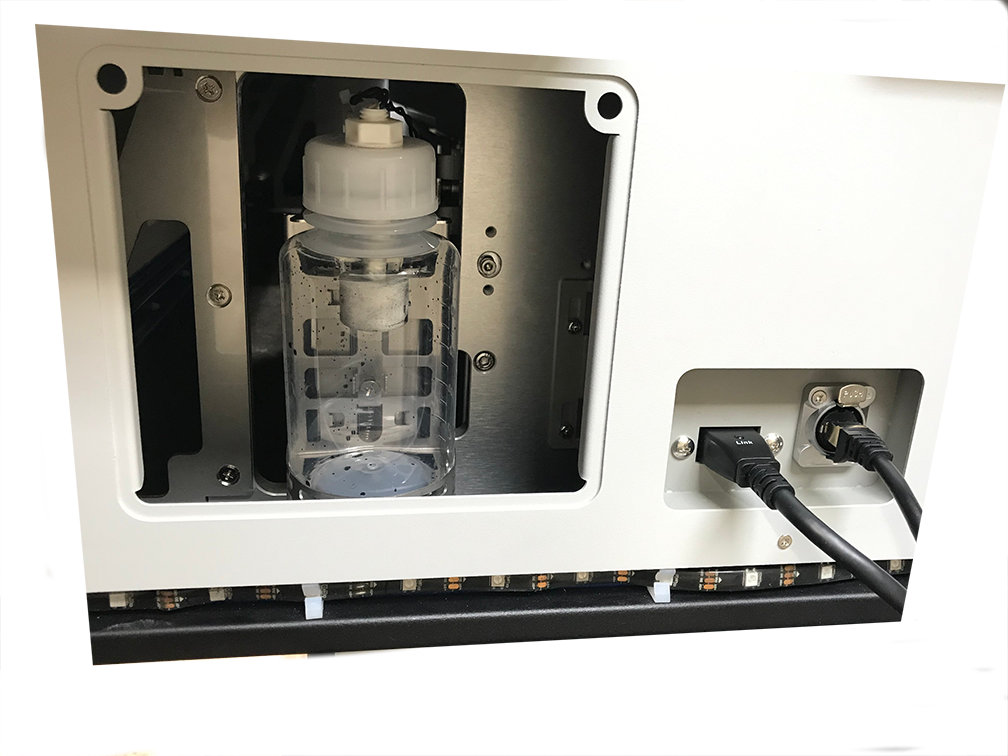
- Check the waste ink bottle’s fluid level and empty, as needed.
- Run the i2 UI program on the printer’s PC, after waiting at least 20 seconds from the time the printer’s power was switched on to ensure that it’s ready to communicate.
- Circulate the white ink for at least 3-minutes, then toggle the Circulation switch to the OFF (red) position.
- Open & reposition all 8 of the ink clips.
- If the printer has been idle a few days, you may want to first open only the white clips to prime the white ink from the manifold through the dampers. Then open all ink clips.
- Run a head cleaning for 3-5 seconds.
- Run Autoscan to set the platen height.
- Print a nozzle check
Daily startup details
Power on and preliminary checks
Turn on the rear power switch, then proceed through some preliminary checks before loading the i2 UI software on the printer’s PC. We do this to allow the printer’s electronics at least 20-seconds to become fully functional before the PC and i2 UI software establish a connection with the printer.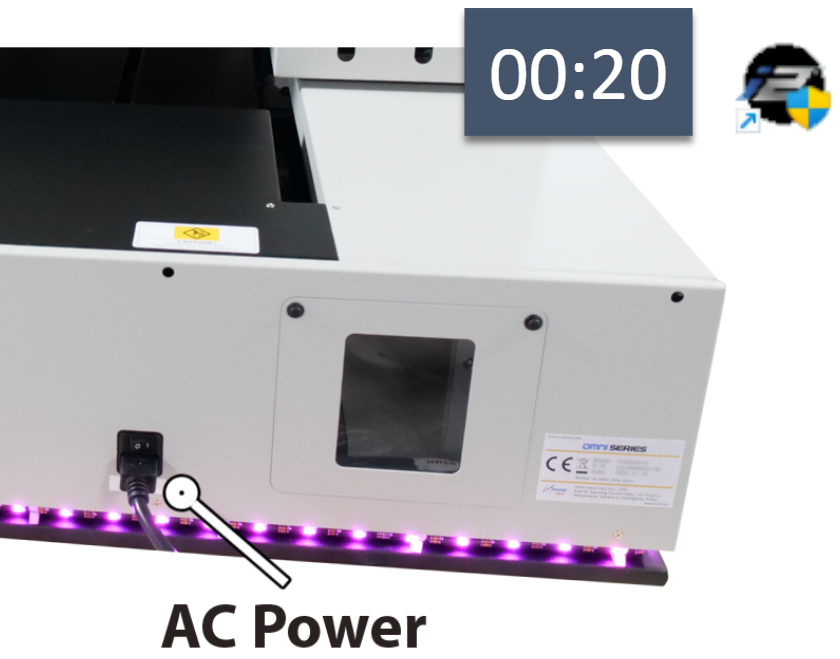
After turning on the printer’s power switch we do the following preliminary checks:
- Confirm that all ink levels are at least near the top of the vertical slot in the back of the bracket that holds them. Refill as needed, keeping the ink level below the fittings where the ink tubes enter the bottle. We want the ink levels maintained between the two red lines in the below image.
- Make sure the white ink’s pigment hasn’t separated from its base in the ink bottle. The white ink bottle should be lifted out of its bracket a shaken side-to-side enough to ensure that it is well-mixed daily. Do this first because you’ll then need to let the white ink settle for 20 minutes or so to ensure that any bubbles introduced while shaking it have risen to the top and dissipated, to avoid getting air into the ink line.
- Empty the waste ink bottle if it isnt already near empty.
i2 UI load and printing prep
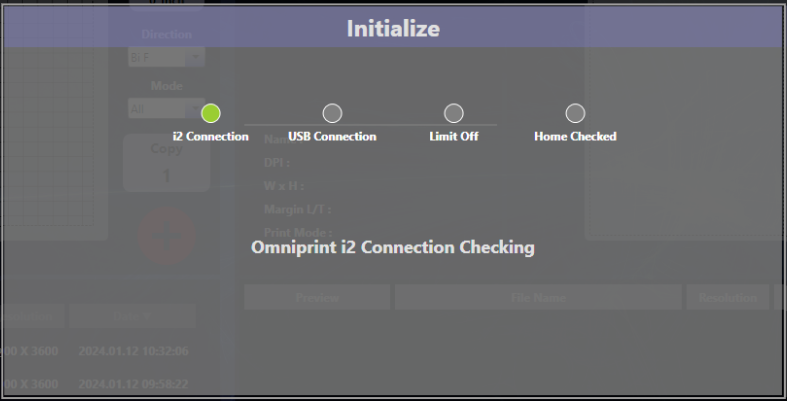
- Load the i2 UI program on the printer’s PC. Several startup tests will run, and the printer will sound its initialization fanfare when completed.
The printer is now ready for use. - Circulate the white ink for 3 minutes or longer.
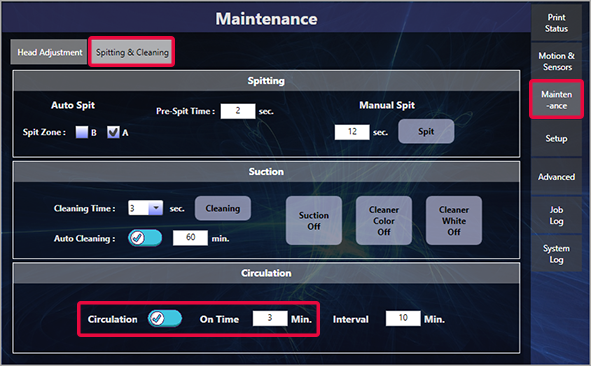
After the 3-minutes of circulation is completed, click on the Circulation switch to turn circulation to the OFF (red) position.
- Confirm that the white ink in the tubes between the manifold and the white dampers is well-mixed, with no separation of the pigment from the base.
- If the ink in those short tubes is not fully opaque (a solid white) then we’ll want to “prime” the white ink briefly. If this is needed, open just the white ink clips then turn on Suction for 5 seconds.
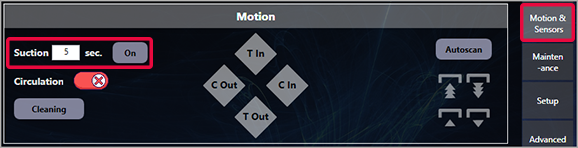
- If the ink in those short tubes is not fully opaque (a solid white) then we’ll want to “prime” the white ink briefly. If this is needed, open just the white ink clips then turn on Suction for 5 seconds.
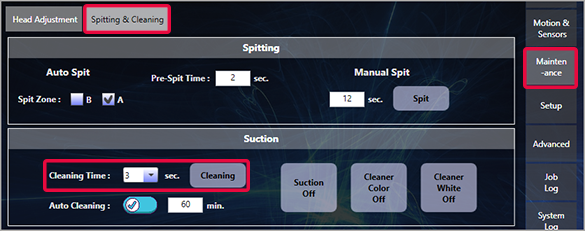
- Open all 8 of the ink clips, then run a 3-5 second head cleaning.
Print a nozzle check
- Place a transparent sheet of plastic, such as a sheet of DTF film, onto the platen. Put it at the front edge of the platen, horizontally centered.
- Run Autoscan to set the platen height.

- Load the nozzle check image in the Job Setting section of the i2 UI app.
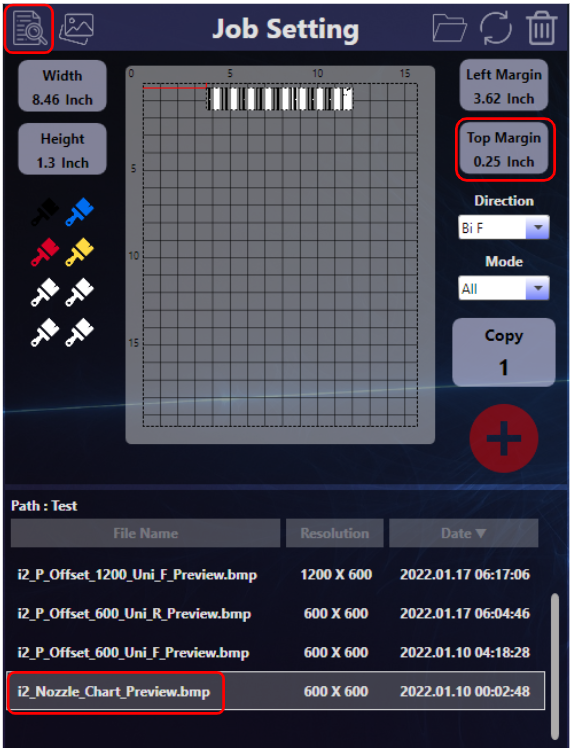
- Select the Test file path by clicking the page & magifying glass icon in the top-left corner of the Job Setting section.
- Select the i2_Nozzle_Chart_Preview.bmp file from the file list.
- Position the image in the desired position on the virtual platen using the Top Margin and Left Margin buttons (usually a 0.25 inch top margin and at the left margin default of centered).
- Use defaults of Direction = “Bi F” and Mode = “All” for printing nozzle checks
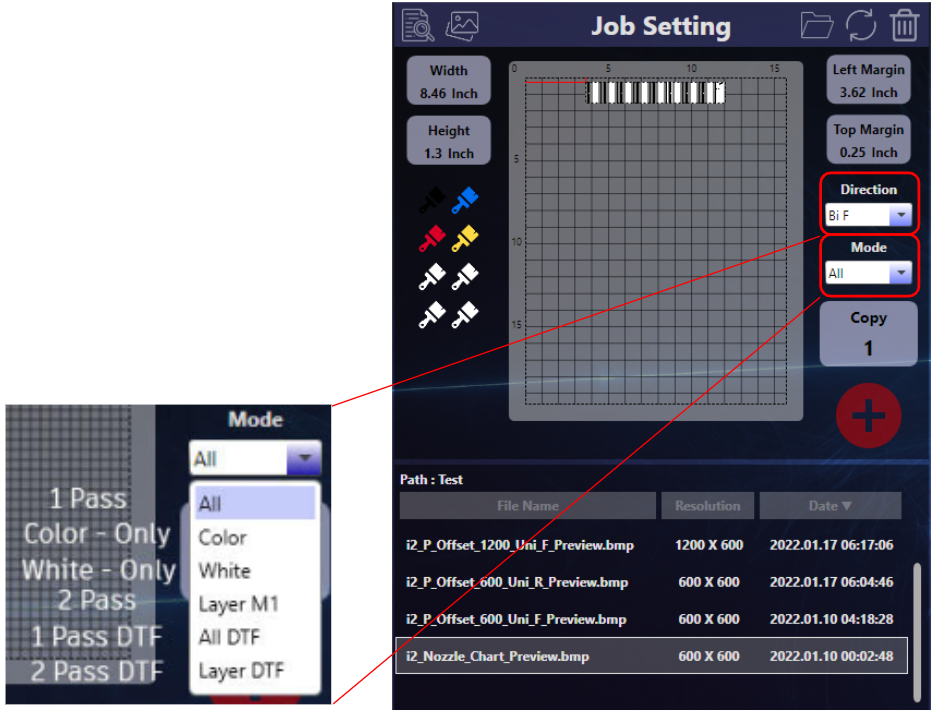
- Click the red ‘+’ button in the Job Setting section to send the configured nozzle check print job to the print queue.

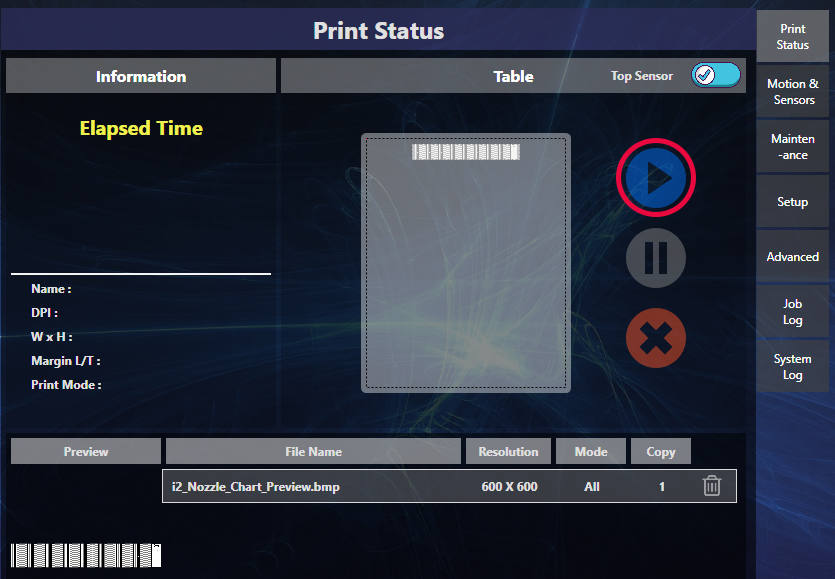
- Click the filename in the print queue (above) on the Print Status section.
- The test image will appear under in the graphic under the Table heading.
- Click the blue right-arrow (“play”) button to send the nozzle check to the printer.
- After the i2 beeps, press its flashing blue Start button to run the print.
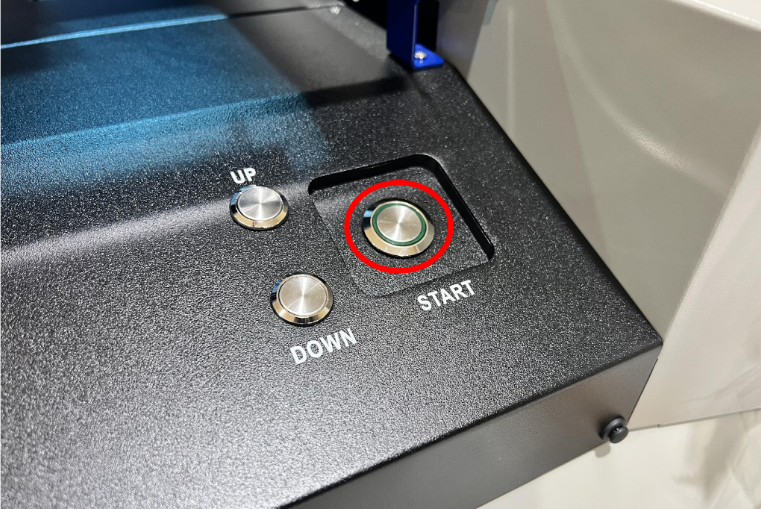
- The nozzle check test pattern prints.
- If the nozzle check pattern is 90% or better, you’re ready to start your production day.

- Run additional iterations of head cleanings & nozzle check prints, as needed, to achieve 90% or better in each color channel.
- Run additional iterations of head cleanings & nozzle check prints, as needed, to achieve 90% or better in each color channel.
Not finding what you need?
You can contact our technical support team by sending an email to support@omniprintonline.com with your company name, contact name, phone number, printer serial number, and a quick description of how we can help you.
This will automatically open a support case for you in our ticketing system and a technical support rep will follow up with you shortly.