DirectRIP provides a wealth of options for how you’d like to print your image, to allow you maximum control over your products. This article will discuss how to select, import, and set up an image for Freejet 330-series printing in DirectRIP.
Format Considerations
No matter how high-quality the shirt, and how perfect the pretreatment job, there’s no amount of technical tweaking that can turn a bad image into a good print. Before you get started with setting up the print, you’ll want to make sure that you’re working with a properly formatted image that will yield satisfactory results! If you need guidance on how to create and format a proper print image, please follow the guidelines contained in this knowledgebase article.
Importing Your Image
DirectRIP makes importing your image a snap! You can either use the ‘File’ menu option on the top-left corner of DirectRIP , or simply click and drag any compatible image from Windows’ File Explorer into the gray space in the center of DirectRIP!
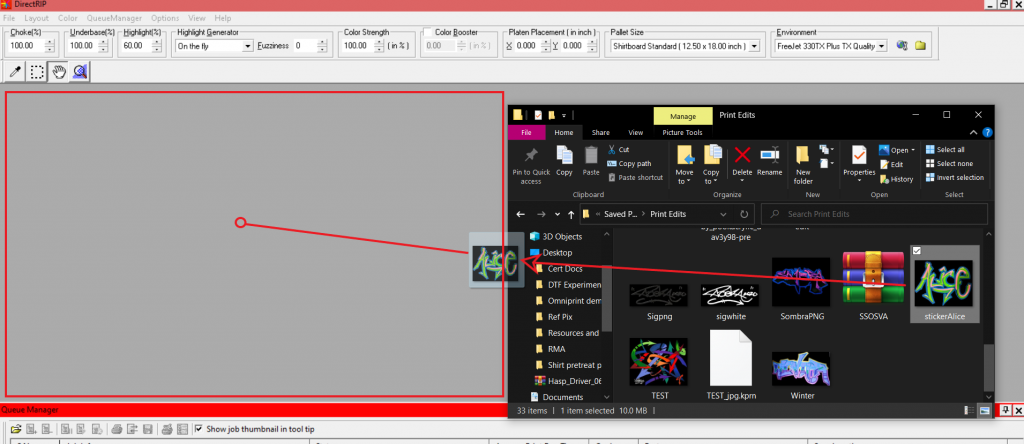
File import (open image file in DirectRIP)
To make sure your images print at your expected size, there should be very little “negative” or dead space (transparent content) along the borders of your image, to give a more precise projection of the artwork’s dimensions. Otherwise, the printed image itself will be reduced in size by the amount of transparency at the edges of the image. This would typically be handled during image creation in a tool like Photoshop or Corel Draw, but DirectRIP can be used for simple, rectangular cropping, too.
Steps to crop an image in DirectRIP
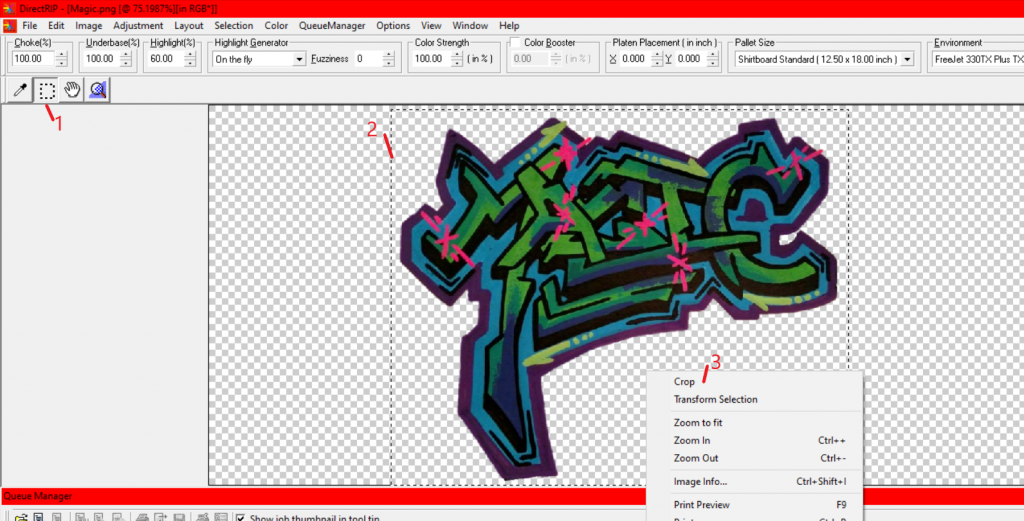
To crop the image in DirectRIP:
- Click the Selection tool. It is the dashed box near the top-left of the image window.
- Click & drag to draw a selection box around the parts of the image that you want to keep.
- Right-click the image and select Crop from the pop-up menu to make the crop.
Configuring Your Print
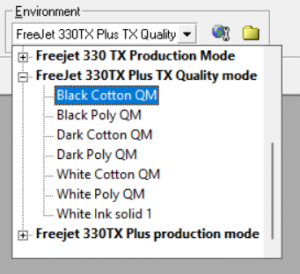
Now that your image has been loaded and properly cropped to size, you can begin your setup process. The first step of any print configuration is to choose your Environment. Your choice of Environment will depend on two or three factors, depending on your printer model:
- Expected (based on artwork) or desired print quality
- Color of fabric being printed on
- Type of fabric (Freejet 330TX PLUS model only)
In the Environment drop-down box, select the Environment Group and Environment which corresponds with the desired type or quality of your printed image.
Environment selection
Once you have selected an Environment, most of the heavy lifting of setting up the print is already complete and all that’s left is for you to size and place your image! Next, turn your attention to the QRip subwindow:
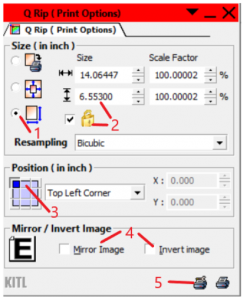
Q Rip subwindow
- In the Size section of the Q Rip subwindow, select the third radio button from the top, to enable resizing of the image.
- Make sure the checkbox to the left of the padlock icon is checked to lock in the original aspect ratio of the image (preventing distortion of the horizontal & vertical proportions), then resize as desired.
- Select the desired positioning of your image on the garment. This should be Top Center unless you’re doing something specific which requires some other print positioning.
- Note the Mirror and Invert image options, which are typically not used. Mirror Image will print the design backwards, which is useful for Direct-to-Transfer (DTF) printing, or anytime you want to reverse the horizontal axis of your image. Invert Image will print your image’s photonegative — a dramatic effect seldom needed, but available.
- Locate the two printer icons on the bottom right corner of the QRip subwindow. The icon on the left is the Print Setup icon. Click it to open the Print Setup window.
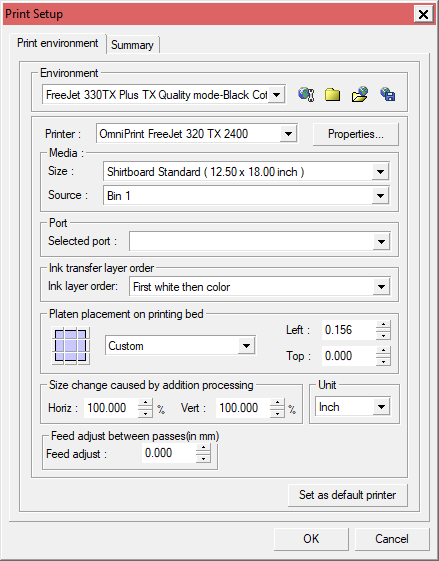
Print Setup
In the Print Setup window, select “Epson Stylus Photo R2400” from the Selected port dropdown box, then click the Properties button to pull up the Properties window.
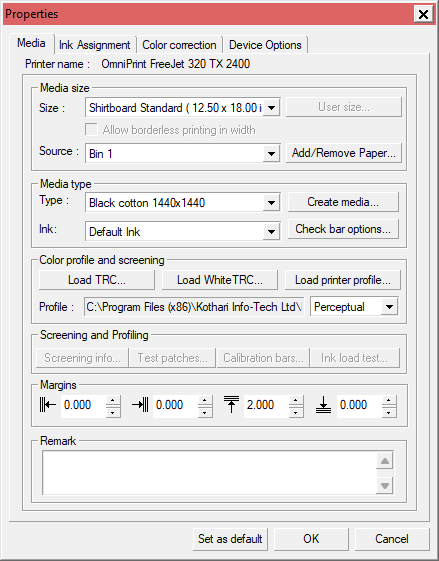
Print Setup — Properties window
In the Properties window’s Margins section, set each desired margin. These margins set print position offsets from the justification setting previously selected in the QRip window. Each of the four arrows point to the side from which the margin can be set. For example, the 3rd box with the upward-pointing arrow indicates setting a margin from the top.
It’s a common practice in DTG printing (and garment printing, in general) to leave a 2″ margin down from the collar before printing the design.
Click ‘OK’ to finalize the Properties settings and close that window, then click ‘OK’ again on the Print Setup window to close it and save the settings.
Final Preparations
If you’re using the Dark or Black environments on a 330TX Plus, or the Color or Black environments on the 330TX, DirectRIP will generate a White Underbase. Since white ink may slightly expand when it lands on a garment, we will need to slightly restrict the edges of the underbase to compensate and ensure that there won’t be an unintended white “halo” around the edges of the printed design. To do this, select the Image menu near the top left corner of DirectRIP, then select ‘Add WhiteUnderbase Choke’ from the menu — the second-to-last option on the list.
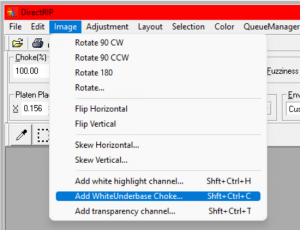
Add white underbase choke
Click ‘OK’ on the dialogue box that appears to accept the default of 2 pixels for the white underbase choke, then confirm that “UnderbaseChoke 1” has appeared in your Channels Palette.
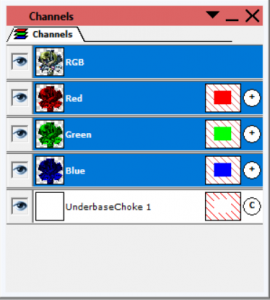
Channels, with white underbase choke
At this point, the design is technically ready to print. But, you always want to be careful and make sure it has been formatted correctly! To check your work, right-click your image and select Print Preview.
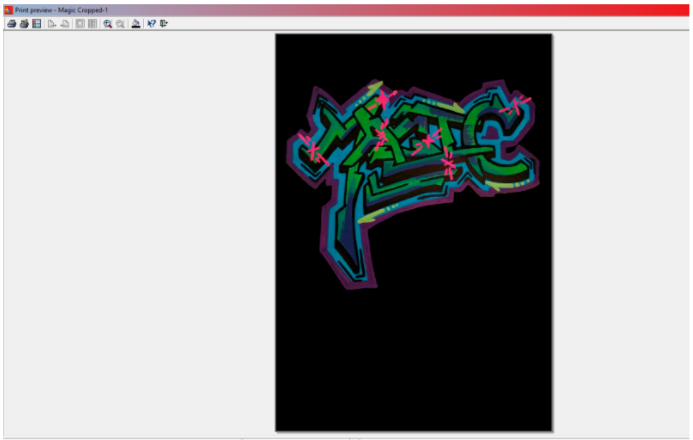
Print Preview
The image displayed in Print Preview is proportionally accurate to the way your design will look when printed on the 12.5″ x 18″ Standard Adult Platen. You can reasonably expect the design to appear on the print surface the same as it appears on this screen. To make sure you get the most accurate comparison, select the fill bucket icon (3rd from the right among the icons at the top of the screen) to change the background color to match your garment or print surface.
If everything in the preview looks solid, tap the Esc key on your keyboard to exit Print Preview mode.
DirectRIP print job setup speedrun
Starting the Print
Once your print job is completely configured, you’re ready to print! Run through the following checklist to make sure everything else is properly set up:
- Is the platen properly mounted on the printer and flush against the alignment rails?
- Is a pretreated garment mounted smoothly and securely on the platen?
- Have you properly adjusted the platen height?
- Is the gantry in the Print Ready (fore) position?
If you can answer “Yes” to all of these questions, you’re good to go!
As you can see, there are a few steps to configuring prints in DirectRIP, but the process is not complex and can be completed within a minute if your graphic is ready to go. Once you’ve performed a few prints, you’re sure to get it down to muscle memory in no time.
Happy Printing!
Not finding what you need?
You can contact our technical support team by sending an email to support@omniprintonline.com with your company name, contact name, phone number, printer serial number, and a quick description of how we can help you.
This will automatically open a support case for you in our ticketing system and a technical support rep will follow up with you shortly.