There are two maintenance tasks that should generally be performed on a monthly schedule: carriage bar cleaning & lubrication and resetting the waste ink pad counter.
Cleaning & lubricating the carriage bar
This video demonstrates and explains how to properly clean and lubricate the carriage bar.
Remember to use only a lint-free cloth or paper towel for the cleaning procedure, and only OmniPrint’s blue Freejet Grease for lubricating the carriage bar. Use of any other lubricant may damage the carriage, requiring that it be replaced. Damage due to improper maintenance is not covered by the warranty.
Resetting the waste ink pad counter
Resetting the waste ink pad counter is done 100% in software. The details on performing that aspect of the monthly maintenance are available here.
OmniPrint recommends resetting the waste ink pad counter of FreeJet 330-series printers on a monthly basis. Doing so will prevent an error condition that is described at the bottom of this article from occuring.
Resetting the Waste Ink Pad Counter
See how to reset the waste ink pad counter in the below video or the following step-by-step instructions.
The Adjustment Program should be used only as directed below. Any other use without the direct guidance of OmniPrint staff is strongly discouraged and may cause problems that would not be covered by the warranty.
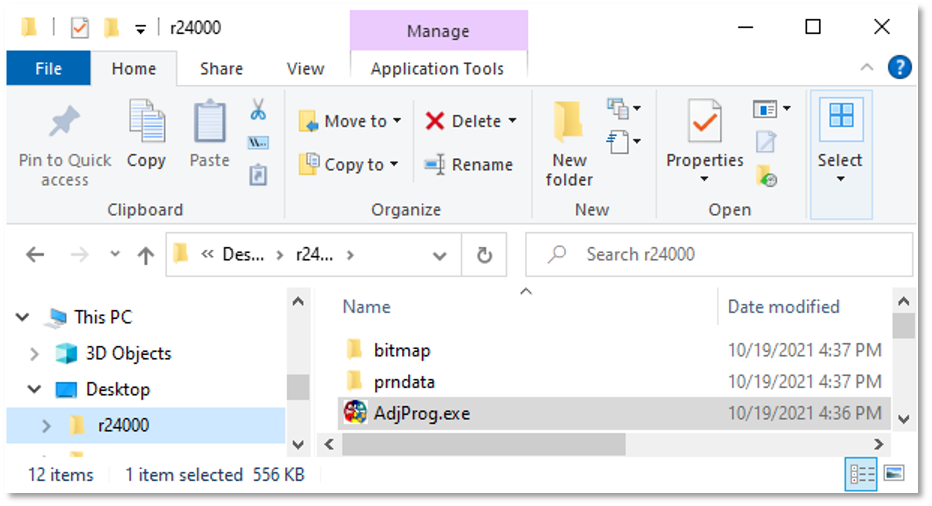
Use Windows File Explorer to navigate to where you installed the Adjustment Program, then double-click on the AdjProg program’s icon to launch the Adjustment Program.
If you don’t already have the Adjustment Program on the PC connected to your Freejet printer, you can get it and find installation instructions here.
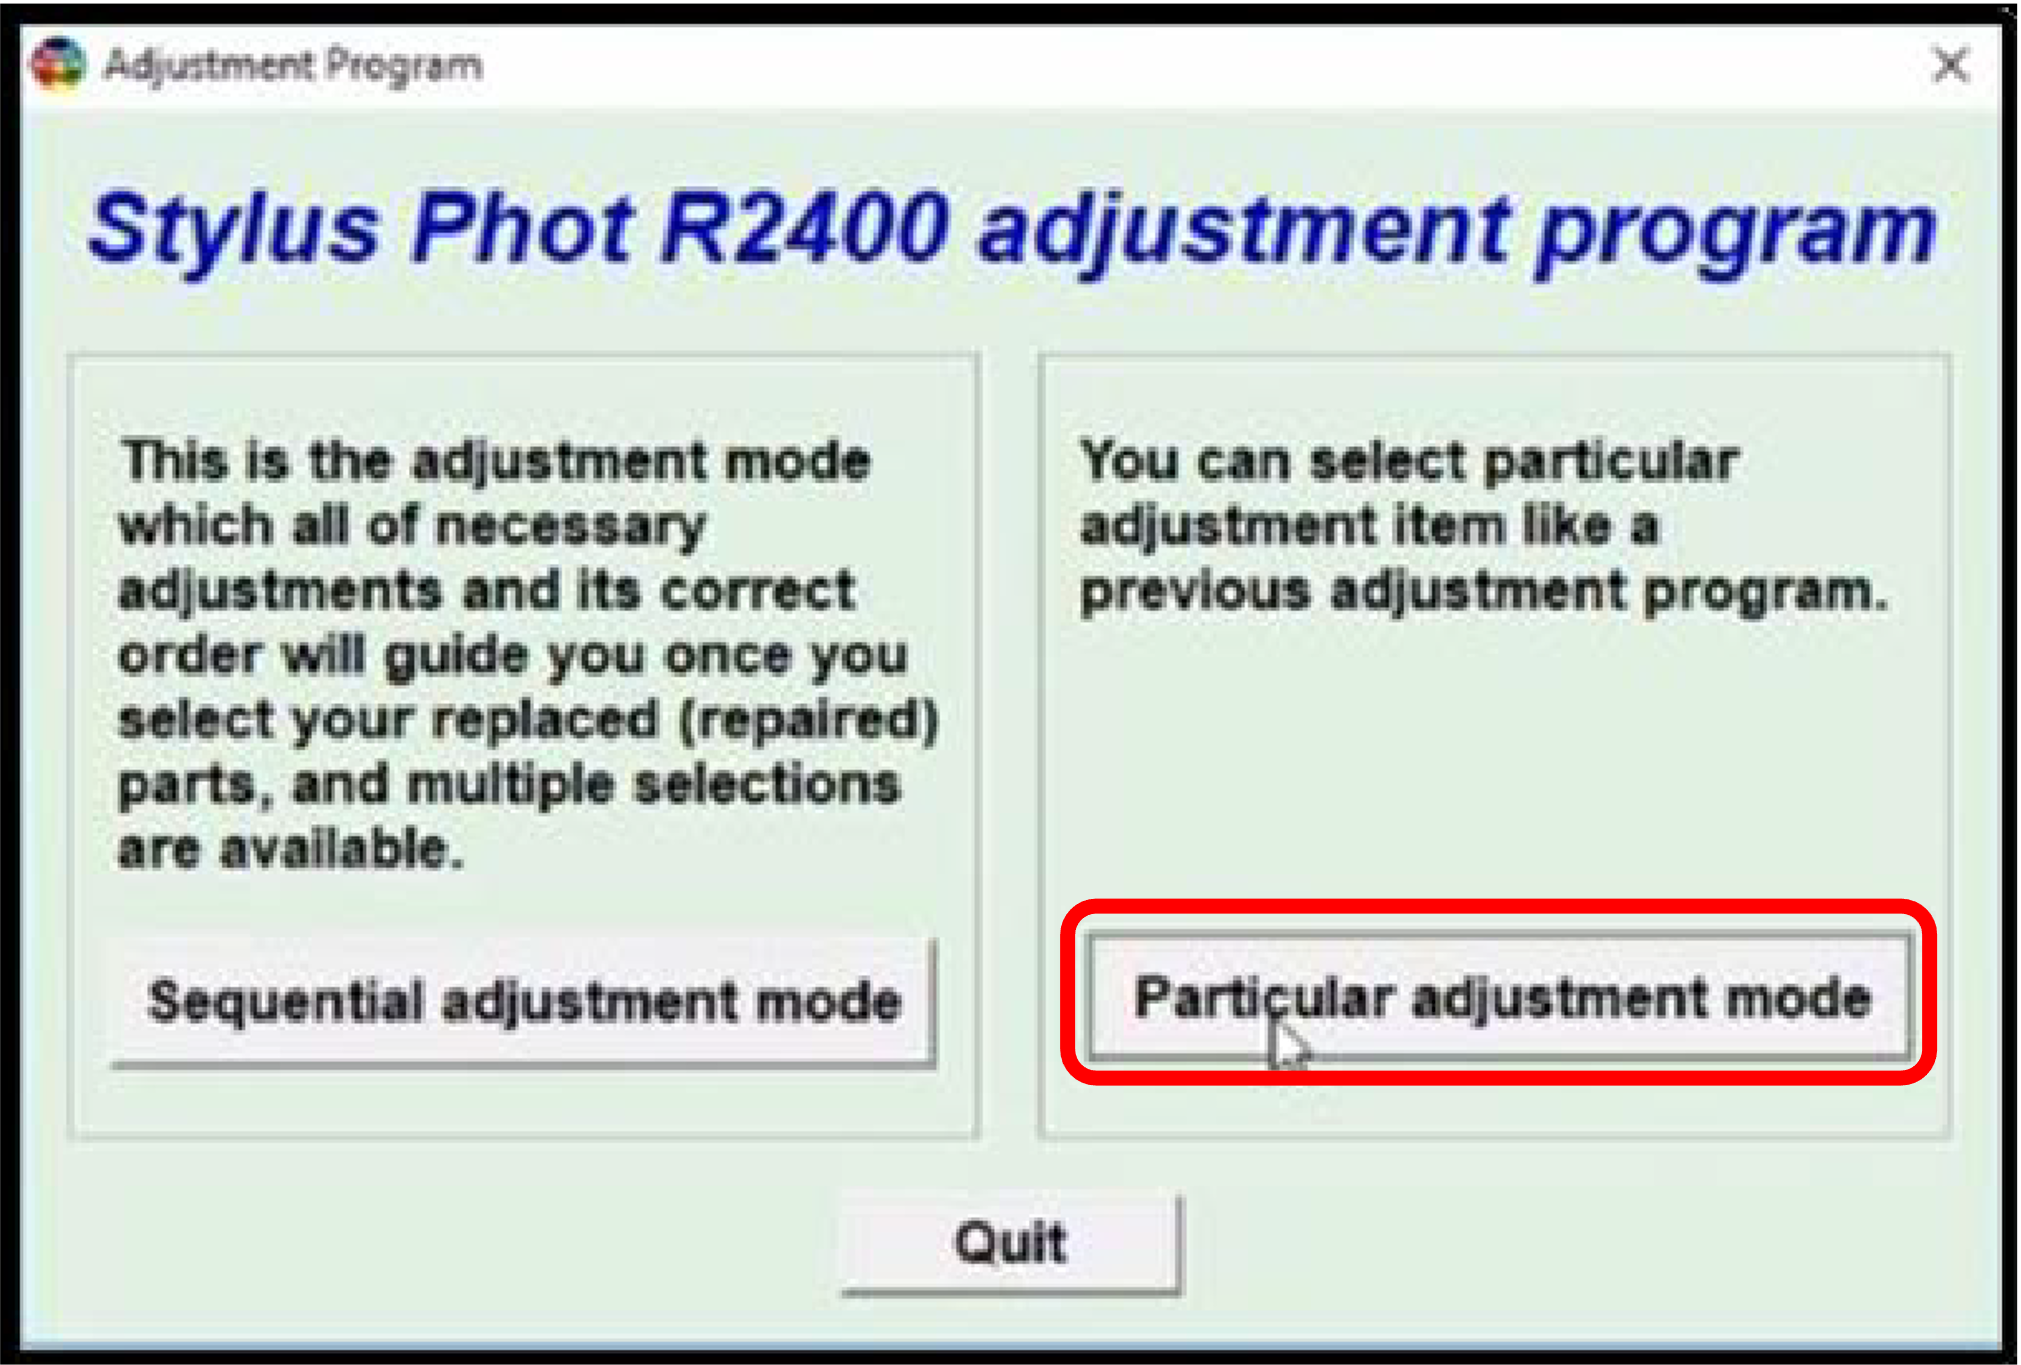
Click on the ‘Particular adjustment mode’ button.
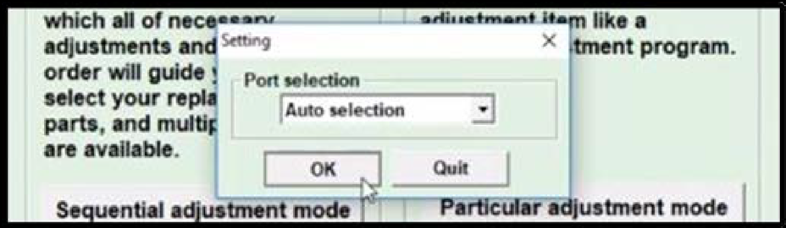
In the pop-up window, confirm that the Port selection is set to ‘Auto selection’, then click ‘OK’.
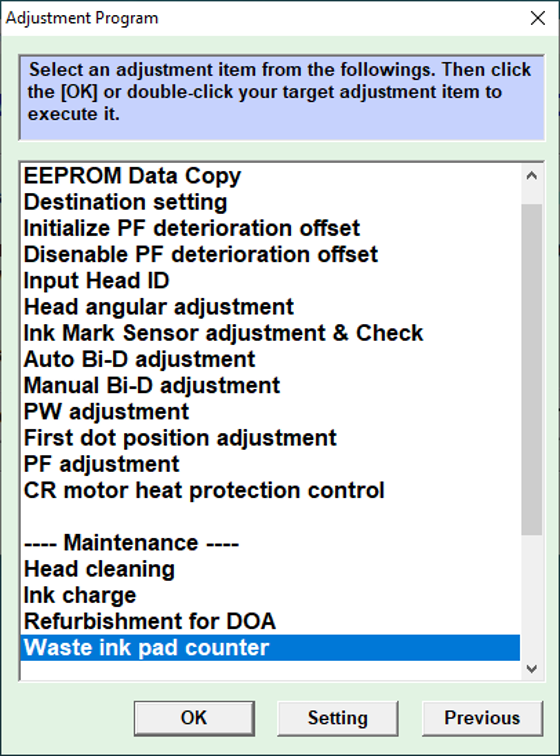
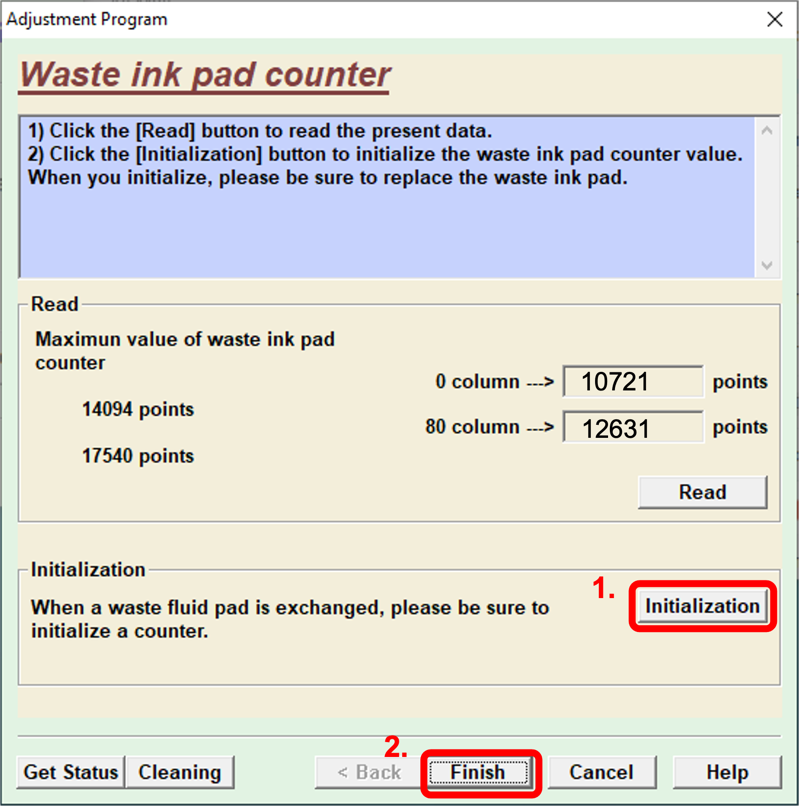
When the Adjustment Program window appears, scroll down to the ‘Maintenance’ section and select ‘Waste ink pad counter’, then click on the ‘OK’ button.
Click on the ‘Initialization’ button to reset the waste ink pad counter, then click ‘OK’ to close the informational window which pops up, then click ‘Finish’.
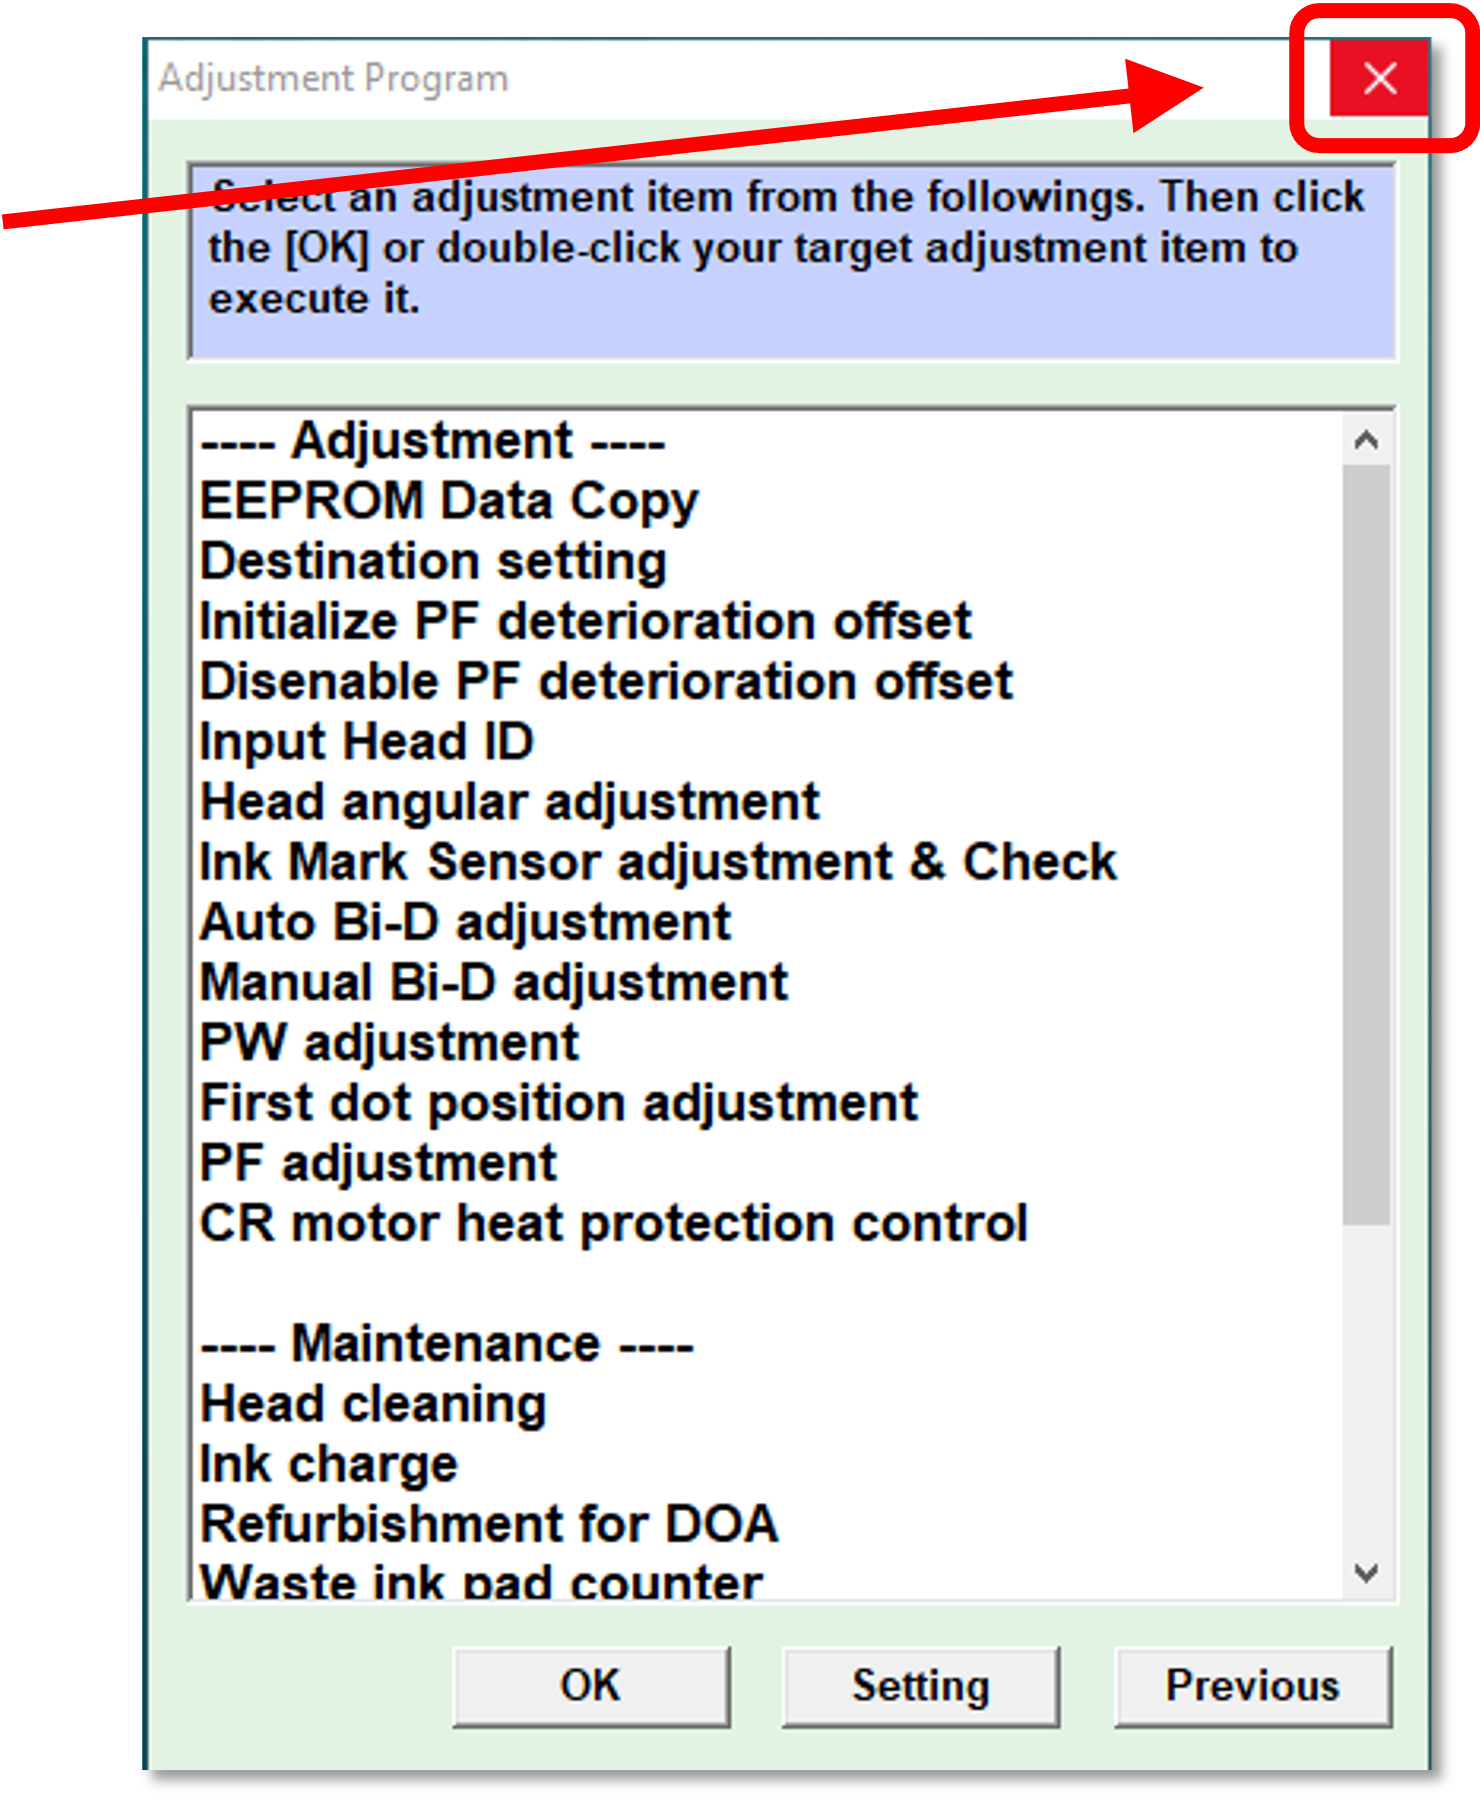
Click the ‘x’ in the upper-right corner of the Adjustment Program’s menu screen to close that window.
Click on the Adjustment Program’s ‘Quit’ button to end the program.
Turn the printer off from the rear power switch, wait 5 seconds, then turn it back on.
Congratulations! The waste ink pad counter has now been reset.
Error Condition Requiring a Waste Ink Pad Counter Reset
If a waste ink pad counter reset isn’t performed on a routine basis, the ‘Error’ and ‘Ink’ lights on the control pad will eventually begin flashing — blinking in an alternating pattern. Once this has occurred the printer will no longer accept print jobs until we acknowledge and clear the error, using the procedure detailed above. But there’s no need for that to happen.
Rather than wait for this to happen, we proactively check the waste ink tank level visually to avoid overfilling, and we use the Adjustment Program to reset the counters which trigger the error condition. By doing this as part of routine maintenance, we avoid ever having a print job interrupted by the error condition.
The absorbent waste ink pad at the bottom of the waste ink tank should be replaced once it is thoroughly saturated. This waste ink tank is the chrome, rectangular box at the left end of the printhead carriage. See our article about replacing consumable parts for details on how to replace the pad.