The OmniPrint i2 comes with two software tools: Print Pro RIP software and the i2 UI program.
The below video and following step-by-step directions demonstrate and explain the workflow of using Print Pro to configure & rip a print job to a file, and the i2 UI to precisely position the print on the platen, select print modes, and send the print job to the printer.
Video Demonstration
Step-by-Step Directions
We’ll split the process into two sections: 1) ripping an image to a “print” file, and 2) printing the image. The first section uses the Print Pro software while the second section uses the i2 UI software.
Let’s get started!
“Printing” an Image RIP to a File
- Load an image file to be printed into Print Pro.
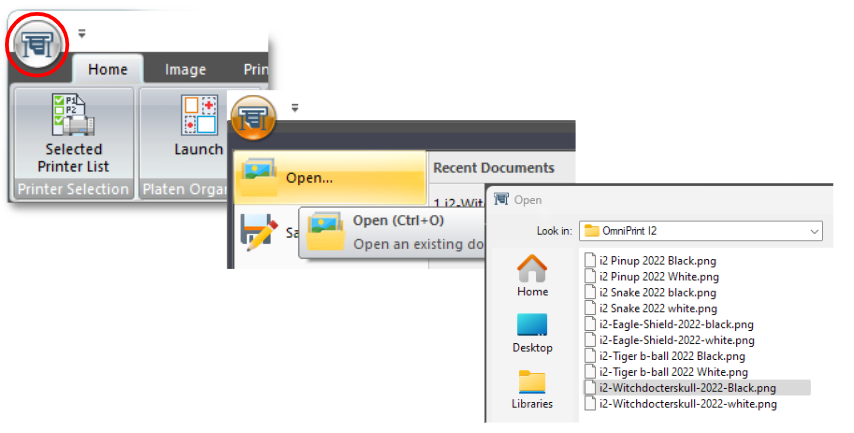
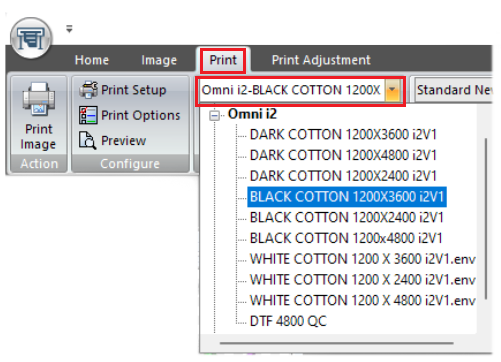
- Select an Environment (based on shirt color & desired resolution) from dropdown list on the Print tab’s toolbar to load presets.
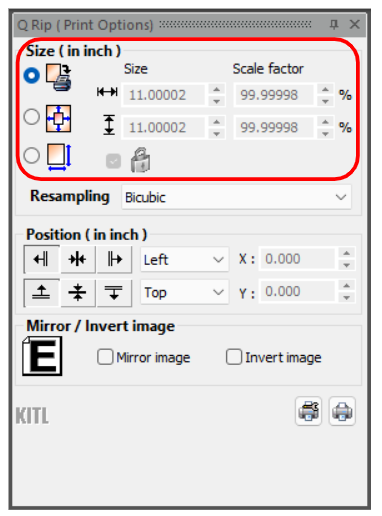
- Set the desired image size for the print in the Q Rip panel.
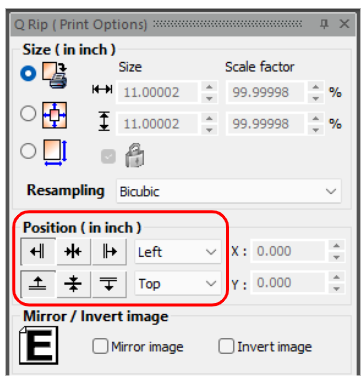
- Position the image at top-left in the Q Rip panel (actual positioning is done later).
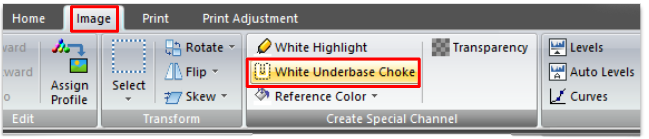
- Select White Underbase Choke from the Image tab’s toolbar…
…then accept the default of 2 pixels and click OK to create the choke.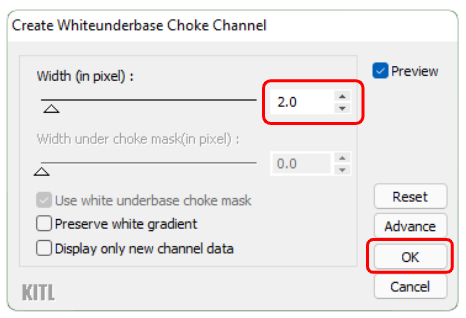
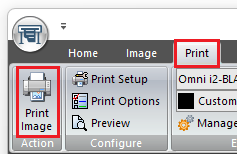
- Click Print Image on the Print tab’s toolbar.
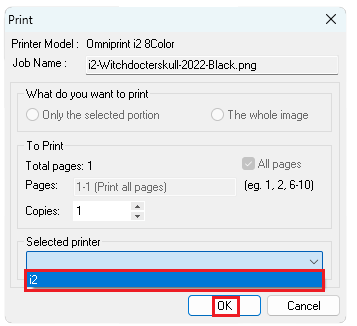
- Click the Selected printer dropdown and select the i2, then click OK.
The ripped image has completed its print-to-file process when the Status in the Queue Manager says “PrintDone”, so we will now switch to the i2 UI software to continue.
Finalizing and Sending the Job to the i2
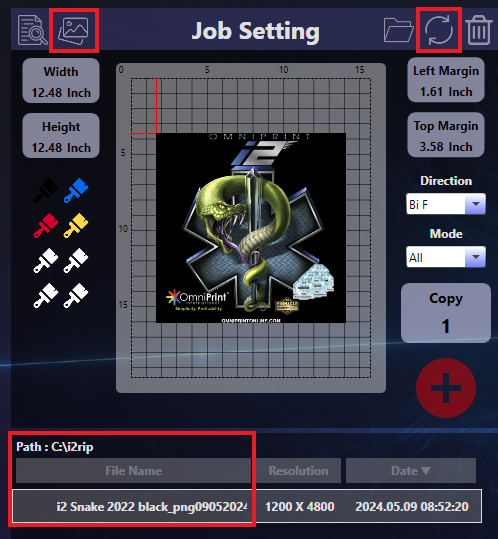
- Confirm that the “i2rip” folder is selected in the i2’s Job Setting section (by clicking on the ‘photos’ icon) and that the file list in Job Setting is current (by clicking on the ‘reload’ icon), then select the ripped file name to be printed.
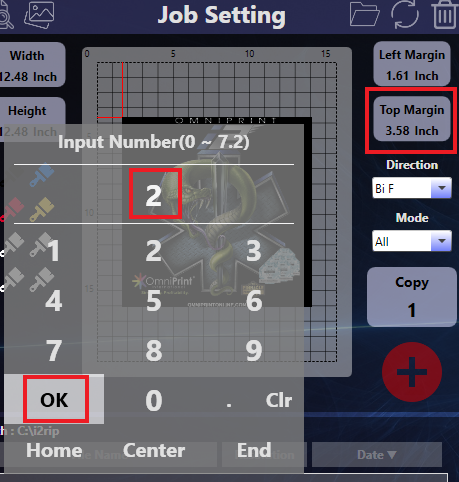
- Set the top margin to 2 inches.
- Set Direction to “Bi F”.
- Set Mode to “All”.
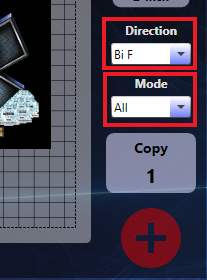
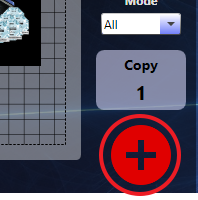
NOTE: See the above video for details on the Direction and Mode options. - Click the red ‘+’ button to send the job to the Print Status queue.
- Go to the Print Status tab (if not already there), then click the image’s file name in the Print Status queue.
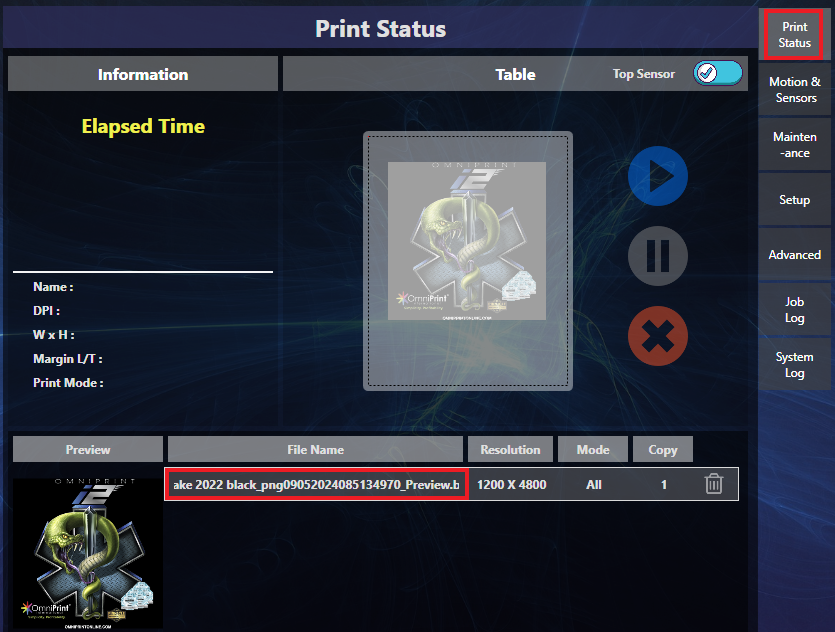
A thumbnail of the image to be printed appears in the print queue Preview section and on the Print Status platen representation. - Mount a pretreated garment onto the platen.
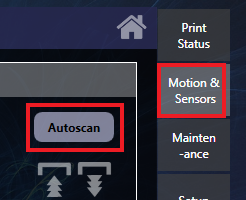
- Go to the Motion & Sensors tab and click the Autoscan button to set the platen height.
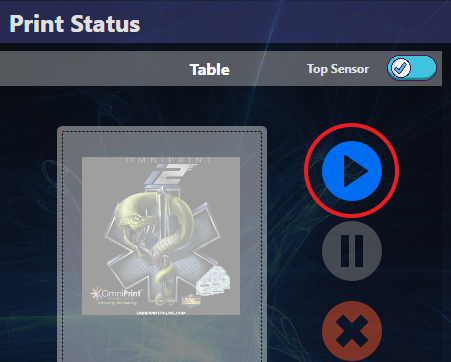
- When the Autoscan is completed, go back to the Print Status tab and click the blue “play” button.
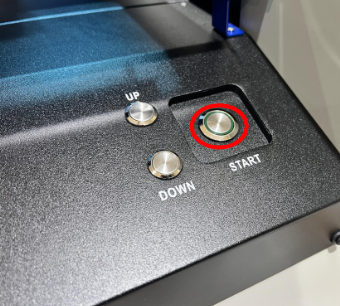
- When the i2 printer’s Start button flashes, push it to run the print.
That completes the process of ripping and printing a graphic.
You can keep the ripped image file sets in the C:\i2rip folder (or wherever your software is configured to store them) for future printing, which allows you to skip the ripping process next time you want to print the exact same image.
Not finding what you need?
You can contact our technical support team by sending an email to support@omniprintonline.com with your company name, contact name, phone number, printer serial number, and a quick description of how we can help you.
This will automatically open a support case for you in our ticketing system and a technical support rep will follow up with you shortly.