Optimal print quality requires that the printheads be a consistent distance from the fabric or film being printed upon. Otherwise, the sections closest to the printhead will have the sharpest detail and the sections furthest from the printhead will have the most overspray and appear more fuzzy.
Platens that aren’t consistently the exact same distance from the nozzle plate also complicate printhead alignments, and may make it virtually impossible to reach the hardware’s potential for very fast & high-quality bi-directional printing.
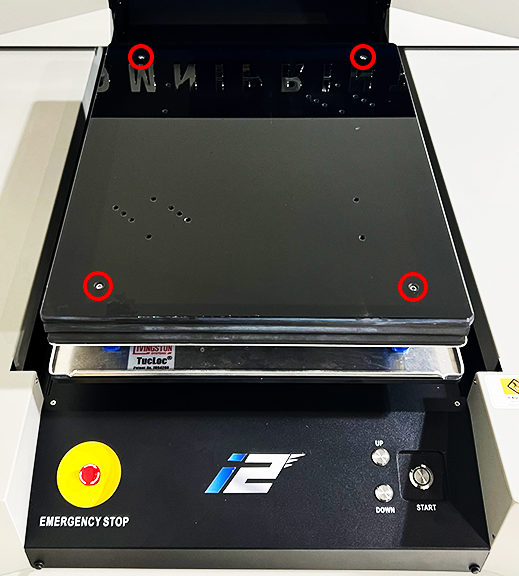
There are four points of measurement and adjustment to ensure an equal distance between the printhead and each corner of the platen. All four are found on the top surface of the platen so readily accessable for adjustment, if needed.
Checking and adjusting the platen-printhead distance is a straightforward process that only takes a few minutes, so let’s get started.
Tools and Supplies
- Two coins, or similarly size and stackable objects.
- 1/8″ Allen wrench/Hex key (if adjustment required).
Checking & “Leveling” the Platen
Let’s preview the process to check & adjust for equal distance across the length and depth of the platen before jumping into the step-by-step details.
We will be moving the carriage away from its home position on the capping station and using the left or right side brackets that the printheads are mounted onto as our upper reference point.
Starting with the carriage near the center of the printer, we’ll systematically check the distance between each of the four platen adjustment screws and work our way around the platen to ensure that all four adjustment points are the same distance from the bottom of the printhead mounting bracket.
- Use the printer’s Down button to lower the platen about an inch below its last-used setting.
- Manually push the printhead carriage toward the center of its range of motion after closing any open ink clips to prevent or minimize dripping.
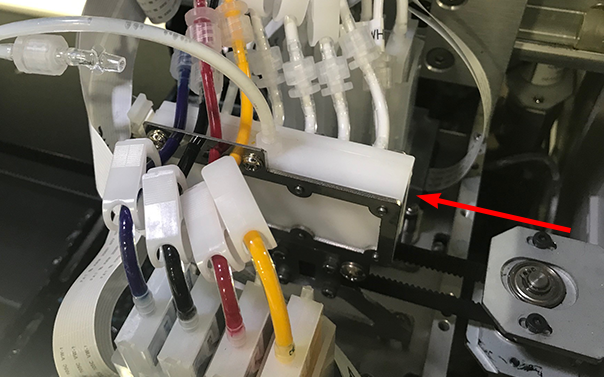

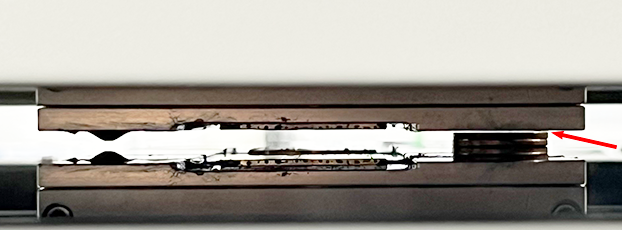
- Lower your perspective to look across the top of the platen to get a view of the undercarriage. Then identify the printhead mounting bracket frame and distinguish it from the printheads’ nozzle plates.
In the below photo, the nozzle plates are outlined in red while left & right mounting bracket frame sections are outlined in green. The top section of the photo is a direct side view of the undercarriage while the bottom section is a reflection of the undercarriage on the platen.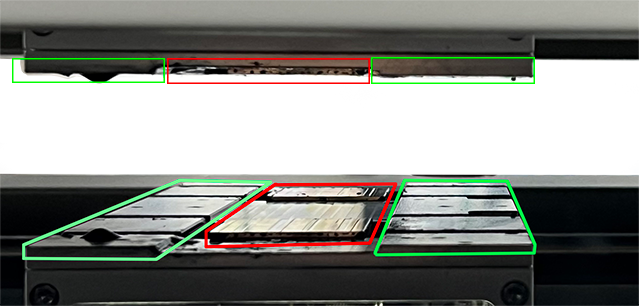
- Place two stacked pennies (or similar stackable objects) on the rear right adjustment screw of the platen…
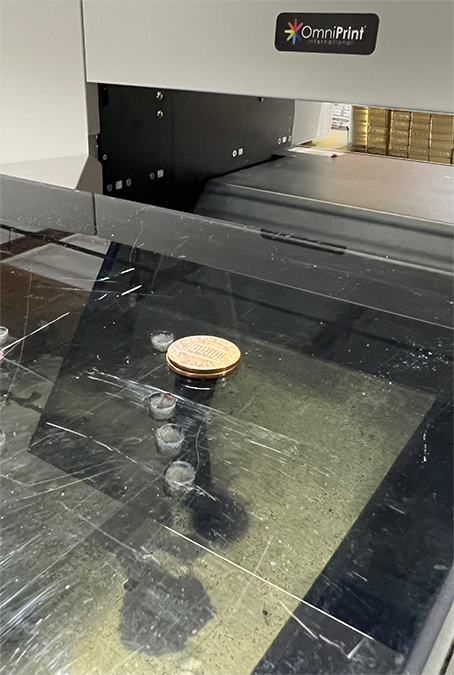
…then manually position the carriage and gantry so that the left or right side of the printhead mounting bracket is directly above the pennies.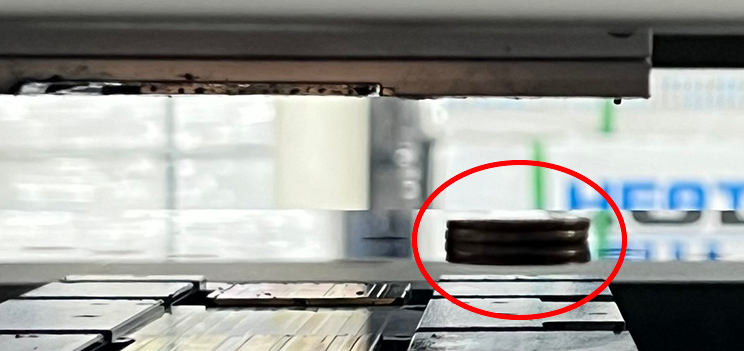
- Carefully use the printer’s Up button to raise the platen until the top penny almost touches the bottom of the carriage’s printhead mounting bracket.
- Slowly move the gantry forward & backward to confirm that the bracket never touches the pennies, adjusting the height very slightly if needed to prevent contact. This will be our starting baseline height.
- Reposition the pennies to each of the other three adjustment screws, one position at a time. At each position, compare the distance to our baseline height (at set at the first position we checked) and adjust as needed to create the same distance at each position.

- To lower an alignment point, turn the adjustment screw clockwise as when tightening a screw, which is exactly what you are doing.
- To raise an alignment point, turn the adjustment screw counter-clockwise.
That’s all there is to it.
Aligning the printheads is recommended if adjustments were made. See the below link for instructions, if needed.
Not finding what you need?
You can contact our technical support team by sending an email to support@omniprintonline.com with your company name, contact name, phone number, printer serial number, and a quick description of how we can help you.
This will automatically open a support case for you in our ticketing system and a technical support rep will follow up with you shortly.