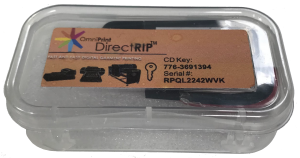
Plastic case with a USB thumb drive containing a copy of DirectRIP and a security key “dongle”
In order to operate your FreeJet Printer, you will need a working installation of DirectRIP on your Windows PC. You may be a first-time user, or possibly have recently acquired a new PC and are looking to migrate your installation, but in any case, the below video and the following step-by-step instructions will show you how to install DirectRIP.
Verify your Equipment
Before we start your installation, ensure that you gather the following components, which are included with your printer purchase:
- USB hub
- USB thumb drive containing installation files & folders
- USB security key “dongle” (Sentinel HASP key)
- DirectRIP plastic case which the USB thumbdrive & security key came in
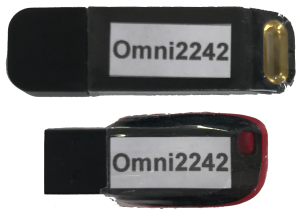
USB thumb drive and security key dongle
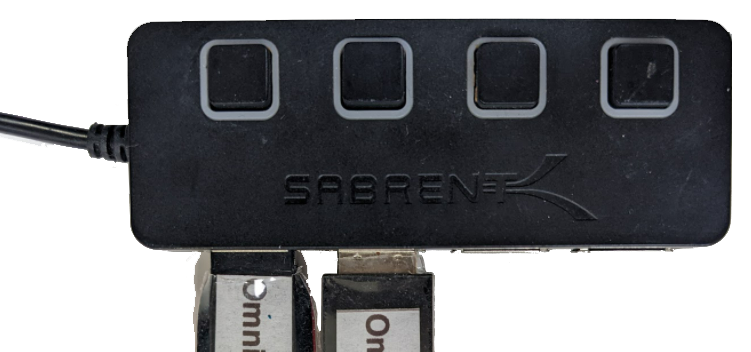
USB hub
Insert the two DirectRIP USB devices from the plastic case into the USB hub as shown above, and connect the hub to a USB port on your PC. If applicable for your hub, ensure the buttons on those USB slots are enabled (depressed).
Installation
With all components connected to your PC, if Windows didn’t automatically open its File Browser to display the contents of the USB thumb drive when it was connected, run File Browser and navigate to the USB thumb drive.
Run ‘Setup’ from the thumb drive to initiate the installation of DirectRIP.
The installation program will prompt you to enter the CD Key from the plastic case. Enter the full key (including the dash!), along with your name and company name, then continue. (You can use anything you like for the name and company name.)
You will then be asked for the serial number. Enter the serial number from your USB device packaging (it starts with ‘RPQL’, as pictured above).
Select the installation location and options as desired to proceed with the installation of the DirectRIP Software. Using the suggested defaults is fine.
Once the installation of DirectRIP is complete, a small window will appear asking “Install HASP Driver?” Select ‘Yes’ to begin the installation of the Sentinel encryption key software. This install will typically hang for a few moments when its status bar reads around 75%, but after a delay, it should rapidly climb to 100% and complete the installation.
At this point, you can check the installation by opening DirectRIP from the shortcut that the installation program placed on your Desktop. If DirectRIP and the Sentinel key driver are installed correctly, the program will load & run.
Once you’ve confirmed that DirectRIP loads you can store the thumb drive in a safe place because it is only needed during the installation process. On the other hand, the security key dongle must always be plugged into the USB hub in order to run DirectRIP.
Configuring Environments
Once DirectRIP is installed, you’ll want to do some initial configuration on the program to reduce clutter and improve ease of use.
First, let’s configure the DirectRIP Environments. You can think of the Environments as macros or as a set of presets that simplify selecting settings for printing on a particular type of shirt.
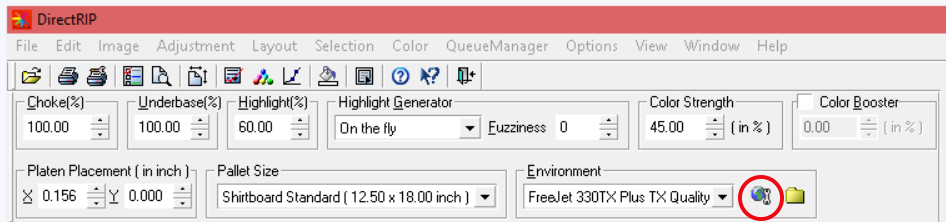
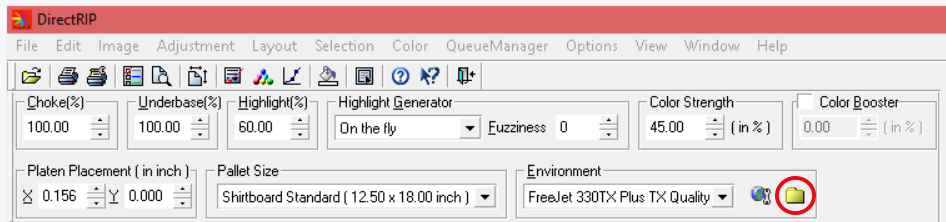
Start by clicking on the icon of a globe & wrench that is to the immediate right of the Environment selection drop-down box in the DirectRIP toolbar.
This will open the ‘Manage Environment’ window.
The next step is to select an Environment row labeled “OmniPrint FreeJet 320 TX” in its ‘Environment Group’ column, then tap your keyboard’s delete key or click the ‘Delete Environment’ icon (a globe over a sheet of paper with a red ‘x’) to delete the selected Environment row.
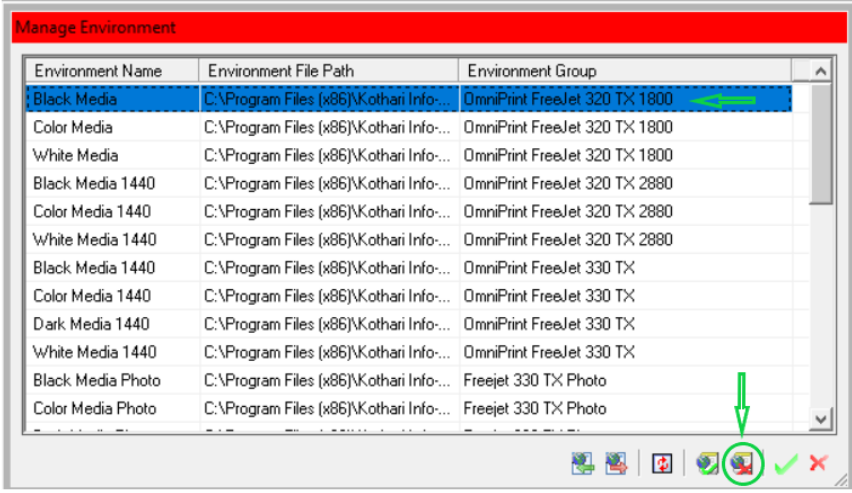
Repeat the deletion for each ‘OmniPrint FreeJet 320 TX’ entry.
If using a standard FreeJet 330TX (not the Plus model):
Also delete any environments with the “FreeJet 330 TX Plus” in the Environment Group Column.
If using the FreeJet 330TX Plus:
Also delete any environments with “Omniprint FreeJet 330 TX” in the Environment Group column, with the exception of the “FreeJet 330TX Photo” Environments, which have value for both the Freejet 330TX and the 330TX Plus.
Click the green checkmark icon at the lower-right corner of the ‘Manage Environment’ subwindow to accept changes and close the window.
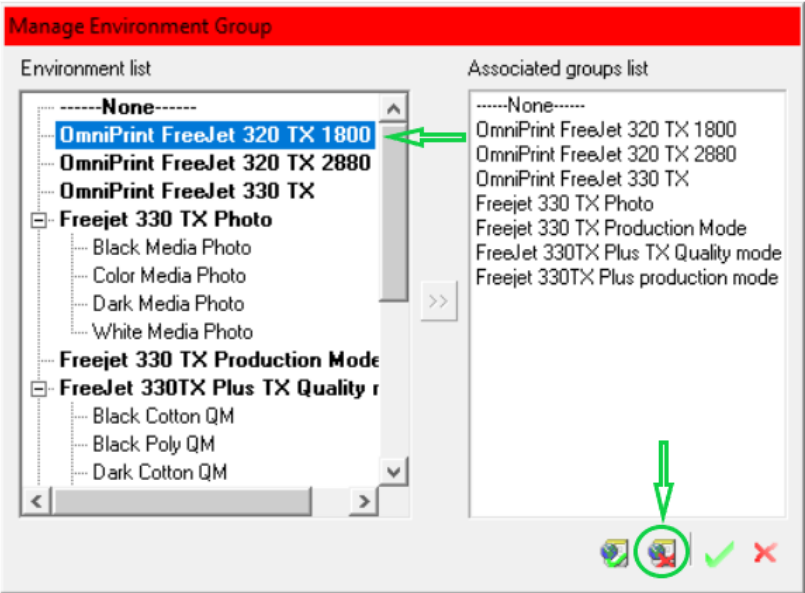
All DirectRIP Environments are organized into Environment Groups, which you can think of as folders in which Environments are stored. The next step is to remove the Environment Groups that are now empty.
To edit Environment Groups, click the folder icon next to the Environment dropdown box to open the ‘Manage Environment Group’ subwindow.
Then, highlight an Environment Group for which all Environments were deleted in the previous step, and click the ‘Delete Environment Group’ button to delete the group. Repeat until you have deleted all of those now-empty groups.
Configuring Ink Costs
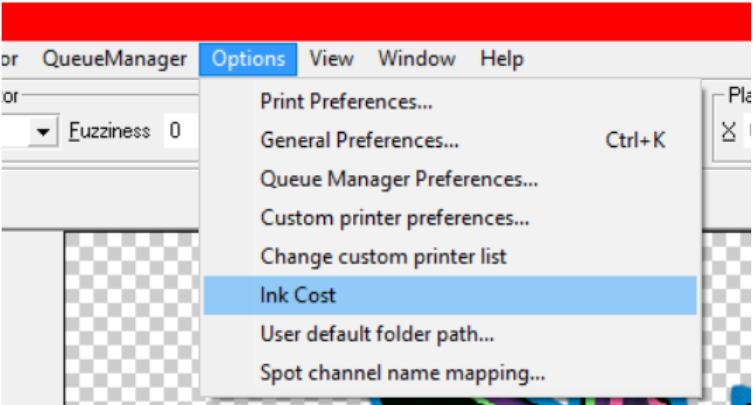
At the top of the DirectRIP window, click the Options menu, then click the ‘Ink Cost’ menu item.
In the ‘Ink Cost’ window, enter the per-liter cost of each color of ink, and leave “Other” at 0.00.
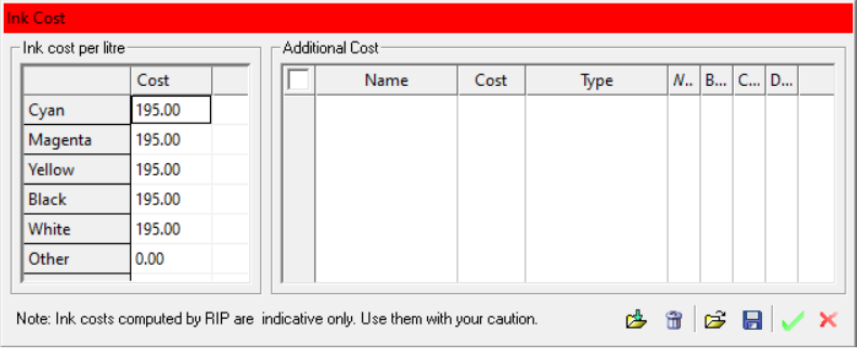
Click the green checkmark to save your changes and close the subwindow.
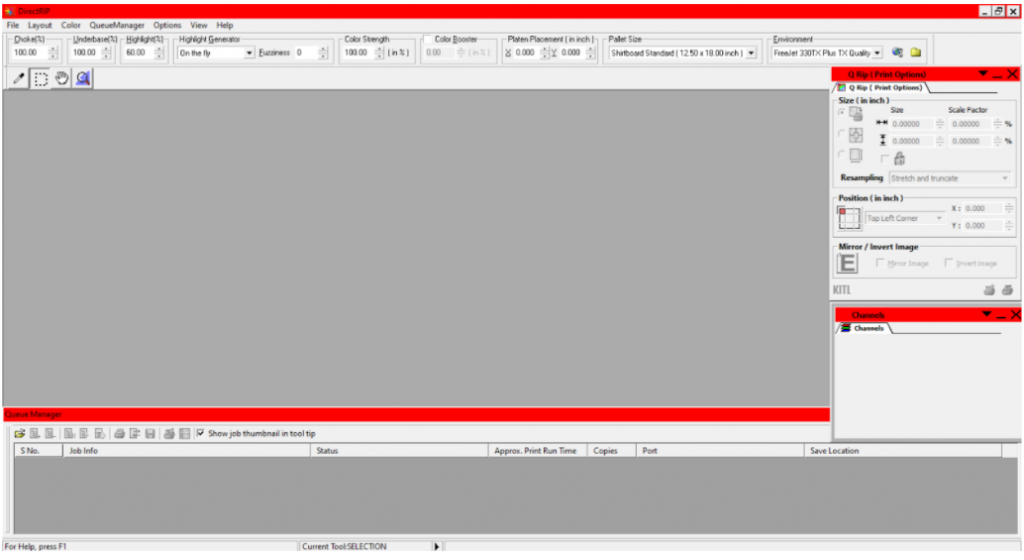
Configuring the Workspace
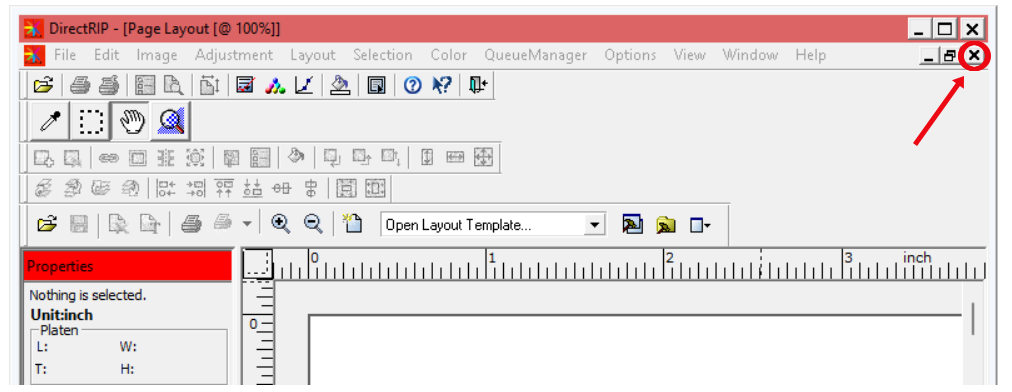
The first time that you run DirectRIP after installing it, a ‘Page Layout’ subwindow will be open. This feature isn’t needed and isn’t used with Freejet printers, so you’ll want to close it. To do this, note the two X’s near the top-right corner of the DirectRIP window (see below) and click the inner or lower one.
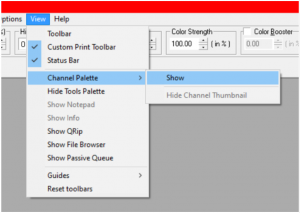
After closing the Layout subwindow, the next step is to open the ‘Q Rip’ window, which is very instrumental for setting up prints. To do this, select the ‘View’ menu at the top of DirectRIP, then select the ‘Show QRip’ option…
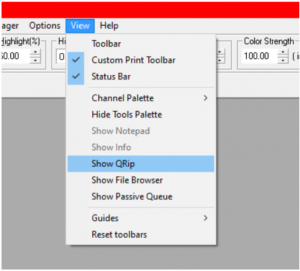
……and then re-enter the ‘View’ menu and select ‘Channel Pallete’, then ‘Show’.
Finally, arrange the ‘Q Rip’ and ‘Channel Palette’ subwindows to your preference. I like to align them at the right edge of the DirectRIP window, so DirectRIP looks like this when the program loads in full-screen mode:
Now you’re all set! DirectRIP is now ready to start running print jobs with all the features that you need at your fingertips.
Not finding what you need?
You can contact our technical support team by sending an email to support@omniprintonline.com with your company name, contact name, phone number, printer serial number, and a quick description of how we can help you.
This will automatically open a support case for you in our ticketing system and a technical support rep will follow up with you shortly.