The most critical maintenance task is properly shutting down your Omni DTF Mini at the end of a production day.
This shutdown maintenance supports producing high-quality prints and maximizing economical operation. That’s because everything we do during the shutdown routine is focused on protecting and prolonging the service life of the printheads.
Follow the steps demonstrated in the below video or described in the following text each time you shut down the Omni DTF Mini to maximize the service life of your printer’s consumable parts.
Video Demonstration
Undercarriage Detail
Shutdown Summary
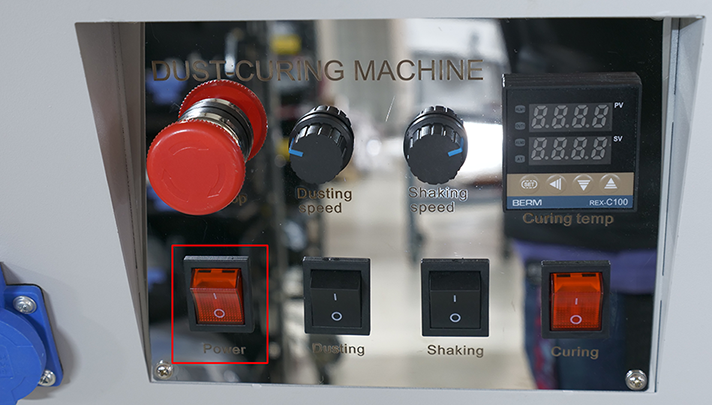
- Turn the oven off.
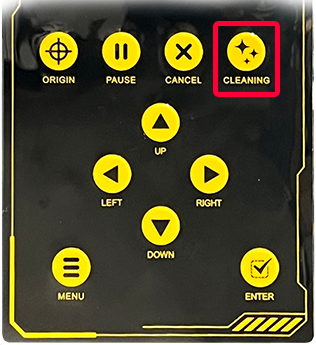
- Run a head cleaning.
- Close the ink clips after the head cleaning is completed.
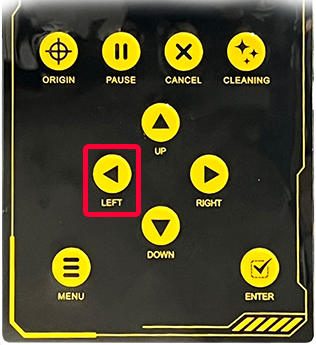
- Move the carriage to its full-left position.
- Clean the wiper blade.
- Clean the capping station seals.
- Flush out the capping stations.
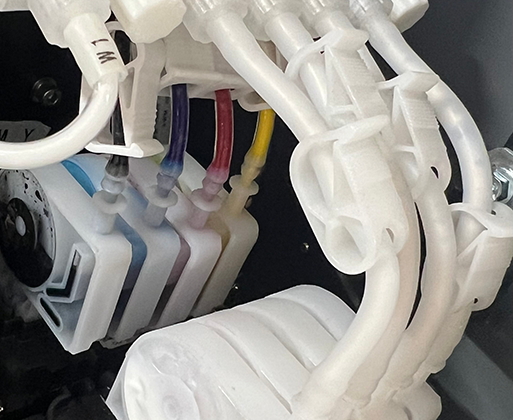
- Clean the undercarriage around the printheads.
- Wet cap the printer.
- Turn the printer off.
Daily Shutdown Illustrated Details
- Turn the oven off.
- Run a head cleaning.
- Close the ink clips after the head cleaning is completed.
- Use the LEFT button to move the carriage to its full-left position.
- Clean the wiper blade using an anti-static foam swab or microfiber cloth wetted with Super Cleaner.
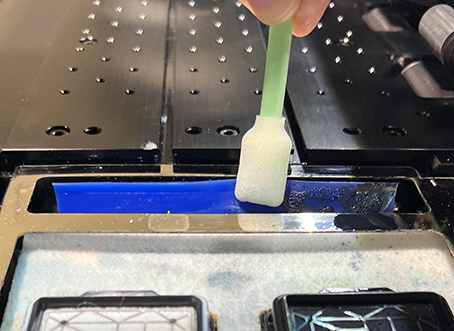
- Clean the capping station seals using Super Cleaner on an anti-static foam swab or microfiber cloth.
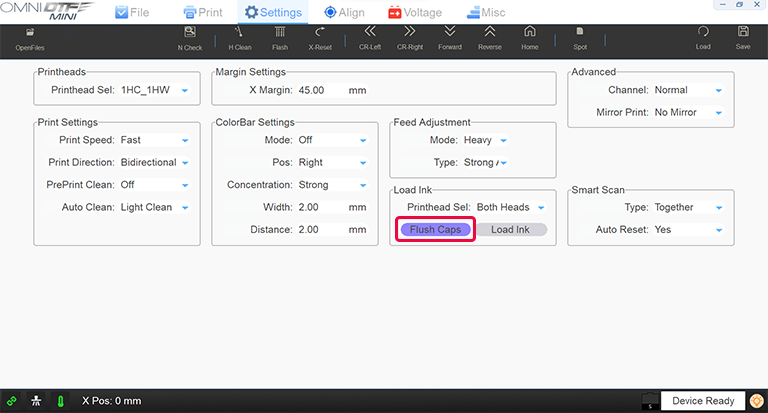
- Flush out the capping stations by clicking the Flush Caps button on the Settings screen of the Omni DTF Mini UI software, then squirting Super Cleaner from the squeeze bottle into each capping station to rinse out any ink residue.
- Click the Stop button once the capping stations are free of ink residue.
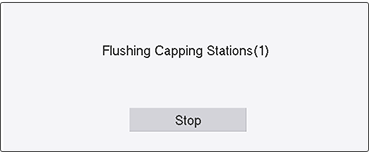
- Click the Stop button once the capping stations are free of ink residue.
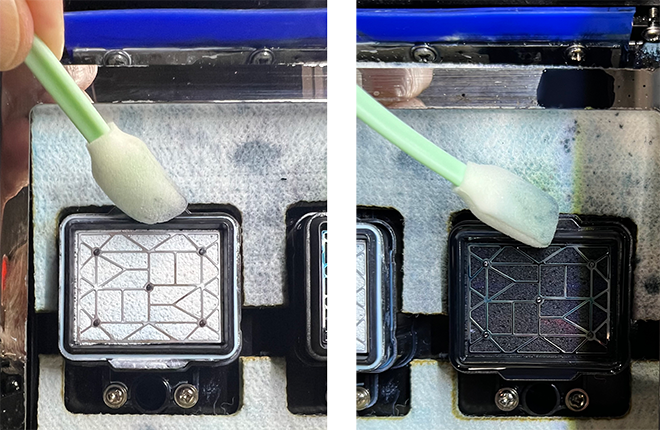
- Clean the undercarriage around the printheads by opening the front-left access panel door.
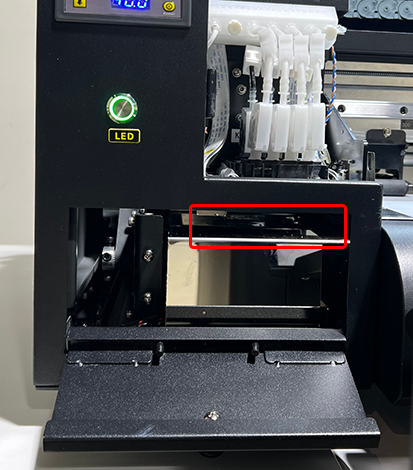
- Use a foam swab or microfiber cloth wetted with Super Cleaner to wipe off any accumulating ink.
- Be careful to clean only the printheads mounting bracket and the side edges of the printheads, and not the nozzle plate (shown with a red tint below).
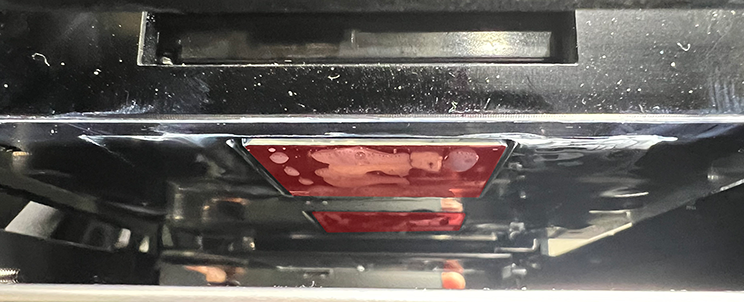
- Be careful to clean only the printheads mounting bracket and the side edges of the printheads, and not the nozzle plate (shown with a red tint below).
- Use a foam swab or microfiber cloth wetted with Super Cleaner to wipe off any accumulating ink.
- Wet cap the printer by filling the capping stations with Super Cleaner…

…then pressing the printer’s Enter key or clicking the Omni DTF Mini UI program’s Home icon.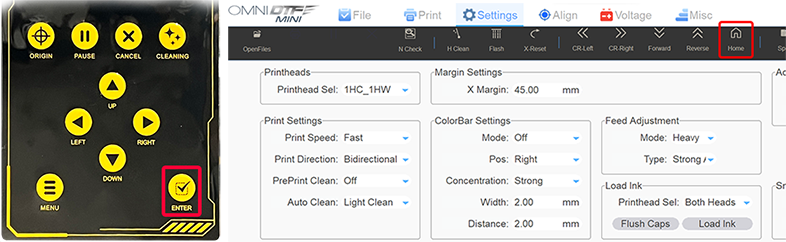
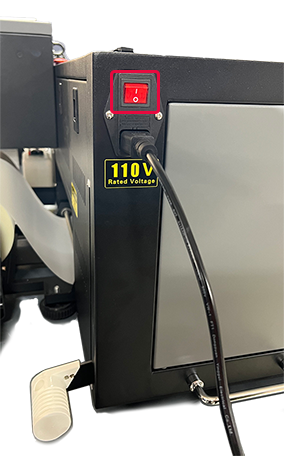
- Turn the printer’s power switch off.
Not finding what you need?
You can contact our technical support team by sending an email to support@omniprintonline.com with your company name, contact name, phone number, printer serial number, and a quick description of how we can help you.
This will automatically open a support case for you in our ticketing system and a technical support rep will follow up with you shortly.