You may be familiar with screen printing. And even if you’re not familiar with it, the name gives you a clue – printing that is done using a treated screen as a stencil. But with Direct to Garment (DTG) printing, it’s a little more vague because the name doesn’t tell you much about the technique.
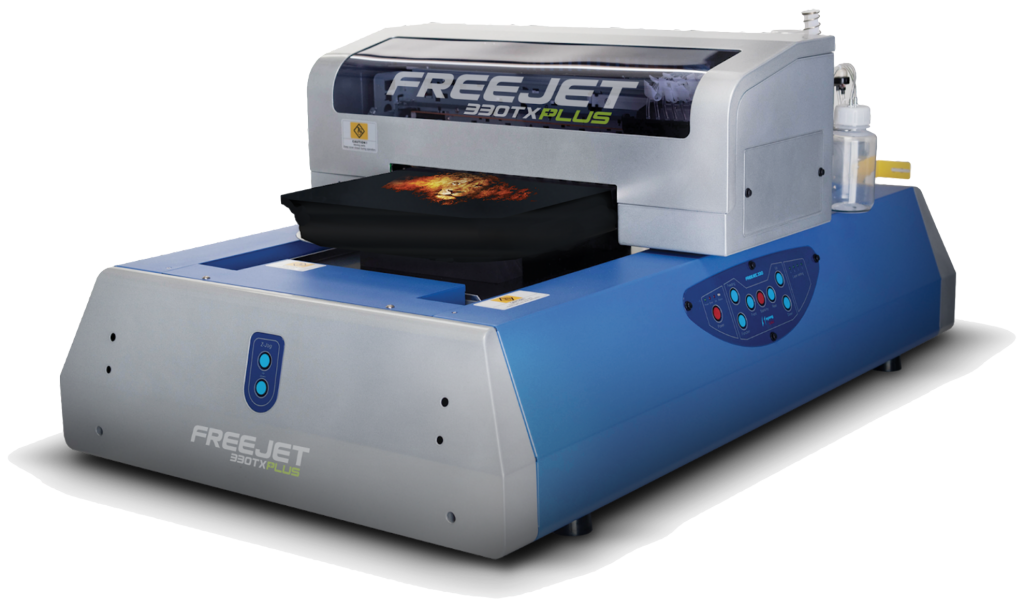
DTG is a process of printing graphics onto textiles and garments. It uses modified inkjet technology to print any type of graphic onto t-shirts, hats, bags, masks, jeans, and even shoes. It isn’t a complex process, but there are multiple steps and some key factors that contribute to print quality. Here’s an overview of the DTG steps:
- Create a design
- Load the design into a DTG Rip/Print App
- Pretreat the garment
- Dry the pretreatment
- Mount the garment
- Print the garment
- Cure the ink
Let’s take a closer look at these steps.
Create Your Design
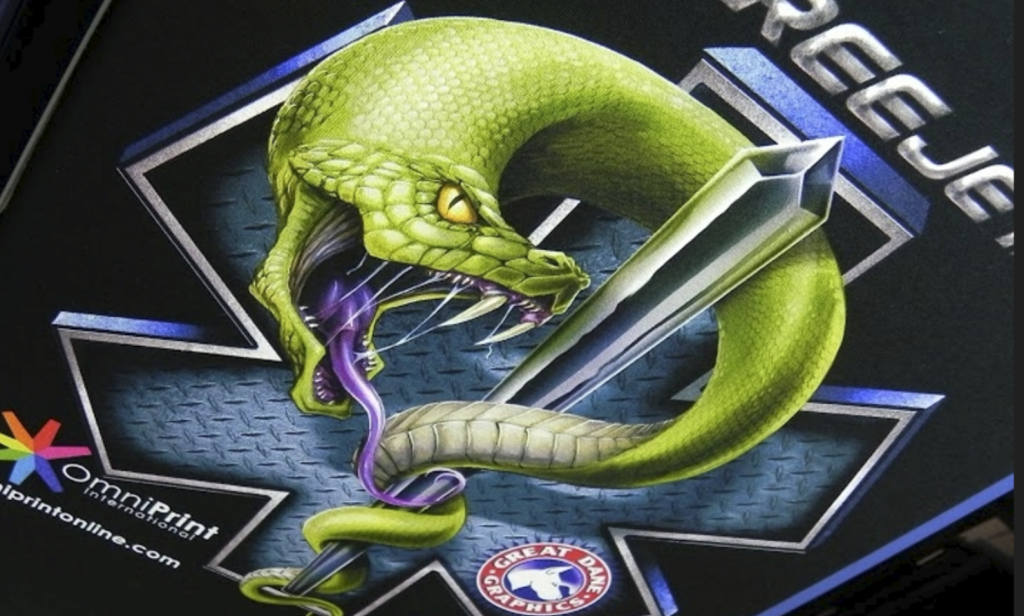
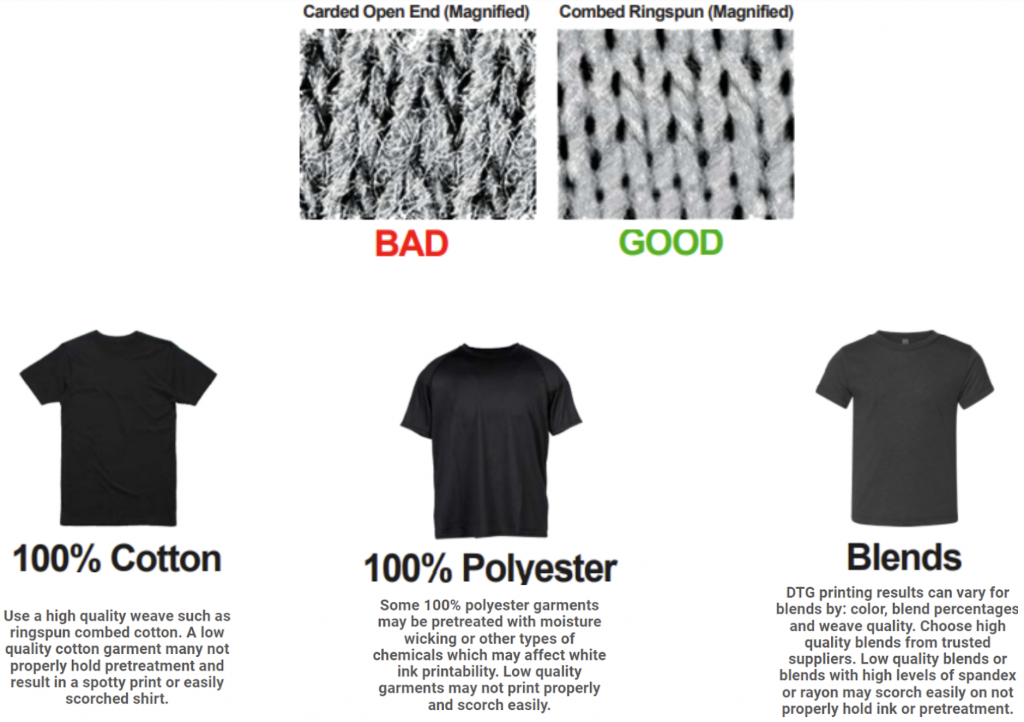
One of the most important factors for a high quality DTG print is a high quality design file. Designers use graphic design software such as Photoshop and Illustrator to create their artwork in high resolution. These designs can be anything from geometric shapes to company logos to digital photographs.
Load the Image into a DTG RIP/Print App
After the design is complete it needs to be loaded into software that can RIP (raster image processing) the image, and then print it. OmniPrint’s software is called DirectRip. Before ripping the image, the print settings are configured. DirectRip simplifies this process by providing Environments that lets you simply select the type of garment that will be printed. Based on that Environment selection, DirectRip then loads a group of presets. Other parameters that can be set include resizing, positioning, and margins.
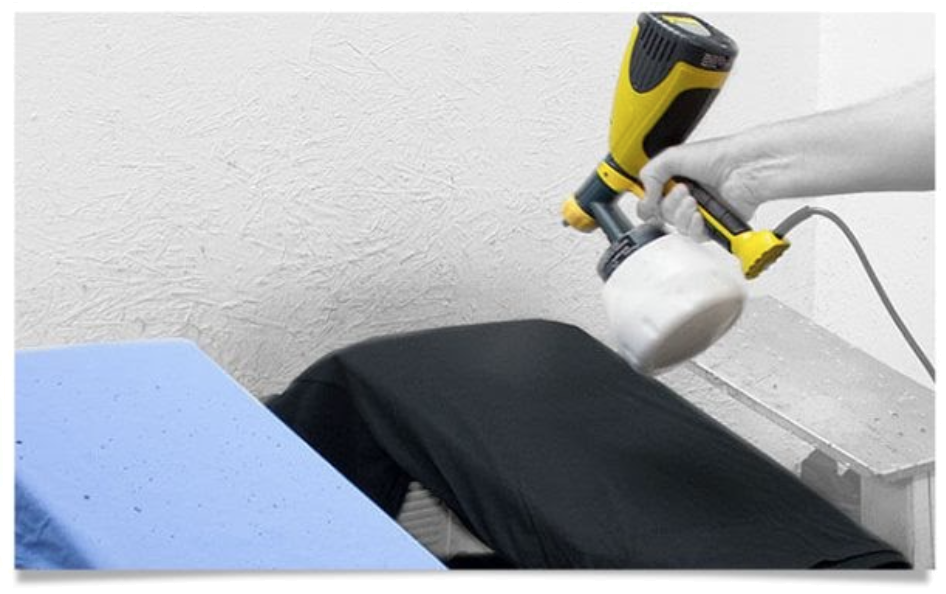
Pretreat the Garment
Properly pretreating the garment is another important factor for creating a high quality print. Pretreatment is like an adhesive that sticks to the garment’s fibers and allows the ink to bond to those fibers. The chemical composition of this adhesive pretreatment material also causes the “underbase” layer of white ink (which is used like a painter’s base coat of primer when printing on colored shirts) to quickly gel. This prevents the CMYK inks from blending with the white underbase and provides great color vibrancy.
Too much pretreatment can make the colors bleed and prevent the ink from bonding with the fabric’s fibers. Too little pretreatment and the ink will disperse too much into fibers, resulting in a light or dull print.
Since getting a proper and consistent amount of pretreat onto each garment is critical to image quality, pretreatment machines have become very popular. Pretreatment machines provide consistency of spraying that can’t be achieved manually.
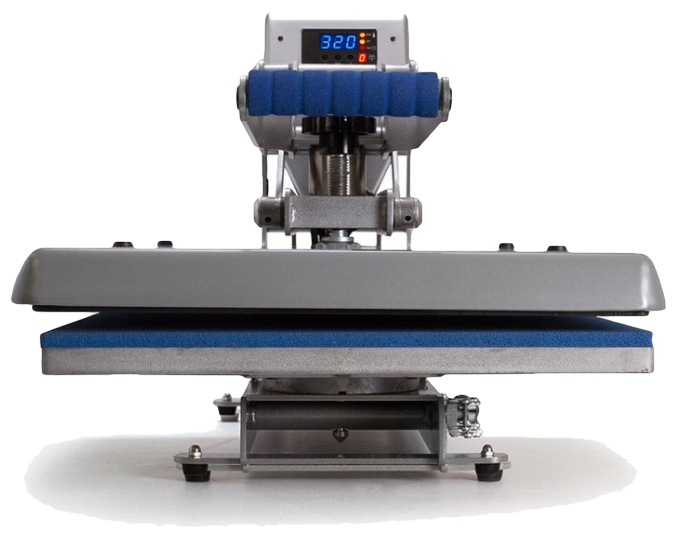
Dry the Pretreated Garment
Once the garment is pretreated it will be damp with pretreatment solution. It’s necessary to dry the print area before applying inks. The best method to dry the garment is using a heat press. This will quickly ensure the print area is dry and ready to print, and the pressure of the heat press also helps to ensure that the pretreatment bonds well to the fabric’s fibers.
Mount the Garment onto a Platen
DTG printers utilize a platen to hold the garment in place as the print head jets ink onto it. The garment is carefully mounted onto the platen to ensure that a perfectly flat surface presented to the print head, properly aligned so that the image is printed exactly where it is expected to be.
Print the Garment
Now that the image is loaded and ripped, and the garment is pretreated and mounted, it’s time to print. The print will be initiated from the DTG Rip/Print software, once the printer is properly prepared to print. Preparing the printer to print includes any required preliminary setup steps (depending on your printer model) such as cleaning the print head, setting the platen height, etc.
Cure the Ink
Once the printer finishes printing, the ink will be wet. It’s necessary to cure the ink on the garment. Curing the ink properly is very important for achieving good washability, meaning that the image will remain vibrant after many laundry cycles. The curing process requires that the ink reach a specific temperature and that it be maintained for a designated period of time. For example, we would cure a black cotton shirt at 320-degrees Fahrenheit for 180 seconds.