This brief article is for those who just need a reminder of the high-level steps to confirm that they aren’t missing anything. For the details of each step, see the link at the bottom of this article for step-by-step instructions.
Load the image to be printed
Select the appropriate Environment for your garment
Set the desired size of your print
Set the position of your print (typically top-center)
Select the port that your printer is on
Set a margin, if desired
Set the white underbase choke (unless printing on a white shirt)
Remember that the total size of your print design plus any margins must be within your platen’s dimensions (12.5” x 18” on the standard adult platen).
While configuring an image for a print job becomes practically muscle memory for operators after a modest amount of practice, it can, nonetheless, become a bottleneck in your production process. You may wish to save the configuration settings of some print jobs for efficient recall at a later time. We’re happy to tell you this is absolutely possible, with just a few details to keep in mind.
The process is essentially the same for Freejet printers using DirectRip and for the OmniDTF using Print Pro DTF. The program’s internal windows are styled a bit differently but the toolbar icon locations & functions in the Queue Manager of both rip software versions are identical. The still images shown are from DirectRip while the videos are from Print Pro DTF.
Before saving print job configurations, you may want to create a folder on your PC for your saved configurations. Sub-folders divided up by image, client, and/or job type would be a wise choice as well. You’ll see why in just a moment.
The next step is to configure your print job in DirectRip or Print Pro as usual. When the print is completely configured and ready, it’s time to Rip the image. You can do that by simply printing the design, which always involves first creating a Rip. Or if you just want to save these settings to print later, you can create a Rip without printing.
Ripping a Print Job without Printing
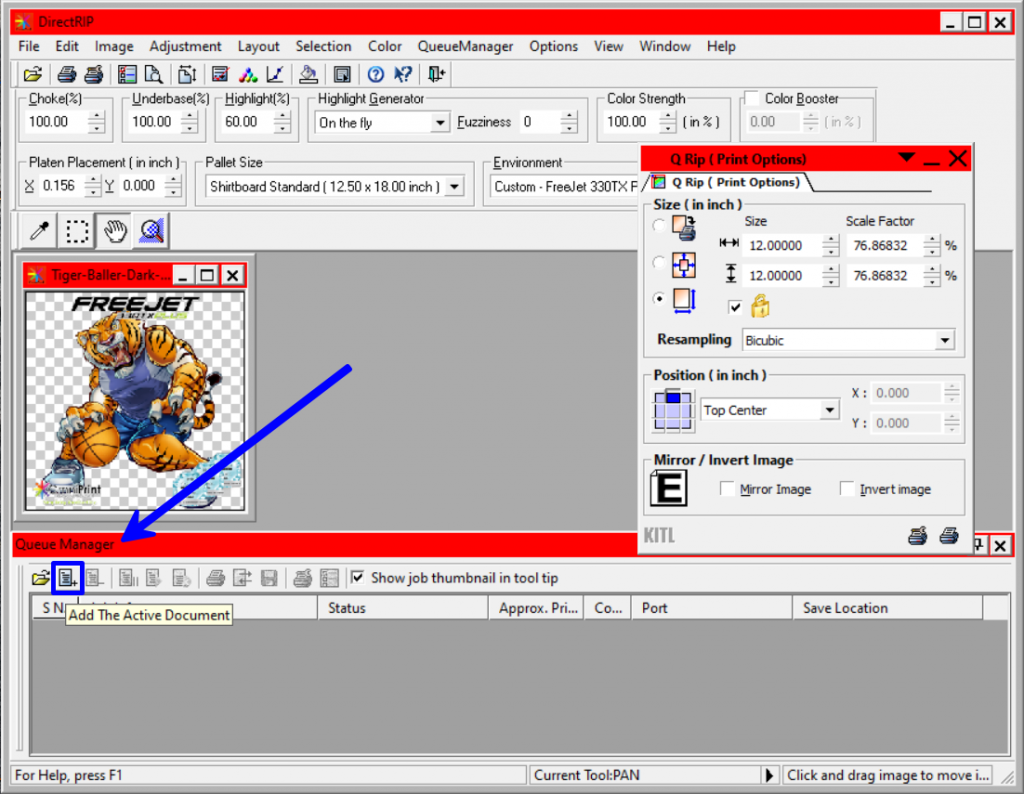
To create a Rip without printing, with your print job fully configured, we will be using features of the ‘Queue Manager’ subwindow at the bottom of the rip software as demonstrated in the below video and the following instructions.
In Queue Manager, click the “Add the Active Document” icon, which looks like a sheet of paper with a ‘+’ sign in its lower-right corner.
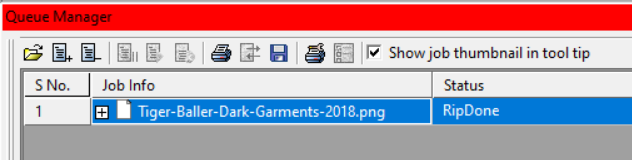
The image’s filename will then appear in Queue Manager’s Job Status column. Right-click the filename, then select ‘Rip’ from the options that appear in the pop-up menu .
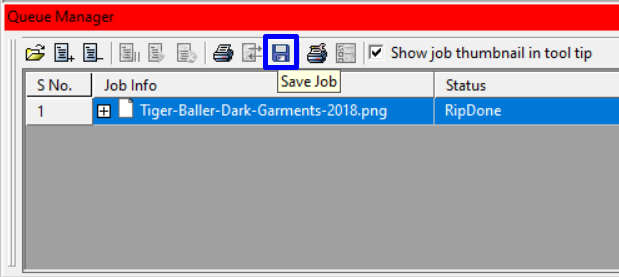
When the Rip has been completed, the Status column in Queue Manager will read “RipDone”.
Saving the Ripped Print Job
Whether you ran a print or used Queue Manager to Rip without printing, once the job has been Ripped, it will be ready to save using the process demonstrated in the below video or the following instructions.
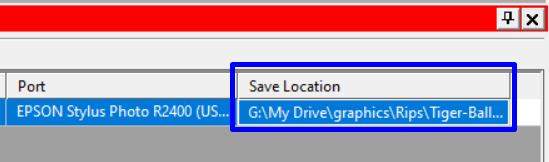
On the far right of the Queue Manager frame, find the column labeled “Save Location”.
Click anywhere in the cell or box displaying the file system path of the current Save location.
The ellipses (“…”) at the end of the path will then turn into a button.
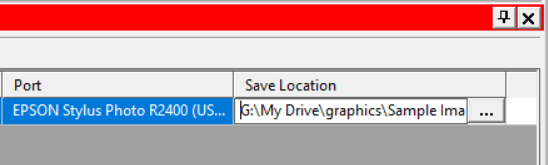
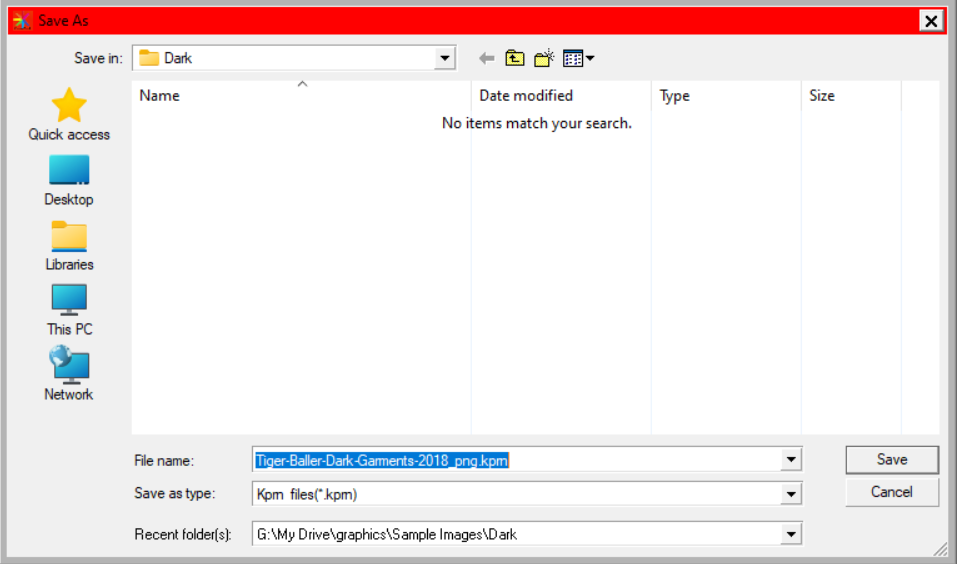
Click the ellipses button that appears to edit the location and filename to be used when saving your Rip file. This will open your file browser. At this point, navigate to the folder in which you want to store the Rip.
After picking the folder, it is recommended that you give the job a new file name. Keep in mind that when selecting a saved print job to load in the future, you will not have a thumbnail or preview of the image. So, not only will the image in the file need to be identifiable from its name, but also the Environment, sizing, placement, and any other variables you may have adjusted when setting up the print job which makes it distinct from other, similar prints. (The file extension of all saved Rips will be .kprn.)
I recommend using something like: “<Image>_<Environment>_<Size>_<Date>”. For example: “TestImage_Dark_10x6_28Jan2022.kprn”. This will be instrumental to finding the file that you want to load for future printing sessions, to ensure that you have the correct version of any Rip file for the shirt you intend to print.
Once you’ve selected the Save Location and entered the filename to use, click the ‘Save’ button. Note that this action only saves the desired file name and location. You haven’t yet saved the actual Rip of the print job.
Next, click the ‘Save job’ disk icon in the Queue Manager toolbar to save the settings to a file.
Once you have clicked the ‘Save Job’ icon, the Rip is saved to the designated folder and filename, and it is safe to close DirectRip.
Recalling a Saved Print Job
To recall the file for later use, open DirectRip but don’t load an image file. Next, instead of loading an image file, we will load a previously saved print job using the Queue Manager.
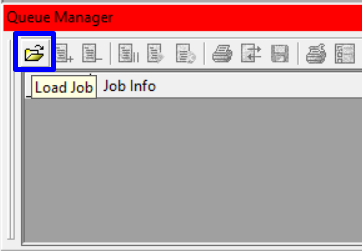
The leftmost icon at the top of the Queue Manager subwindow, the open folder icon, is the “Load Job” option. Click this icon to open a file browser.
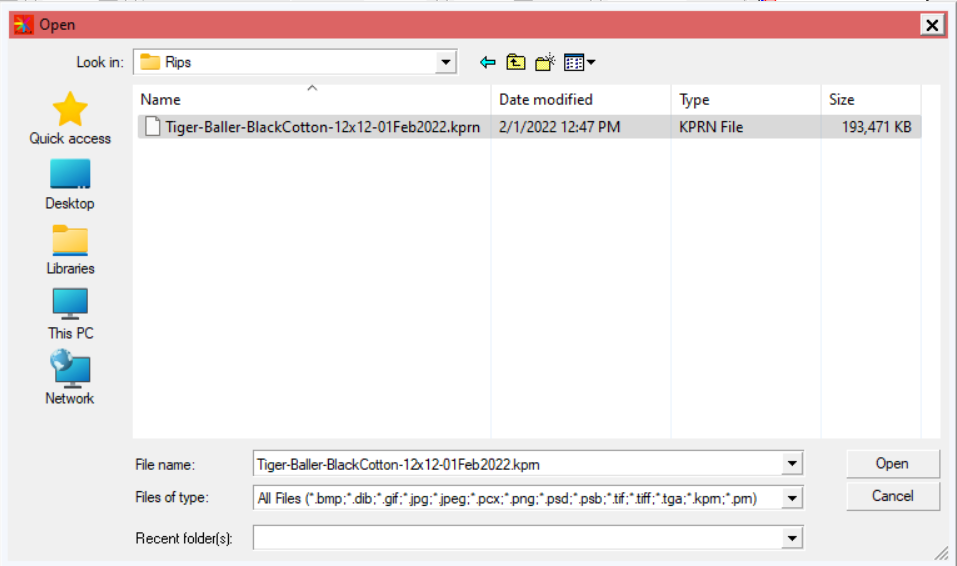
Next, navigate to the folder where your custom job is saved, select the appropriate file, and click “Open”.
The job will populate in the Queue Manager, ready to go!
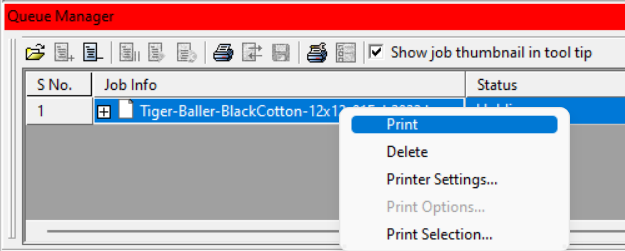
DirectRip’s top-level menus and the Print buttons in the top toolbar and Q-Rip subwindow will all be greyed out since we haven’t loaded an image file. That’s fine because you will use the Print button in Queue Manager’s toolbar to run your print. As an alterative to the Print button, you can also right-click the filename in the Job Info column and select ‘Print’ from the pop-up menu.
This pop-up menu appears after right-clicking the filename in the Job Info column
Notice, as mentioned above, the image to be printed isn’t displayed in DirectRip. However, you’ve already confirmed the configuration of this print job before saving it, so as long as you have the printer started up and in the Print Ready position with a shirt pretreated and loaded on the platen, you are ready to print.
Click the Print icon or right-click the filename in the Job Info column and select ‘Print’ to run the print job.
Enjoy the increase in efficiency for designs that you will be using for multiple print jobs!
The Adjustment Program is used to reset the waste ink pad counter on Freejet 330-series printers. This is typically installed and configured during your setup session with a training coordinator, but it’s quick and easy to do if you don’t already have it.
The Adjustment Program runs only on the Windows operating system, like all software provided by OmniPrint for use with FreeJet printers.
How to use the Adjustment Program is detailed in another OmniPrint Knowledge Base article, but if you don’t already have it installed onto the PC connected to your printer, we’ll explain how to get it and set it up here.
Downloading the Adjustment Program
Click on the following link to download the Adjustment Program to your Windows Desktop or any other folder of your choice: http://www.omniprintonline.com/r2400.zip
Installing the Adjustment Program
The Adjustment Program doesn’t require an installation process, technically speaking. We just need to extract the r24000 folder out of the downloaded zip file using the following simple steps.
Find the r2400.zip file that you downloaded using Windows File Explorer or by searching from the Windows Task Bar.
Double-click on the file if you used File Explorer to find it. If you searched from the Task Bar and selected r2400.zip from the search results, Windows will have already opened a File Explorer window with a view of the contents of r2400.zip.
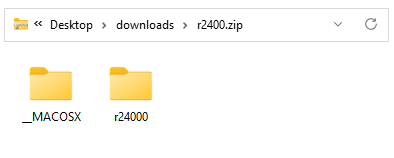
Depending on your File Explorer settings, you’ll see something like this:
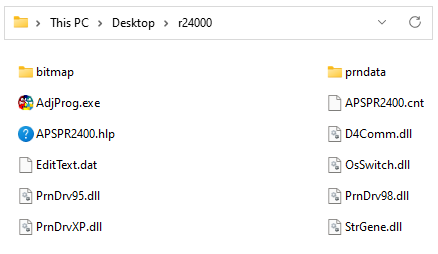
Drag the r24000 folder onto your Windows Desktop, or any other folder of your choice, then go to that r24000 folder with File Explorer. Again, depending on your File Explorer configuration you’ll see some form of this list of files and folders:
AdjProg.exe is the actual executable file which is the Adjustment Program. (You may or may not see the “.exe” file extension, depending on your Windows File Explorer settings.)
We’re now ready to configure the Adjustment Program.
Configuring the Adjustment Program
Before using the Adjustment Program, we need to make a couple of simple configuration changes to the AdjProg.exe file using the following steps:
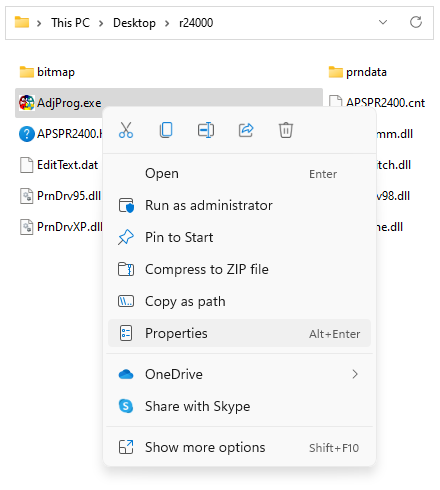
In Windows File Explorer, right-click on AdjProg.exe to open a pop-up menu of things that Windows can do with the file.
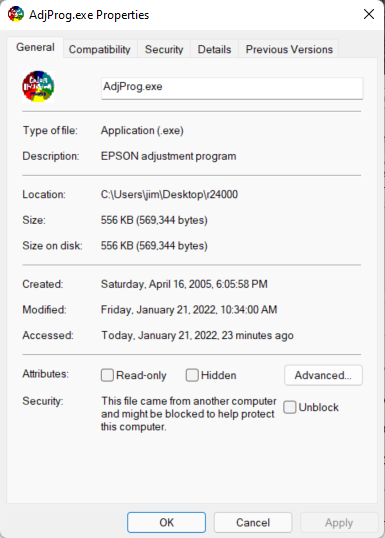
Click on ‘Properties’ and this window will open:
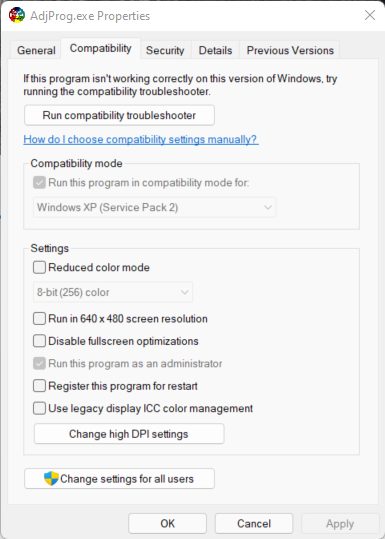
Click on the ‘Compatibility’ tab and the ‘AdjProg.exe Properties’ window contents will change to this:
Windows 10 or Windows 11 may have already configured the compatibilities properties of AdjProg.exe for you automatically. Check the following two items from the above screen.
Compatibility mode should have a check mark on ‘Run this program in compatibility mode for’, and ‘Windows XP (Service Pack 2)’ should be selected from the drop-down list
Run this program as an administrator should be checked
4. Confirm or select the above settings, then click on ‘OK’ to save them.
When using Microsoft Windows 11 you may need to click on ‘Change settings for all users’ in order to modify these settings.
The Adjustment Program should be used only as directed by OmniPrint. Any other use without the direct guidance of OmniPrint staff is strongly discouraged and may cause problems that would not be covered by the warranty.
That’s it! The Adjustment Program is now ready to be used, as explained here.