Transferring a finished print to a garment is simple and can be done immediately after DTF printing and curing, or up to a month later. Longer storage times may be possible if carefully stored in an air-tight container and in a climate-controlled environment.
Prepare your heat press for a DTF image transfer.
Some materials may transfer best using parameters outside of these guidelines. Use the settings that bring the best results for your materials.
Fabric Type
Temp (F)
Pressure
Transfer PressTime
Peel Delay (cold peel film)
Finish PressTime
Cotton
300◦ to 320◦
50-70 PSI Stahl’s 5-7
20 sec
60-90 sec
10-20 sec
Polyester
260◦ to 280◦
50-70 PSI Stahl’s 5-7
20 sec
60-90 sec
10-20 sec
If you experience the film coating itself transferring to polyester or poly blend fabrics (example photo), try increasing the temperature to 300 and the transfer press time to 30-45 seconds.
Cut out the image that you want to transfer to a garment from the film roll or sheet.
Place the garment to receive the image transfer onto the heat press.
An initial pre-press of the garment prior to the transfer press can be helpful to remove any wrinkles and slight moisture in higher humidity environments.
Place the DTF print on the garment, with the ink & glue side of the film directly against the fabric, positioned exactly where you want it transferred.
Verify that the collar, shoulders, and any seams are draped off the side of the heat press to ensure proper pressure at the transfer location
Place a silicone sheet or kraft paper on top of the film.
Press the transfer onto the fabric using the above table for temperature, pressure, and duration.
Remove the garment from the heat press, and lay it on a clean, flat, hard surface.
When using cold peel film, delay this step for a minute or so, until the inked area of the garment has cooled down to room temperature. Carefully peel the film away from the garment at a moderate rate.
Place the shirt back on the heat press with a sheet of parchment or Kraft Paper or a white silicone sheet between the shirt and the top of the heat press, then perform a final “finish” press for the duration shown above at the same temperature and pressure as the transfer. This further cures the surface of the print and creates a smoother transition between ink & fabric.
Print Pro provides a rich set of features to set up a print job using one or more images to automate the creation of “gang run” layouts, making the most efficient use of your film effortless. This article is intended to supplement your Omniprint training as a handy reference to refresh your memory and to use as an annotated checklist of the process steps.
View the below videos or see the following instructions for all the basics of loading & configuring images, then creating and positioning the images onto a Layout.
Loading Images
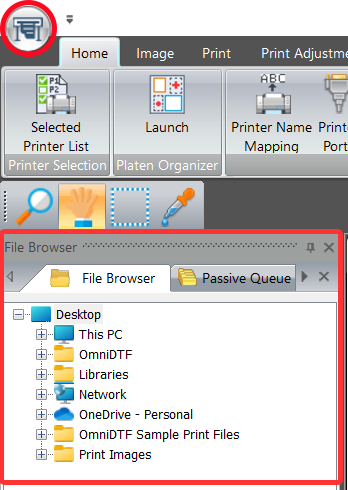
Loading your images is the first step in creating a print job. You can either use the Print Pro ‘File Browser’ or click on the Print Pro printer icon in the top-left corner of the program’s window and select ‘Open…’ to navigate through the Windows file system and select image files to load.
The latter option is recommended because it lets you make your selection from thumbnails of images, rather than just their filenames.
Whether you’re printing a single design or multiple different images for a print job, you’ll want to load and configure each image individually.
Setting the Image Configuration
As each image is loaded, set the following parameters using the Q Rip tool.
If the Q Rip tool isn’t visible go to the Home menu tab, click the Panels item, then select QRip from the drop-down list.
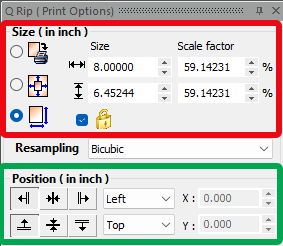
Size the Image
Size the image in the Q Rip window, using the 3rd (bottom) option to rescale the image if needed, ensuring that the width does not exceed 14.25″ for the OmniDTF or 12.5″ for the Omni DTF Mini.
When resizing, be sure the padlock icon option is checked to lock the aspect ratio and prevent distorting the image (see red box in the image).
Position the Image
The default settings of ‘Left’ and ‘Top’ are always used in the Q Rip tool (see green box in the above image.) Changing this setting has no effect on where the image will be positioned on the layout. This is because Print Pro will find the earliest (topmost) point in the layout where each image can fit as they are being added to the print job, maximizing the efficiency of linear film use.
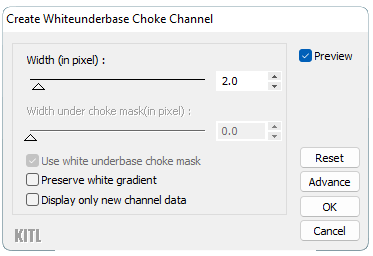
Create a White Underbase Choke
After configuring the image in Q Rip, click on the Image menu tab and then on the White Underbase Choke tool.
Click the ‘OK’ button to accept the default Choke Width value of 2.0.
The image is now configured and ready to be loaded onto a Layout.
If you want to print a Layout with a combination of various images on it, repeat the above steps to open a file, set image parameters, and create a white underbase choke for each image before proceeding.
Creating and Configuring a Layout
Now that any images that we want to print have been loaded and their parameters have been set, we’re ready to create the Layout that the images will be placed onto, using the following steps.
If the Page Layout window isn’t already open, select Open Layout from the Home toolbar
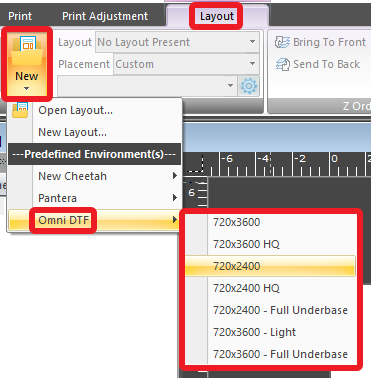
Create a New Layout
Whenever we create a new layout we must also tell the Print Pro software which Environment we want to use for printing the new layout. These Environments are a collection of “presets” that OmniPrint provides to simplify and streamline configuring print jobs.
See the Print Pro DTF Environments knowledge base article for more details about the recommended Environment selection for different situations.
Click on the Layout menu, then select New, then hover over Omni DTF and select the desired Environment from the list that appears.
The Layout window is then loaded and preconfigured with the parameters of the selected Environment.
Put Opened Image(s) onto the Layout
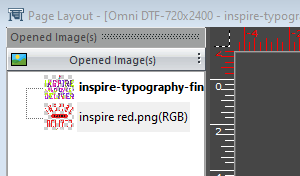
Images opened and configured using the above steps will appear as thumbnails with their filenames under the Page Layout window’s Opened Image(s) header.
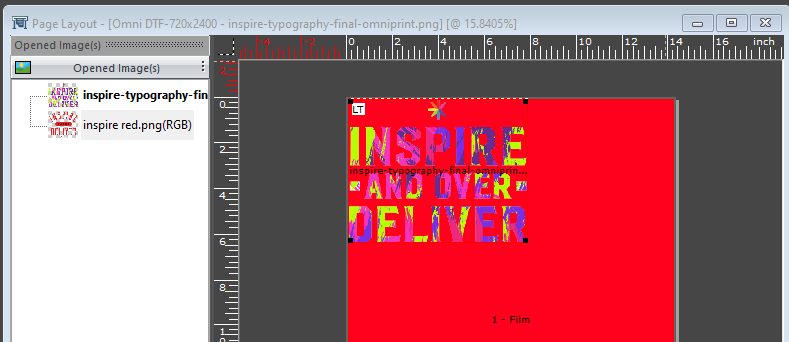
Double-click on any item in the Opened Image(s) list to add it to the Layout.
You can repeat the above step any time to load more images from the Opened Image(s) list onto the layout, or to load more copies of a single image. But there’s a better way to load many copies of an image once it is on the layout.
Duplicating Images on a Layout
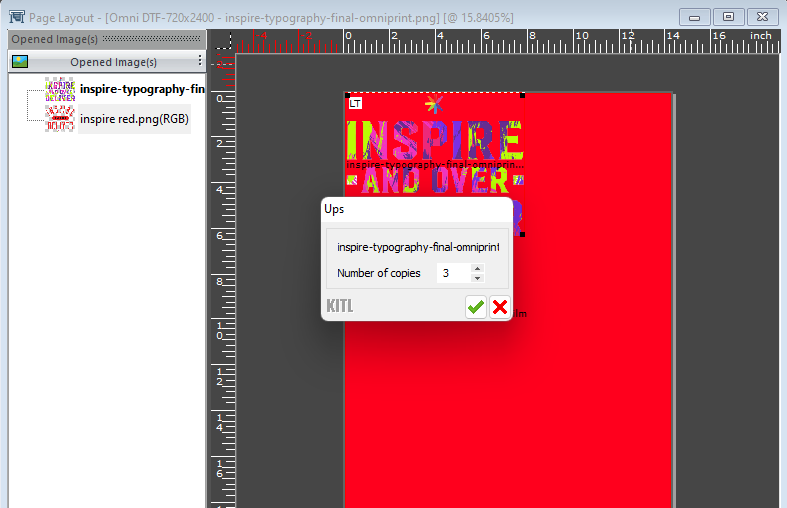
Once an image is on the Layout, you can create additional copies of that image on the layout by clicking the Ups option in the toolbar…
…then enter the number of additional copies you want to add to the Layout into the dialog box that pops up and click the green checkmark.
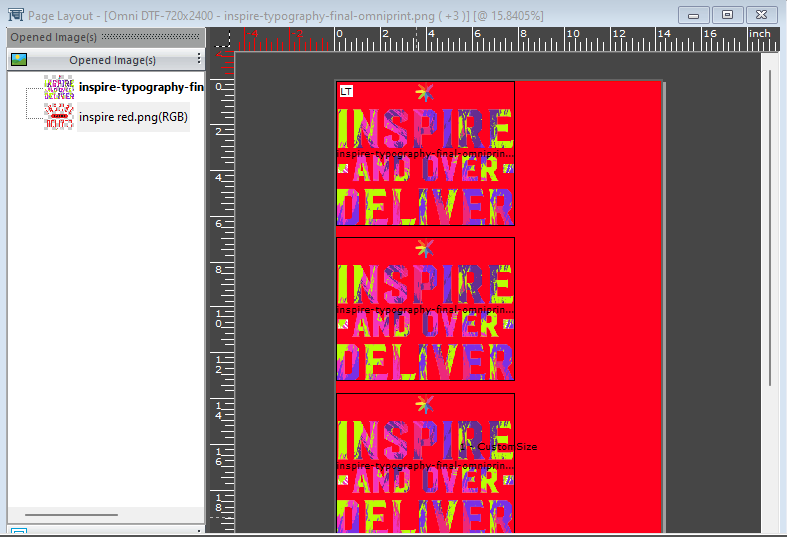
The additional copies of the image will now appear on the Layout. Note: You can scroll down in the Layout window if you want to confirm the number of copies if they don’t all fit in the window’s view. You can also zoom out and in on the layout by using Ctrl+’-‘ (to zoom out) and Ctrl+’=’ (to zoom in).
The ‘Ups’ feature for creating duplicate copies of any image on the layout defaults to copying the image most recently added to the layout. If you want to make copies of a different image (that is already on the layout), first hold down the Ctrl key and click on that image anywhere that it appears on the layout to select that image. Then click the ‘Ups’ button.
That’s how to load images, set their properties, select an Environment for and create a new layout, and place the images onto the layout in Print Pro!
Printing a Layout
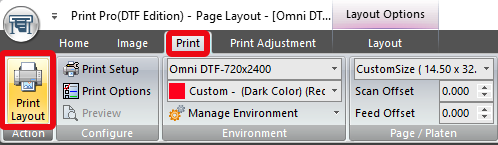
To print the Layout, click the Print menu item, then select Print Layout from the toolbar, or just press Ctrl+’p’….
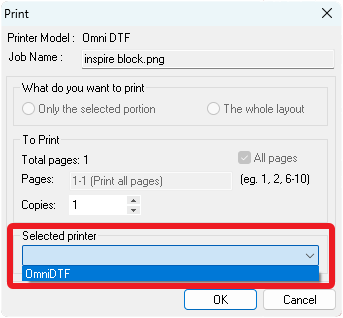
…and make sure your printer is selected in the Print dialog before clicking the ‘OK’ button.
The daily startup routine for the OmniDTF system is very straightforward and can be made even simpler by following a few tips that we’ll include in this brief overview of the process.
Preliminary Steps
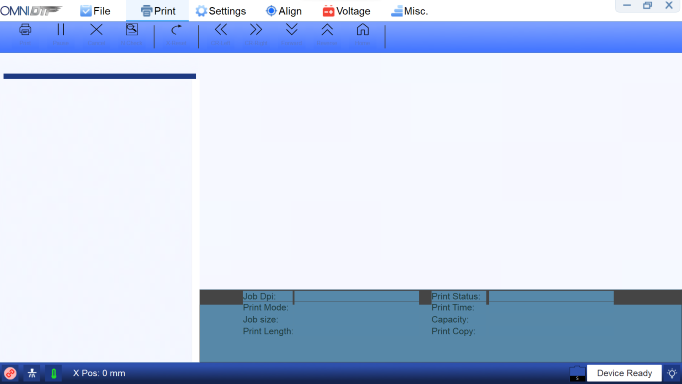
Before starting up the printer, first start up the OmniDTF UI program on your PC, in order to automatically load configuration data when the printer is turned on.
Note that the connection icon in the lower-left corner of the window will flash red until the printer is turned on.
Also, empty the waste ink bottle at the right-rear corner of the printer (left if viewing from the back) if it contains any ink before turning on the printer.
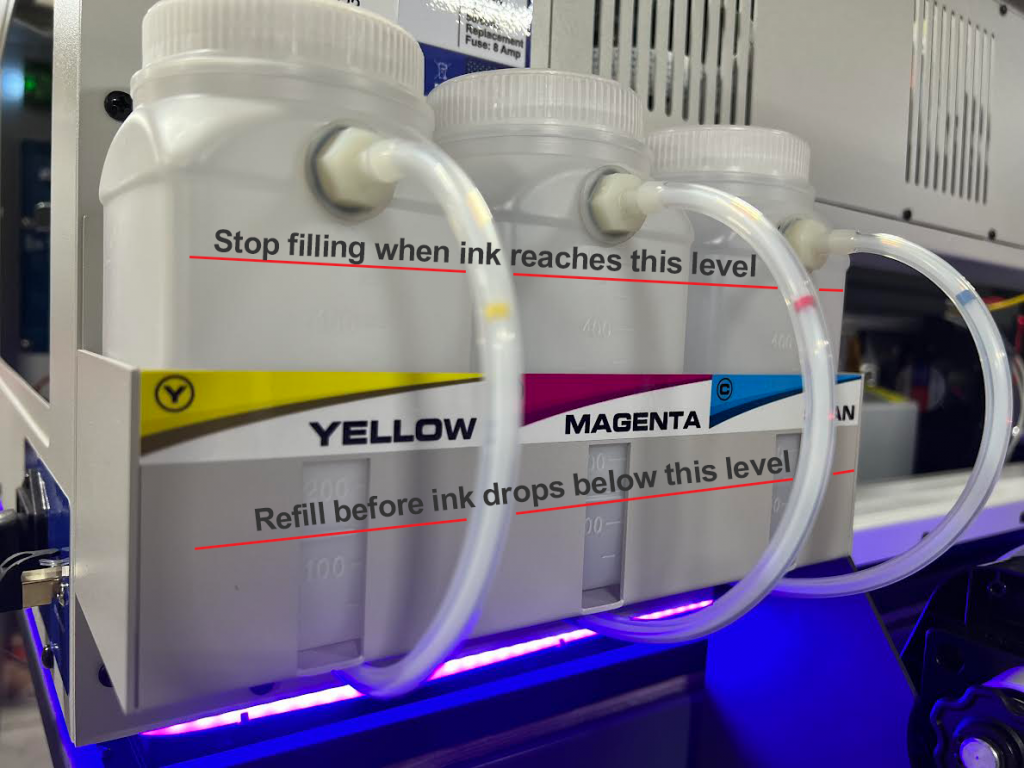
Always check your ink levels before printing and fill the bottles to the level shown above. Be careful not to overfill the bottles because if the ink level reaches the bottle’s fitting where the ink tube enters the bottle as this can cause leakage.
It’s important to never let the ink level in the bottles get below the refill level shown above to maintain good ink flow and avoid getting air into the ink lines.
If the printer has been idle for longer than two days or if the white ink is not opaque, shake the white ink bottles vigorously (while covering the holes in their lids) for 15-20 seconds. Then wait for at least 15 to 30 minutes to allow the white ink to settle before starting up the printer and running the routine white ink circulation.
When finished, use a clean cloth to wipe away any ink that appears to be blocking the breathing holes in the center of the bottle caps.
The final step before turning on the printer is to confirm that the white ink lines are clipped shut. This should already be shut since that is an important step of the shutdown procedure, but it’s advisable to double-check now.
Starting up the OmniDTF printer
Start-up video demonstration
Step-by-step instructions
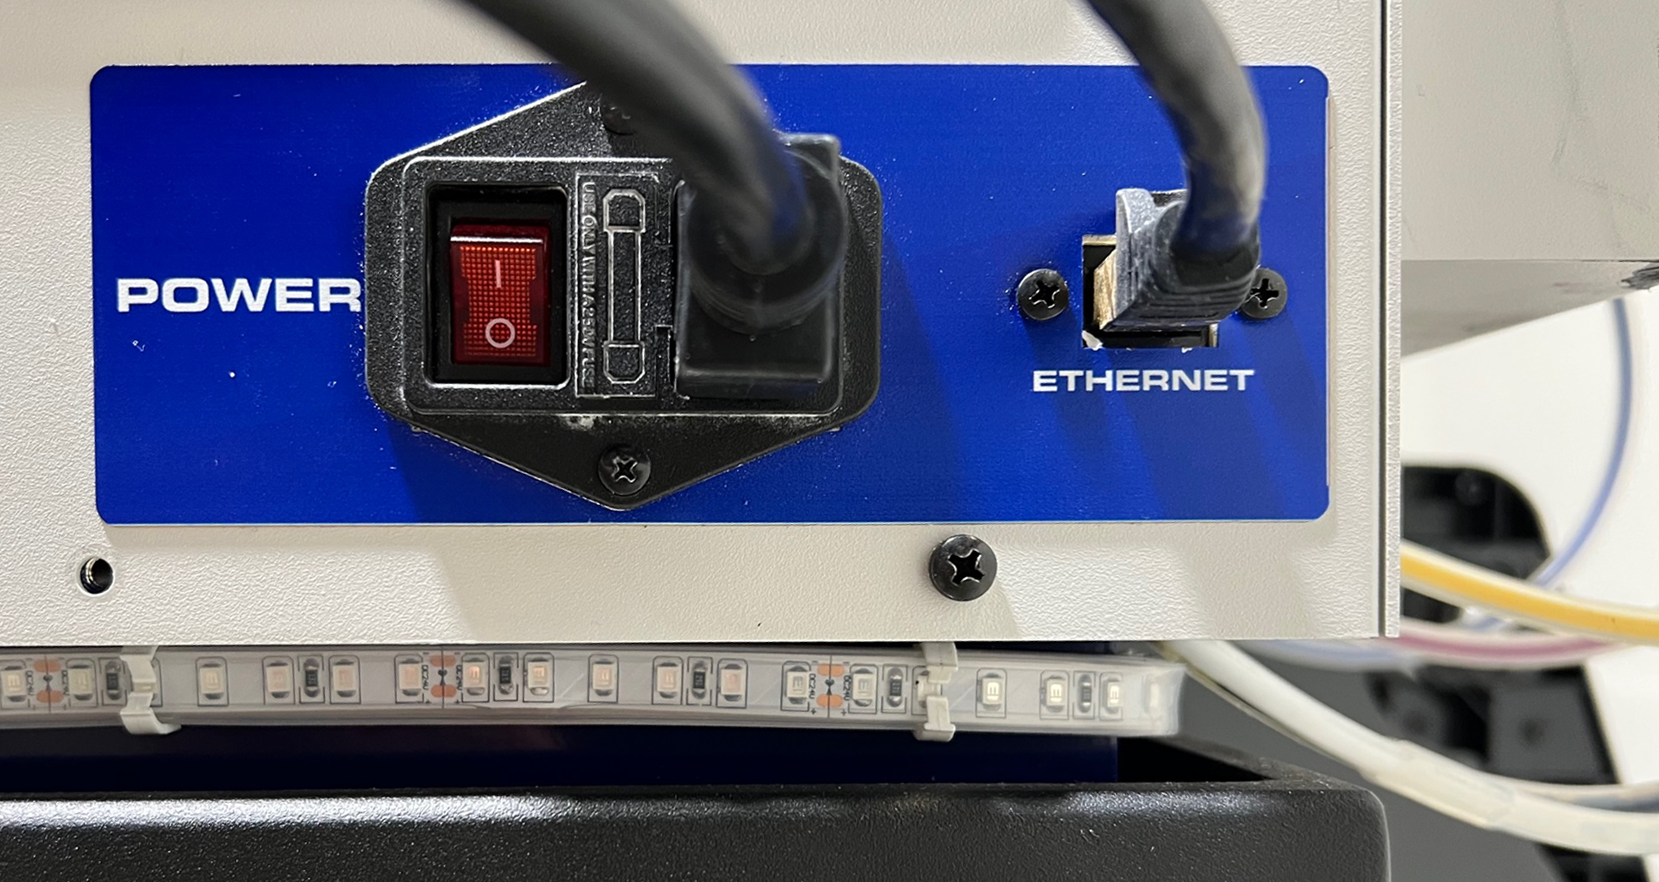
Turn on the printer using the power switch on the right side, near the back.
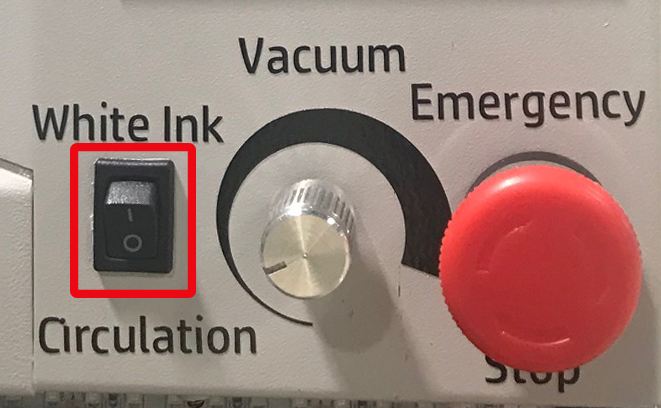
Circulate the white ink by turning on the White Ink Circulation switch on the front of the printer if it isn’t already on. You will hear it running for 3 minutes when switched on, and will then automatically turn off.
Confirm that the rotary Vacuum switch, shown above, is on (not fully counter-clockwise.) It’s recommended to keep this at its minimum strength, which provides plenty of vacuum power to keep the film against the platen without cooling the platen heaters.
The White Ink Circulation and Vacuum switches can be left in their ON positions at all times. Then they will automatically engage when the printer is turned on.
After the white ink circulation pump has stopped running, open all eight of the ink clips
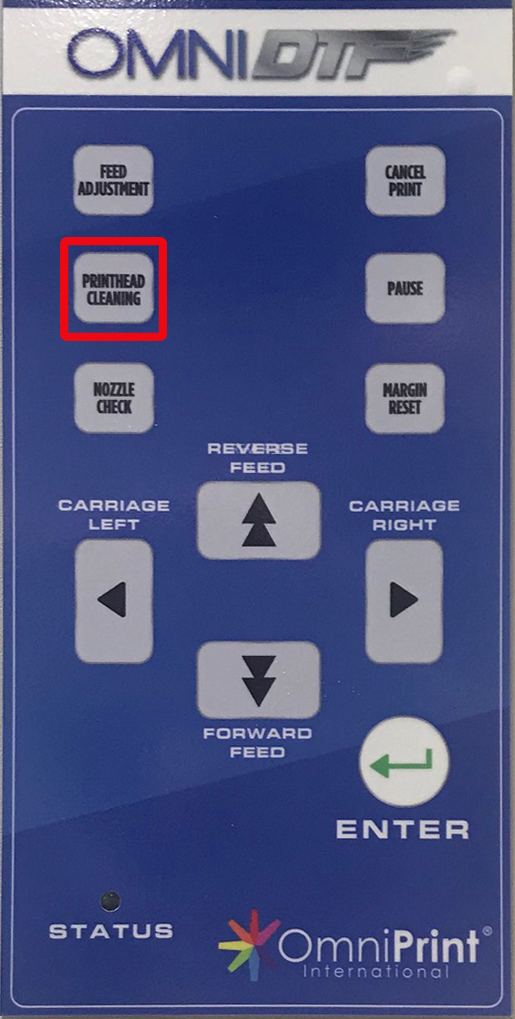
Press the Printhead Cleaning button on the printer’s control pad to run a head clean.
Once the control pad display indicates that the head clean is finished, press the Printhead Cleaning button once more to run a second head clean.
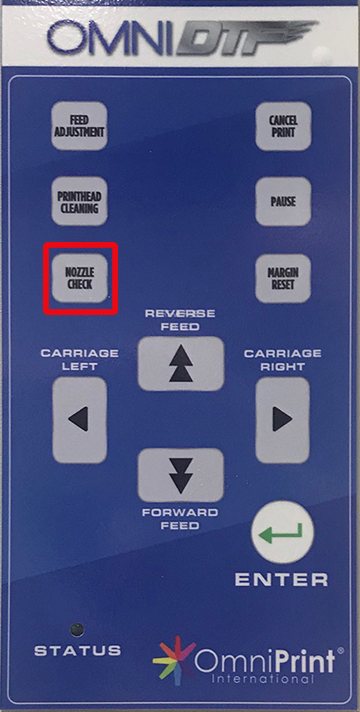
Press the Nozzle Check button on the printer’s control pad to print a nozzle check test pattern.
If the nozzle check isn’t at least 90% complete on all 8 channels, additional Printhead Cleaning should be done to achieve that standard.
Be careful to keep an eye on the fluid level in the waste ink bottle if running multiple head cleans, and be sure to empty it before it gets beyond 2/3 full.
Confirm that there is an appropriate amount of DTF Powder at the bottom of the U-shaped loop of film in the dusting chamber and add more as needed.
Turn on the curing oven assembly’s main Power switch, along with the Curing switch to begin heating the oven.
The previous oven settings will be retained so typically won’t need to be adjusted as part of the daily startup process.
If the film in the oven is being heated excessively and warping, keep the film moving through the oven by continuing to print, or lift the oven’s lid open when the printer is idle.
The printer is now ready and you can proceed with production work!
Production Notes
Monitor the status of the following items periodically when printing to ensure trouble-free operation and optimal print quality:
Film Alignment: Confirm that the film runs straight through the printer, across the bridge, and through the oven assembly. Center it with the yellow stickers’ alignment lines and at the opening to the Dust-Curing Machine where the bridge rests. Pause printing and adjust as needed to correct any skewing.
Powder dusting: Activate as needed to maintain sufficient powder on the film.
Powder shaking: Adjust as needed to effectively remove excess powder.
Waste ink bottle: Monitor the level before running a head clean and empty the bottle before it exceeds 2/3 full.
Ink bottles: Refill before the level drops to 1/2 full to maintain optimal ink flow and prevent air from entering the ink lines.
Powder: If the powder dispenser supply is depleted, briefly pause printing and refill the supply.


