The White Underbase & Underbase Choke

Intro

The purpose of the white underbase is to neutralize the color of the garment when we DTG print onto or apply a DTF transfer to it. Think of the white underbase as a primer coat of paint on a wall to cover the old paint color before painting a new color.

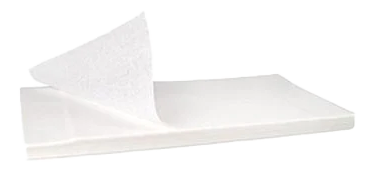
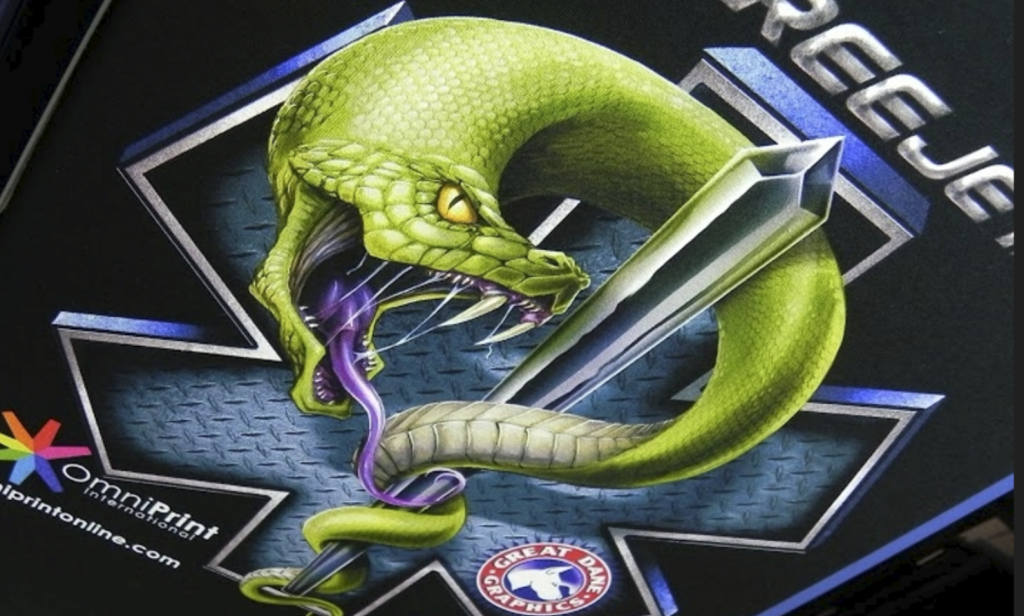
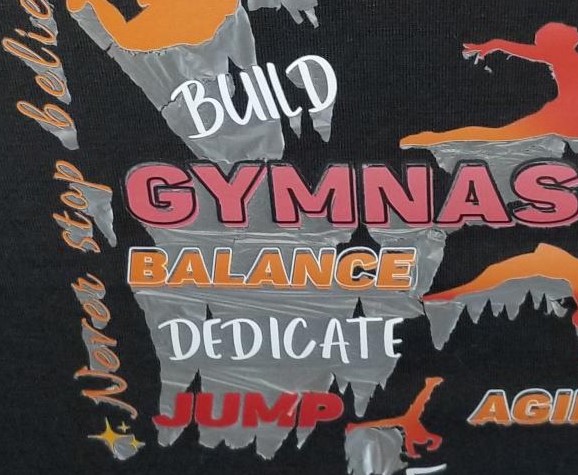
The rip software automatically generates a pure white version of the image being processed as the underbase, as depicted below (with a black background for viewing on a white page).

Example of CMYK & full white underbase layers

There are sometimes misunderstandings about how the white underbase is applied, particularly the white underbase choke. There are a few underbase types, which we’ll detail below. The white underbase choke, on the other hand, has a singular definition regardless of the underbase type.

Choking the White Underbase

What do we mean by “choke”? Let’s be clear that no underbase was harmed during the making of this article. 😉 It might be helpful to think of creating the white underbase choke as slightly shrinking the white underbase by some number of pixels (usually 2) since that’s exactly what is happening.

Why would we want to shrink the underbase? Simple. It’s to provide a tiny margin of error to ensure that we don’t see a slight outline of white ink around the edges of our designs when they’re printed. This white outline can occur even with perfectly aligned printheads, so we proactively make the underbase 2 pixels smaller than the color layer at all image edges.

Here’s a representation of what the above design might look like when printed on a black shirt if the underbase is not choked.

Representation of a design printed on or transferred to a black shirt with no white underbase choke.

White Underbase Types

“Diff’rent strokes for diff’rent folks.” -Sly Stone

Different designs and materials may all get optimal results from using the same type of white underbase. OmniPrint provides a variety of presets, called Environments with our rip software to deliver different types of white underbases (along with other parameters) for various printing conditions and preferences.

Full Underbase: The full underbase prints a solid white layer of the complete design. This provides the most thorough neutralizing of the garment color, using the heaviest layer of white ink in the underbase. When used for DTF printing on DTG printers without a heated platen, this may be too much ink for dense designs and result in bleeding. In DTG printing, the FreeJet 330TX “Color Media” Environment options provide a full underbase.

Standard Grayscale Underbase: In DTF printing, Environments not labeled or named with a specific type of underbase will produce a grayscale underbase. Such an underbase will use more white ink for the underbase of the highest intensity or brightest colors in a given design and less for the underbase of the darkest shaded colors. In DTG printing, the OmniPrint i2 and FreeJet 330TX-series “Dark” Environment options provide a grayscale underbase with no white underbase where a design is pure black (RGB = 0,0,0).

Black or Black Garment Underbase: Selecting a Black Environment type results in printing no underbase and no black ink where a design is pure black. The intention is to reduce black & white ink use when the print is produced on or for a black shirt by letting the black shirt’s color provide the black content of the design. Note: DTF printing with a Black Environment calls for special care to ensure that film prints created this way are only transferred to black shirts.

Light Garment: In DTF printing, the Light Garment Environment types use less white ink in the underbase since lighter-colored garments need less ink to cover the garment color.

White Environments (no underbase)

The White Environment types for the OmniPrint i2 and FreeJet DTG printers are intended for printing only onto white garments. They produce no white underbase and print no white ink in the parts of a design that are pure white (RGB = 255,255,255), instead allowing the shirt color to provide the white content.

White Outline on Single Edge

On a printer with multiple printheads, if you consistently see a white outline on either the left or right edges of a design’s print (but not both or all edges) it’s recommended to adjust the horizontal printhead alignment.

If there’s a consistent white outline on either the top or bottom edges of a design’s print (but not both or all edges) it’s recommended to adjust the vertical printhead alignment.

Increasing the white underbase choke beyond the normal 2 pixels may be an effective workaround to eliminate white “shadows” on single horizontal or vertical edges when a deadline requires ongoing high production levels. Remember to correct any alignment issues as soon as the urgent work is completed.

Using Hover mode on a Hotronix Hover Press

Pressure / Hover Settings for each Timer

The Stahl’s Hotronix Hover Press has two timers built in, and each of the timers can be configured to apply pressure (with the amount of pressure defined by manually adjusting a knob) or to hover slightly above the platen when latched down.

Given those two options (pressure or hover) on each of two timers, there is a total of four possible configurations that you can set up, as follows.

Pressure/Hover
Setting Number
Timer #1Timer #2
001Pressure*Pressure*
002HoverPressure*
003HoverHover
004PressureHover

As shown above, timers 1 & 2 can be set to both use pressure (setting #001), to both use hover mode (setting #003), or to use a combination of pressure and hover (settings 002 and 004).

The only difference between 002 & 004 is which of the two timers gets pressure and which hovers — the 1st or 2nd timer. Either way, in those two settings the unit will alternate between pressure and hovering.

How to Change Setting Numbers

Changing the pressure/hover setting for either or both of the timers requires that we first turn the heat press off, then follow specific steps using the control pad to select the setting number for the pressure/hover setting we want for each timer using the following steps.

  1. Turn off the heat press.
  2. Press and hold both the ‘-‘ (decrease) and ‘+’ (increase) buttons on the control pad.
  3. Turn on the heat press while holding the ‘-‘ and ‘+’ buttons for 3-5 seconds longer.
  4. Press the ‘Mode’ button. Confirm that the number 555 appears on the display.
    • If ‘555’ doesn’t appear, go back to step 1 after confirming that you have a Hotronix Hover Press, not an Auto Open Clam or other model or brand.
  5. After ‘555’ appears on the display, press the ‘Mode’ button again.
  6. Press the ‘-‘ or ‘+’ button to cycle through the pressure/hover mode number (001 – 004), as shown above, selecting the number for the pressure/hover combination that you want.
  7. Once you’ve selected the desired pressure/hover mode for the two timers, press the ‘Mode’ button two time to exit the pressure/hover selection mode.

You will now be in the regular temperature selection mode, where you can change the temperature setting and use the ‘Mode’ button to cycle through the timer settings and back out to operating mode.

Which Inks Can I Use in My Printer?

OmniPrint offers a variety of inks for use in our DTF & DTG printers, but it’s important to note that each printer has only one specific ink type that should be used in it.

Using the wrong ink will give you unpredictable print quality at best, and may result in needing to replace all of the consumable components that ink flows through, including pumps, printheads, dampers, and even tubing.

Ink Compatibility by Printer Model

Please see the following table to confirm the type of ink to be used with your printer.

Printer ModelInk Type
FreeJet 330TXDirect Ink
FreeJet 330TX PlusGamut Plus ink
All DTF printersDTF Plus ink
i2 printerGamut Plus Hybrid ink

Ink Shelf-Life

The shelf-life of our inks is 1-year. Any ink older than that should be disposed of and replaced.

How Big Can I Make My Prints?

All printers have a maximum printable area, at least for the width, related to the dimensions of the carriage mechanism which moves the printhead back and forth while printing.

DTG printers will also have a maximum platen size defining the biggest printable width and length. This maximum size will apply whether the operator is operating in DTG mode or printing onto a sheet of film.

DTF printers will also have a maximum width, while those which load film from a roll (such as the OmniDTF) can have a virtually unlimited print job length.

The following table shows the maximum printable area for all of OmniPrint’s DTG and DTF printers.

Printer ModelMax WidthMax Length
FreeJet 330TX12.5 inches22.6 inches (with XL platen)
FreeJet 330TX Plus12.5 inches22.6 inches (with XL platen)
OmniPrint i216 inches20 inches
Cheetah16 inches20 inches
OmniDTF14.5 inches
(14″ max recommended)
238 feet (2,856 inches)
Omni DTF Mini13 inches
(12.5″ max recommended)
238 feet (2,856 inches)
Omni DTF Plus36 inches238 feet (2,856 inches)
Printable area of OmniPrint printers.
Remember that, for DTG printing, any margins must be added to the selected image’s dimensions when determining the maximum print size. For example, if the maximum length is 18″ and a 2″ margin will be added to the top, then the maximum length of the image to be printed will be 16″.

Using Silicone Sheets & Kraft Paper

We use a protective sheet between the heat press upper platen and garment whenever drying pretreat, curing the ink of DTG prints, or transferring DTF prints to fabric. Different types of sheets can also result in slightly different finishes when curing ink and applying a finish press to DTF prints.

There are a variety of opinions about what type of sheet is best for different aspects of garment printing. What we’ll cover here is the usage that is in practice among our in-house print production and operator training teams.

As always, your mileage may vary so if you have a different approach that is working well for you, we don’t need to mess with success.

OmniPrint offers two types of sheets: silicone and kraft paper. Here’s how we recommend using them.

Silicone sheets

Silicone sheets are recommended primarily for drying pretreat in DTG printing.

That process is to repeatedly press at medium pressure (a setting of 4-6 on Stahl’s heat presses or 40-60 PSI) for 15-20 seconds per press until the fabric is dry.

  • Rotate or spin the sheet 180-degrees after the first press.
  • Let steam escape between each press.

Kraft paper sheets

Kraft paper sheets are recommended for curing ink in DTG printing and for the finish press (after peeling away the film) in DTF printing.

Preferences may come into play here. We like the matte finish that we get from using kraft paper at the end of our DTG and DTF processes. If you prefer a glossier finish, you may want to try using silicone sheets for finishing up your prints & transfers.

Keep in mind…

Kraft sheets are quite durable and can typically be used for dozens of presses or until they show signs of cracking. Silicone sheets should be discarded once wrinkles appear, usually after 7-8 presses, and they are discounted significantly in the OmniPrint online store when purchased a higher quantities.

About Dampers

Dampers are deceptively simple-looking but critical components in the ink flow of DTG & DTF printers.

Damper examples
Damper examples from Freejet (left) and OmniDTF (right) printers.

Dampers perform 4 functions.

  1. Provide a consistent ink supply reservoir for the printhead.
  2. Screen out any foreign material in the ink before it reaches the printhead.
  3. Act as a “pump”. There is round diaphragm behind the clear film side which has a spring behind it. As the printhead uses ink and the damper empties, the diaphragm gets pulled inward and starts compressing the spring mechanism. When the spring mechanism is pulled inward far enough, it eventually pushes back out, pulling ink in from the ink line and bottles.
  4. Dampen and regulate pressure changes in the ink line at the printhead as the printhead carriage rapidly stops and reverses direction while printing. When the carriage motion in one direction stops, the pressure momentarily increases and when it starts going back in the other direction, the pressure momentarily decreases, due to inertia. This is why the ink lines are not connected directly to the printheads. The dampers absorb these minor pressure deviations.
To maximize production and minimize scrap prints due to ink flow issues, we recommend replacing dampers after 6 months of use.

Damper failures can be caused by a number of things. The spring can start getting weak, so it doesn’t “pump” correctly. The O-ring that seals the connection to the ink line can start leaking air, resulting in banding or ink dripping from the bottom of the head. One of the clues you have a damper is failing is when the missing nozzles on your nozzle check prints keep moving around between head cleanings.

A full set of 8 dampers is included in the recommended Support Kit for your printer, along with other consumable parts that should be kept on-hand to minimize down-time.

Transferring a DTF Print

Transferring a finished print to a garment is simple and can be done immediately after DTF printing and curing, or up to a month later. Longer storage times may be possible if carefully stored in an air-tight container and in a climate-controlled environment.

  1. Prepare your heat press for a DTF image transfer.
Some materials may transfer best using parameters outside of these guidelines. Use the settings that bring the best results for your materials.
Fabric TypeTemp (F)PressureTransfer Press TimePeel Delay (cold peel film)Finish Press Time
Cotton 300 to 32050-70 PSI
Stahl’s 5-7
20 sec60-90 sec10-20 sec
Polyester260 to 28050-70 PSI
Stahl’s 5-7
20 sec60-90 sec10-20 sec
If you experience the film coating itself transferring to polyester or poly blend fabrics (example photo), try increasing the temperature to 300 and the transfer press time to 30-45 seconds.
  1. Cut out the image that you want to transfer to a garment from the film roll or sheet.
  2. Place the garment to receive the image transfer onto the heat press.
An initial pre-press of the garment prior to the transfer press can be helpful to remove any wrinkles and slight moisture in higher humidity environments.
  1. Place the DTF print on the garment, with the ink & glue side of the film directly against the fabric, positioned exactly where you want it transferred.
    • Verify that the collar, shoulders, and any seams are draped off the side of the heat press to ensure proper pressure at the transfer location
  2. Place a silicone sheet or kraft paper on top of the film.
  3. Press the transfer onto the fabric using the above table for temperature, pressure, and duration.
  4. Remove the garment from the heat press, and lay it on a clean, flat, hard surface.
  5. When using cold peel film, delay this step for a minute or so, until the inked area of the garment has cooled down to room temperature. Carefully peel the film away from the garment at a moderate rate.
  6. Place the shirt back on the heat press with a sheet of parchment or Kraft Paper or a white silicone sheet between the shirt and the top of the heat press, then perform a final “finish” press for the duration shown above at the same temperature and pressure as the transfer. This further cures the surface of the print and creates a smoother transition between ink & fabric.

The transfer process is now complete!

How DTG Printing Works

OmniPrint's Freejet 330TX DTG printer

You may be familiar with screen printing. And even if you’re not familiar with it, the name gives you a clue – printing that is done using a treated screen as a stencil. But with Direct to Garment (DTG) printing, it’s a little more vague because the name doesn’t tell you much about the technique.

DTG is a process of printing graphics onto textiles and garments. It uses modified inkjet technology to print any type of graphic onto t-shirts, hats, bags, masks, jeans, and even shoes. It isn’t a complex process, but there are multiple steps and some key factors that contribute to print quality. Here’s an overview of the DTG steps:

  1. Create a design
  2. Load the design into a DTG Rip/Print App
  3. Pretreat the garment
  4. Dry the pretreatment
  5. Mount the garment
  6. Print the garment
  7. Cure the ink

Let’s take a closer look at these steps.

Create Your Design

One of the most important factors for a high quality DTG print is a high quality design file. Designers use graphic design software such as Photoshop and Illustrator to create their artwork in high resolution. These designs can be anything from geometric shapes to company logos to digital photographs.

Example graphic of a t-shirt print design.

Load the Image into a DTG RIP/Print App

After the design is complete it needs to be loaded into software that can RIP (raster image processing) the image, and then print it. OmniPrint’s software is called DirectRip. Before ripping the image, the print settings are configured. DirectRip simplifies this process by providing Environments that lets you simply select the type of garment that will be printed. Based on that Environment selection, DirectRip then loads a group of presets. Other parameters that can be set include resizing, positioning, and margins.

Pretreat the Garment

Properly pretreating the garment is another important factor for creating a high quality print. Pretreatment is like an adhesive that sticks to the garment’s fibers and allows the ink to bond to those fibers. The chemical composition of this adhesive pretreatment material also causes the “underbase” layer of white ink (which is used like a painter’s base coat of primer when printing on colored shirts) to quickly gel. This prevents the CMYK inks from blending with the white underbase and provides great color vibrancy.

Too much pretreatment can make the colors bleed and prevent the ink from bonding with the fabric’s fibers. Too little pretreatment and the ink will disperse too much into fibers, resulting in a light or dull print. 

Since getting a proper and consistent amount of pretreat onto each garment is critical to image quality, pretreatment machines have become very popular. Pretreatment machines provide consistency of spraying that can’t be achieved manually.

Dry the Pretreated Garment

Once the garment is pretreated it will be damp with pretreatment solution. It’s necessary to dry the print area before applying inks. The best method to dry the garment is using a heat press. This will quickly ensure the print area is dry and ready to print, and the pressure of the heat press also helps to ensure that the pretreatment bonds well to the fabric’s fibers.

Mount the Garment onto a Platen

OmniPrint Standard Adult Platen

DTG printers utilize a platen to hold the garment in place as the print head jets ink onto it. The garment is carefully mounted onto the platen to ensure that a perfectly flat surface presented to the print head, properly aligned so that the image is printed exactly where it is expected to be.

Now that the image is loaded and ripped, and the garment is pretreated and mounted, it’s time to print. The print will be initiated from the DTG Rip/Print software, once the printer is properly prepared to print. Preparing the printer to print includes any required preliminary setup steps (depending on your printer model) such as cleaning the print head, setting the platen height, etc.

Cure the Ink

Once the printer finishes printing, the ink will be wet. It’s necessary to cure the ink on the garment. Curing the ink properly is very important for achieving good washability, meaning that the image will remain vibrant after many laundry cycles. The curing process requires that the ink reach a specific temperature and that it be maintained for a designated period of time. For example, we would cure a black cotton shirt at 320-degrees Fahrenheit for 180 seconds.

DTG vs. Screen Printing

Screen Printing

“The technique of creating a picture or pattern by forcing ink or metal onto a surface through a screen of fine material.”

Oxford Languages

Traditional screen printing is a printing method where ink is pushed through woven screen stencils onto fabric. The ink doesn’t soak into the fabric but lays on top of the fabric.

To transfer the ink, a special screen is made for each color in the design. Then, the inks are mixed for each color in the design. Each color is printed onto the garment, one by one, through the screen stencil prepared for that color in the design. The more colors in the design, the more screens must be prepared and the more instances of applying the ink for each color. Once those screens are created and inks mixed for each color in the design, it’s easy to produce a large volume of prints in a timely manner.

The best designs for screen printing are solid graphics without small detail — designs with simple symbols, geometric shapes, and basic typography. This is because making screen stencils for detailed graphics with many colors is very time-consuming and it’s difficult to get fine details right. Screen printers often need to limit the amount of color in a design to reduce set-up time and costs.

Direct to Garment (DTG)

DTG printing is a process of printing graphics onto textiles and garments using an inkjet print head. DTG printers utilize a platen to hold the garment in place as the print head jets ink onto the textile.

Typically, the textile is pretreated with a special adhesive that sticks to the garment’s fibers and allows the ink to bond to those fibers. The chemical composition of this adhesive pretreatment material also causes the “underbase” layer of white ink (which is used like a painter’s base coat of primer when printing on colored shirts) to quickly gel. This prevents the CMYK inks from blending with the white underbase and provides great color vibrancy.

DTG can print just about any type of graphic. All you need to do is load an image into the printer’s software, select a few settings, and click print. Any type of design can be printed, even those with complex graphics and thousands of colors.

Because there are no screens to prepare, DTG has a considerable setup time advantage over screen printing. Depending on the fabric and graphic, DTG may take more time for the actual print. But, since setup is very minimal, DTG enables on-demand order fulfillment with no upfront costs, making one-time and lower quantity print runs economical.

Both screen printing and DTG produce quality prints, but with differing setup methods and costs. Here’s a chart detailing advantages and disadvantages:

DTG
Printing
Screen
Printing
High-quality printsYesYes
Detailed designsYesNo
Unlimited color optionsYesNo
Order minimumsNoYes
On-demand fulfillmentYesNo
Bulk discountsYesYes
Significant setup costs per designNoYes
SustainableYesNo

Choosing the Right Garment

Stack of colorful folded fabrics

When choosing a garment for DTG printing the most important factor will be the quality of your garment. High-quality garments will produce high-quality results, while low-quality garments will produce poor results. And since OmniPrint’s DTG ink is water-based, certain fabrics interact better with the pretreatment, ink, and fabric.

We recommend experimenting with various fabrics by a variety of manufacturers to see which garments work well with your graphics. Typically, DTG printing works best on natural fabrics and natural-synthetic blends. It will take practice to find the right pretreat amount based on the fabric type, fiber content, and amount of pretreat. Here are some general guidelines to consider:

  • Garments with loose weaving may allow pretreatment to migrate away from the top of the fabric, resulting in spotty prints and poor washability
  • Cheaper than average garments should be a warning of low quality
  • Rayon or spandex dominant blends tend to scorch when curing the ink so should be avoided
  • Avoid Carded Open End and garments with too many stray fibers
  • Combed Ringspun 100% Cotton is the preferred garment choice
  • The 330TX model can print on up to 50% polyester
  • The 330TX PLUS model can print on 100% polyester

Once you have considered and optimized these factors you can print on:

  • Beach towels
  • Canvas tote bags
  • Hoodies
  • Crew neck t-shirts
  • Polos
  • Toddler shirts or onesies
  • Jeans
  • Hats
  • Etc…